Installation Instructions
Range
I If you have questions, call ].800.GE.CARES or visit our Website at: GEAppliances.com I
In the Commonwealth of Massachusetts:
• This product must be installed by a licensed plumber
or gas fitter.
• When using ball-type gas shut-off valves, they shall
be the T-handle type.
• A flexible gas connector, when used, must not exceed
3 feet.
BEFOREYOU BEGIN
Readthese instructions completely and carefully.
Installation of this range must conform with local
codes or, in the absence of local codes, with the
National Fuel Gas Code, ANSI Z223.1/NFPA.54, latest
edition. In Canada, installation must conform with
the current Natural Gas Installation Code, CAN/CGA-
B149.1 or the current Propane Installation Code,
CAN/CGA-B149.2, and with local codes where
applicable. This range has been design-certified
by CSA International according to ANSI Z21.1, latest
edition, and Canadian Gas Association according
to CAN/CGA-I.1 latest edition.
Aswith any appliance using gas and generating heat,
there are certain safety precautions you should follow.
You will find these precautions in the Important .Safety
Information section in the front of this manual. Read
them carefully.
•IM PORTANT- Savetheseinstructions
for localelectrical inspector's use.
•IMPORTANT- Observeallgoverning codes
and ordinances.
• Note to Installer - Besure to leave these
instructions with the Consumer.
• Note to Consumer - Keepthese instructions
for future reference.
• Note - Thisappliance must be properly grounded.
• Servicer - The electrical diagram is in an envelope
attached to the back of the range.
• Skilllevel- Installation of this appliance requires basic
mechanical skills.
• Properinstallation is the responsibility of the installer.
• Product failure due to improper installation is not covered
under the Warranty.
PART INCLUDED
Anti-Tipbracketkit
33
FOR YOUR SAFETY
Donot store or use combustible materials, gasoline or
other flammable vapors and liquids in the vicinity of this
or any other appliance.
Ifyou smell gas:
O Open windows.
O Don'ttouch electrical switches.
Extinguishany open flame.
Immediately callyour gassupplier.
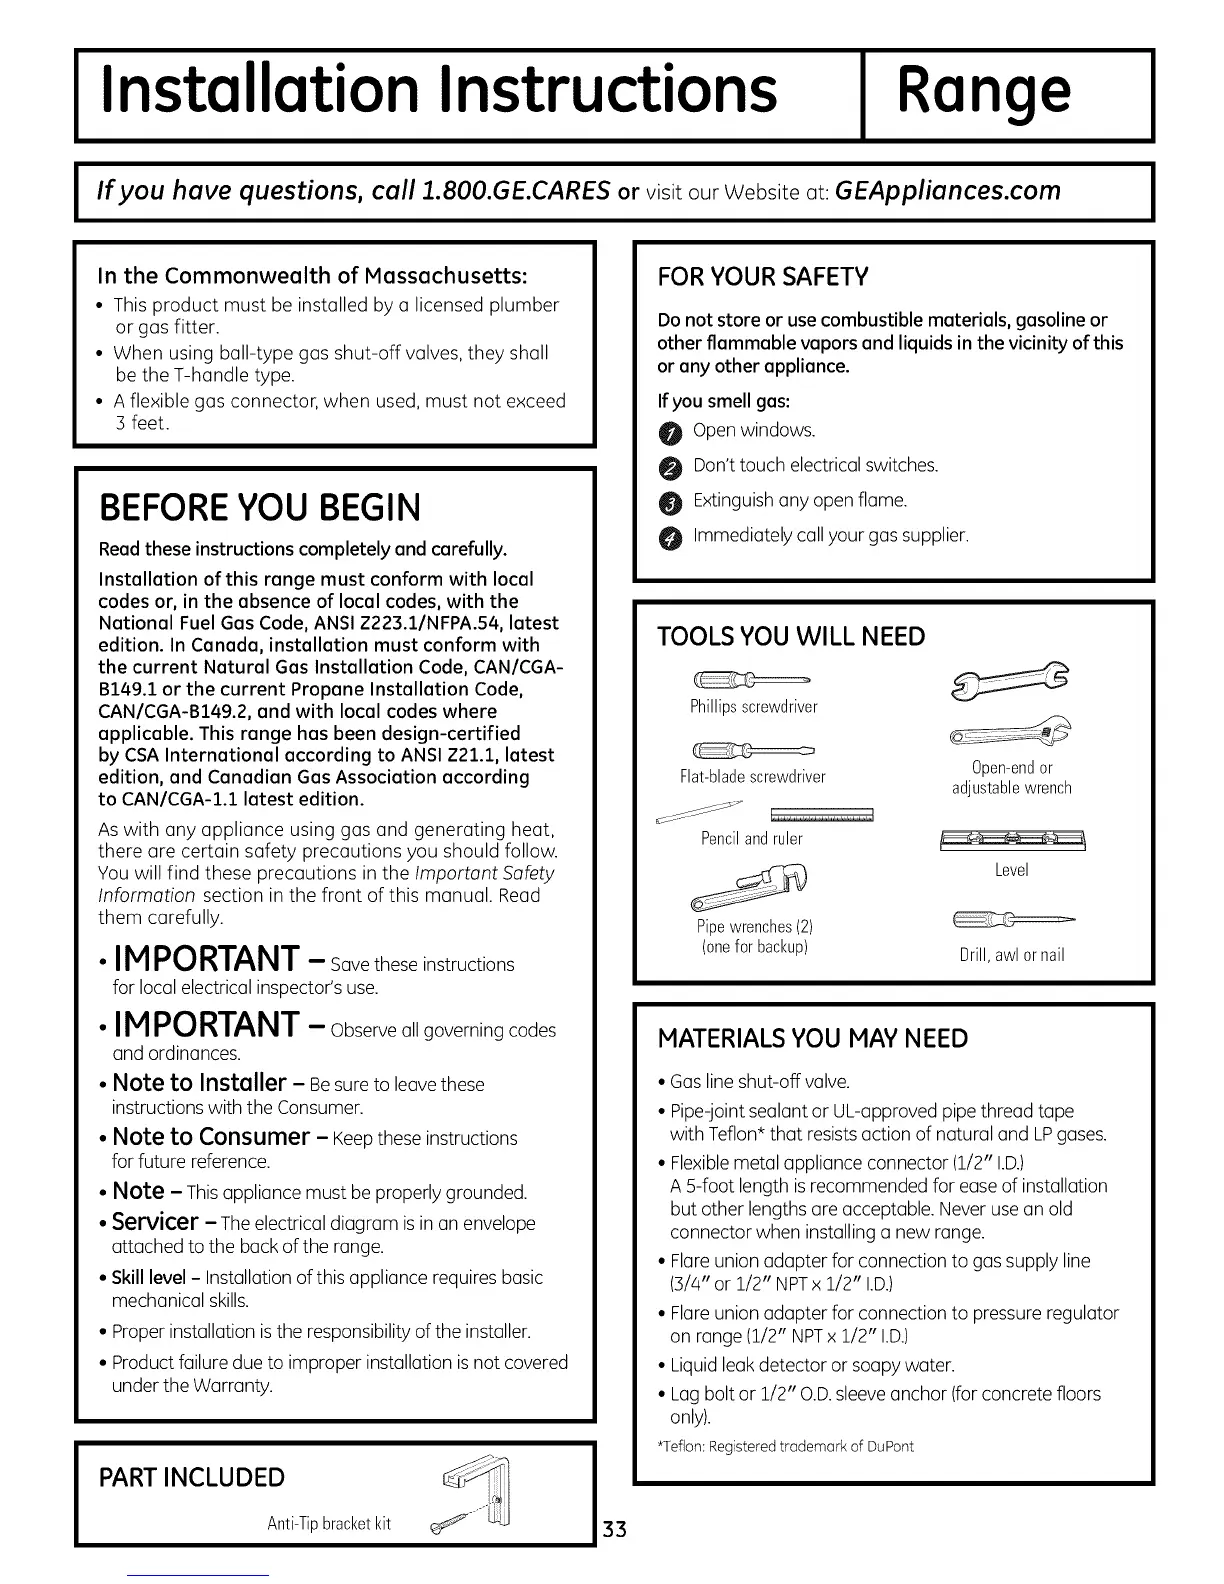
TOOLS YOU WILL NEED
Phillipsscrewdriver
Flat-bladescrewdriver 0pen-endor
adjustablewrench
_S _'_'c_ _.,...,.,..,,.,....,.,.,.,.
Pencilandruler
Level
Pipewrenches(2)
(onefor backup) Drill,awl or nail
MATERIALS YOU MAY NEED
• Gasline shut-off valve.
• Pipe-jointsealant or UL-approved pipe thread tape
with Teflon*that resistsaction of natural and LPgases.
• Flexiblemetal appliance connector (1/2" I.D.)
A g-foot length is recommended for easeof installation
but other lengths are acceptable. Never use an old
connector when installing a new range.
• Flareunion adapter for connection to gas supply line
(3/4"or 1/2" NPTx 1/2" I.D.)
• Flareunion adapter for connection to pressure regulator
on range (1/2" NPTx 1/2" I.D.)
• Liquid leakdetector or soapy water.
• Lag bolt or 1/2" O.D.sleeveanchor (for concrete floors
only).
*Teflon: Registeredtrademark of DuPont