12. Save and close the "hosts" file after verification.
13. Navigate to /etc/network
14.
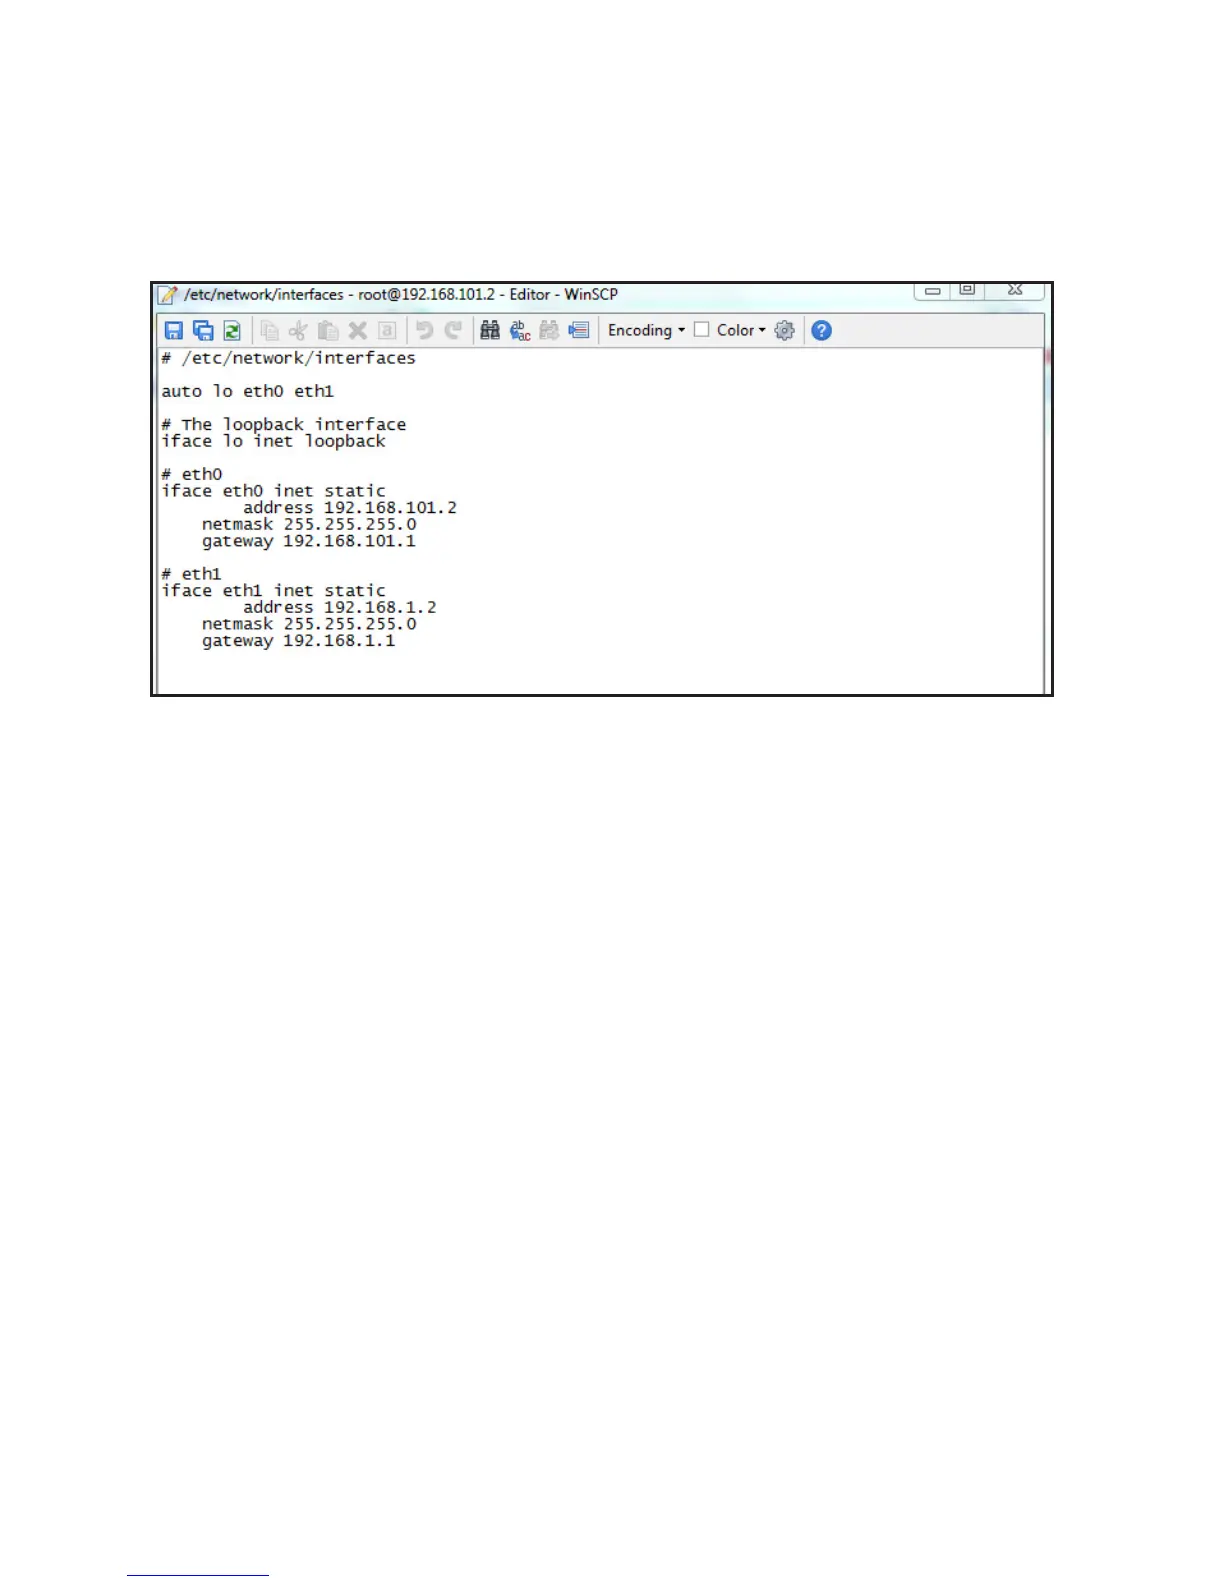
Right-click on "interfaces" file and select Edit.
The "interfaces" file opens as shown in the screenshot:
15. Under # eth0, Change "gateway 192.168.101.1" to "#gateway
192.168.101.1".
16. Under # eth1 change the following entries:
• "address 192.168.1.2" to "address <IP Address>"
• "netmask 255.255.255.0" to "netmask <Subnet Mask>"
• "gateway 192.168.1.1" to "post-up route add default
gw <Default Gateway> dev eth1"
See "Facility information" for the values of <IP Address>,
<Subnet Mask> and the <Default Gateway>.
After these changes, the "interfaces" file looks as shown in
the below screenshot.
The three IP addresses shown in the below screenshot
under # eth1 is only for illustration purposes. See "Facility
information" for actual addresses.
Note
2094532-001 D 02 2018 9
 Loading...