– 56 –
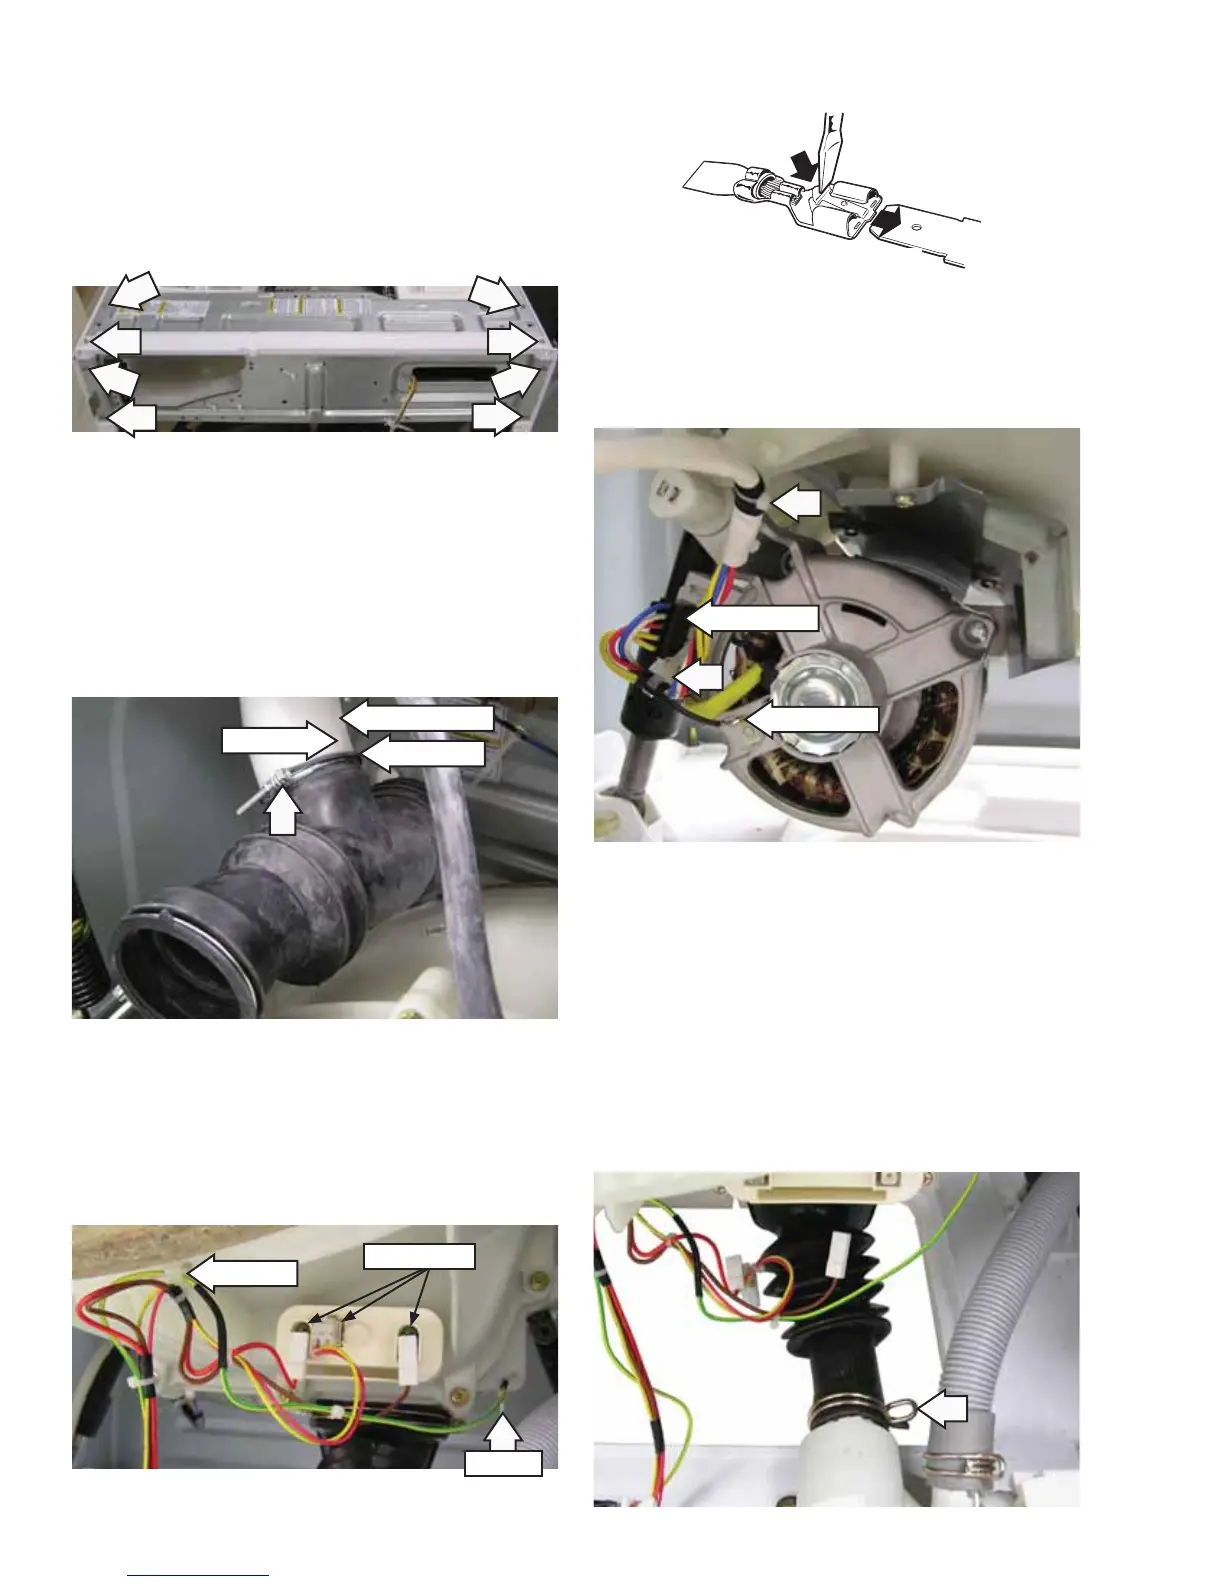
10. Using either a Phillips-head screwdriver or a
7-mm hex-head nut driver, loosen the clamp
and remove the dispenser outlet hose from the
vent pipe.
Note: Install the dispenser outlet hose with the hose
indicator aligned with the tub vent pipe protrusion.
(Continued Next Page)
14. Remove the tub drain hose from the pump.
Note: The tub drain hose is diffi cult to remove.
a. Squeeze the clamp and slide it back.
b. Carefully break the hose loose by inserting a
small, fl at blade screwdriver under the hose
to break the seal.
c. Remove the hose.
8. Disengage the steam hose, water line nozzle,
light, vent bracket, and vent from the gasket.
(See Tub Gasket [Boot].)
9. Remove the remaining 8 Phillips-head screws
that attach the front bracket and control panel
rear cover and set the front bracket aside.
Tub Vent Pipe
Protrusion
Indicator
Note: The motor ground wire connector has a
release/locking tab.
11. Disconnect the 3 heater assembly wires.
12. Remove the plastic wire ties that hold the heater
assembly wiring and the ground wire to the
outer tub.
Disconnect
Disconnect
Disconnect
Wire Tie
13. Disconnect the motor wire harness and motor
ground wire and remove the plastic wire ties
that hold the wiring to the motor and outer tub.
Wire Tie
ELECTRICAL TERMINAL
RELEASE/LOCKING TAB
Electrical Terminal
Release/Locking Tab