Chapter 3. Installation and Start-up: Rack-based and RX7i Embedded Interface
GFK-2224Q January 2017 25
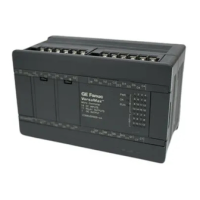
Installing an RX3i Ethernet Interface Module
1. Record the 12-digit hexadecimal MAC Address from the printed label
located on the front of the Ethernet Module.
2. PLC rack power may be off or on (“hot insertion”). For hot insertion, be
sure that all cables are disconnected from the Ethernet module
3. Slide the module into the slot for which it was configured in the system.
(Must go into main rack.)
4. Press the module firmly in place, but do not force.
5. Connect one or both of the network ports on the Ethernet Interface to the
Ethernet network.
6. Unless this is a hot insertion, turn on power to the PACSystems rack.
Set the PLC to Stop mode via the Run/Stop switch or the programming
software
Figure 8: MAC Address on RX3i
ETM001 Module