47 / 64
613, 618
11.2.4 Setting the dead zone
Operating condition
middle LED lit (on)
Set 16-level rotary switch to desired
position:
Position Dead zone
0 ± 0.5 %
1 ± 0.8 %
2 ± 1.1 %
3 ± 1.4 %
4 ± 1.7 %
5 ± 2.0 %
6 ± 2.3 %
7 ± 2.6 %
8 ± 2.9 %
9 ± 3.2 %
A (factory setting) ± 3.5 %
B ± 3.8 %
C ± 4.1 %
D ± 4.4 %
E ± 4.7 %
F ± 5.0 %
Press upper or lower button for less than
0.5 sec.
middle LED lit (on)
new dead zone was saved
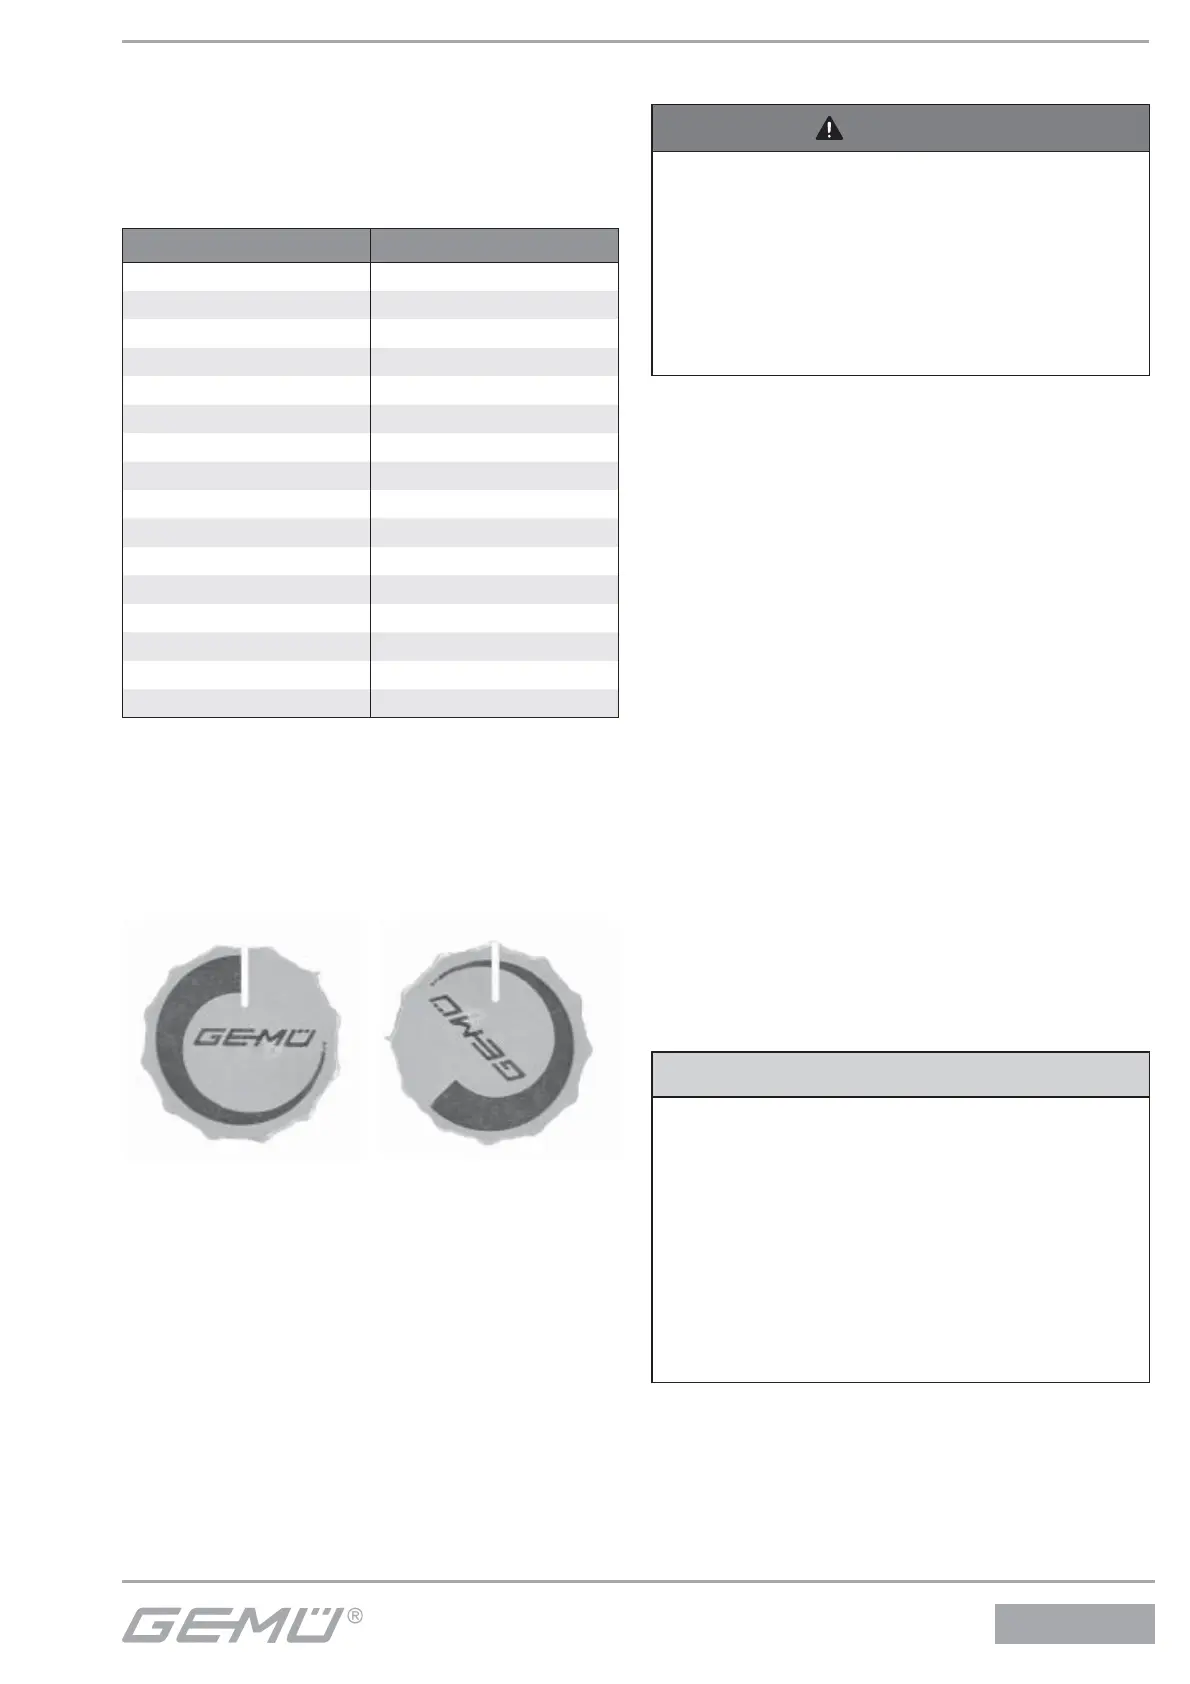
11.3 Optical position indicator
Valve open Valve closed
12 Electrical connections
DANGER
Electric shock by dangerous voltage!
Adjustments are made with the actuator
cover removed and while the unit is
connected to the power supply. Electric
shock can cause severe burns and fatal
injury. Therefore, refer all adjustments
to qualifi ed electricians.
12.1 Procedure
The on-site cable ends must be
connected to the terminal strip according
to the connection diagram for the
standard version.
For the integrated control modules, the
included connectors must be wired to the
on-site cable ends (power supply and
signal cable) according to the connection
diagram.
Depending on the version, there may
be one or two socket connectors on the
housing; for the power supply - labelled
with the voltage type - and for the signal
line.
12.2 Connection Diagrams
12.2.1 Internal wiring diagram with
connection to terminal strip
CAUTION
There is a danger of destroying the
potentiometer!
The potentiometer will be destroyed
if both the limit switch and the
potentiometer are connected to
terminals 5-8.
Therefore, connect either the limit
switch or the potentiometer!
Never connect both!