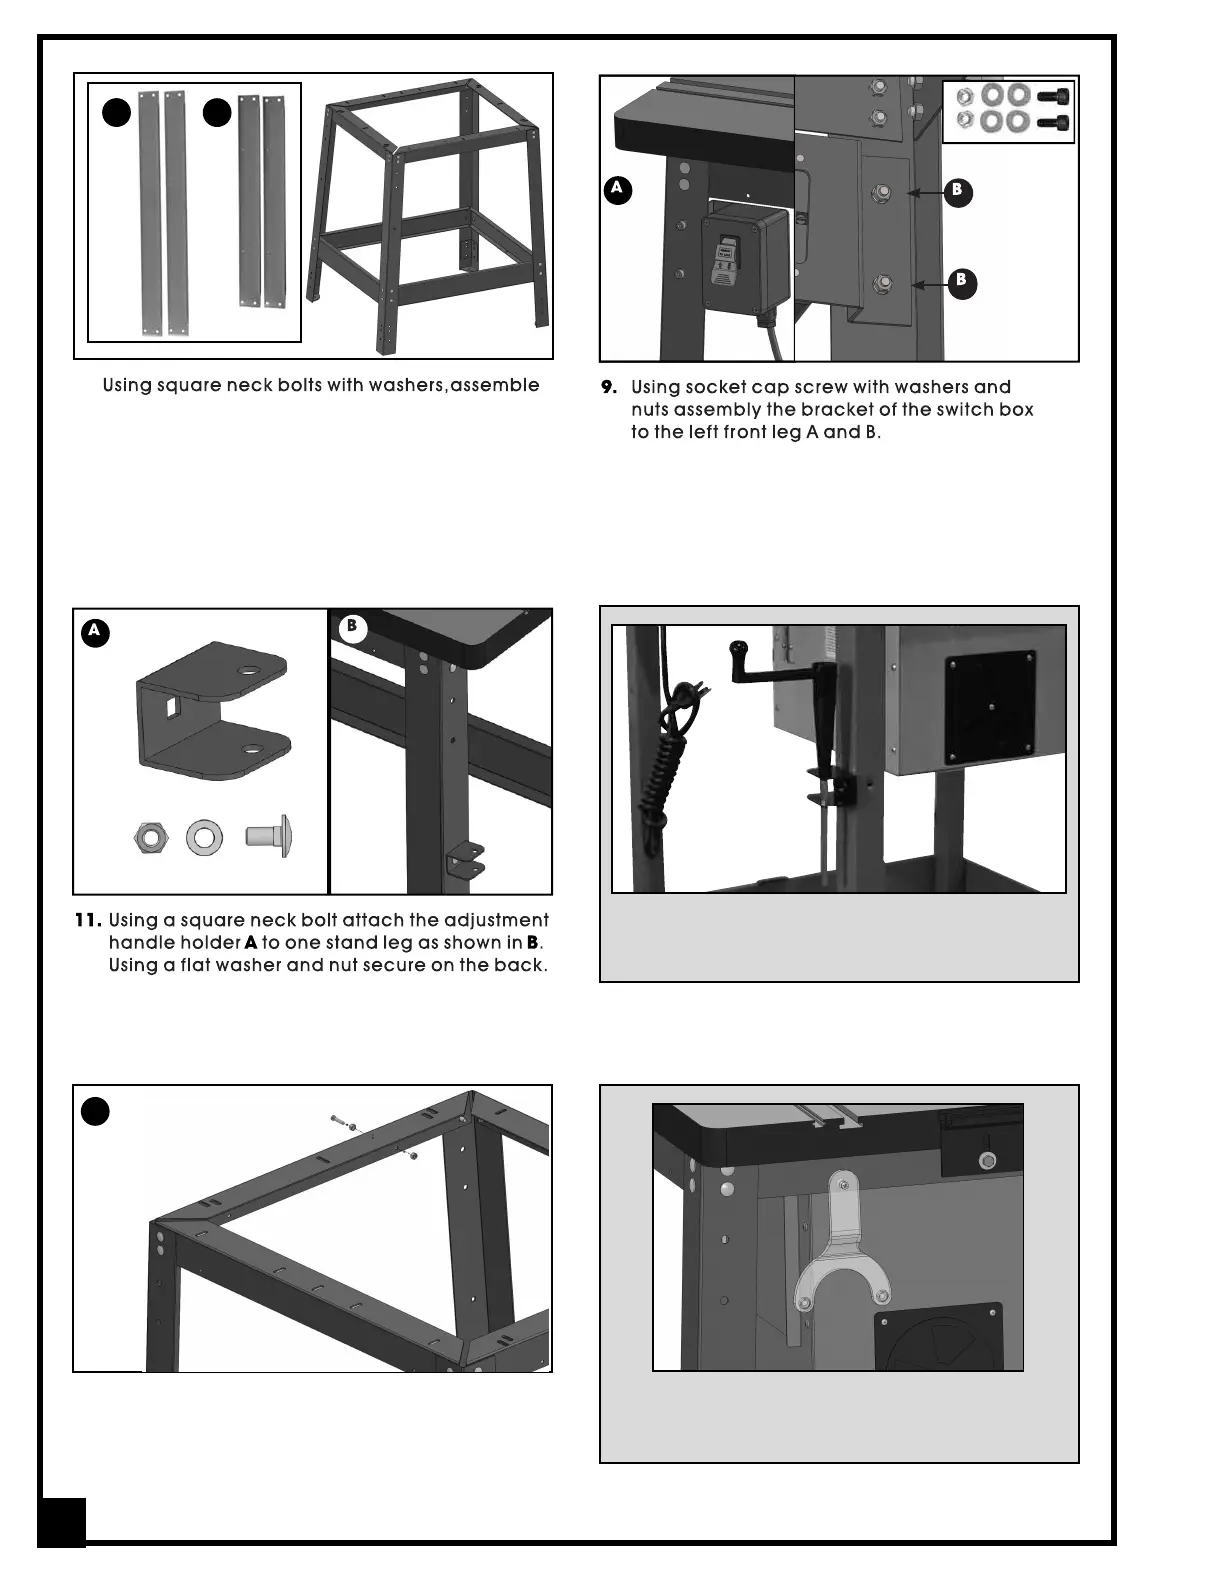
8.
the two sub assemblies using the front/rear bot-
tom A and top B braces.
Do not tighten the stand bolts until after you have
fastened the stand to the router table top. (See
step 3 on page 14.)
The router lift crank handle may be stored on the holder
as shown above.
B
12. Insert a phillips head screw with hex nut through
one of the holes on the left top cross brace, and
from the other side of the brace, lightly thread a
second hex nut to lock the screw in position.
The insert ring wrench may be stored on the screw as
shown above.
A
12
A
B
 Loading...