44-00-0297 SHERLOCK102/202 REV. 4.1 05-02-15
43
Calibration - Sherlock Oxygen Sensor
See manual 44-0165 Oxygen Sensor Calibration for more
ZERO CALIBRATION INSTRUCTIONS
Prior to continuing, ensure that the sensors are properly con-
nected to the SHERLOCK Monitor and that the sensor has been
energized for over 3 hours.
NOTE: If the sensor is reading too far from 20.9%, the sensor
will not calibrate. The display will read “CALIBRATION
ERROR”. Check the oxygen levels around the sensor. If every-
thing is okay, it may be necessary to do the calibration on the
sensor itself. This process is also called Sensor Zero Offset and
is discussed on this page. Once this is done then do the Control
sensor calibration again.
To accurately calibrate the Sherlock O2 Depletion Sensor, the
O2 Sensor Calibration Kit must be used.
Kit Setup Instructions
1. Insert the tube into the fitting at the end of the chamber,
tighten the fitting until the tube is snug.
2. Remove the sensor from the wall or mounting point. Take
the front face cover off of the sensor.
3. Mounting the Sensor
a. Place the chamber on its side so that the tube comes out
from the left or right side.
b. Mount the sensor module in the chamber using the sup-
plied mouniting screw, making sure that the cable fits into
the notch at one end of the chamber.
c. Seal the chamber.
NOTE: Sensor module must be mounted so that the sensor
(spool-like object) is sitting straight up and down with the
wires at the top.
4. Take the free end of the tube and mount it onto the barbed
end of the flow regulating valve.
Calibration Procedures.
1). Filling the Chamber
a. Mount the valve onto the 20.9% Oxygen tank. Open
the valve for 2 minutes.
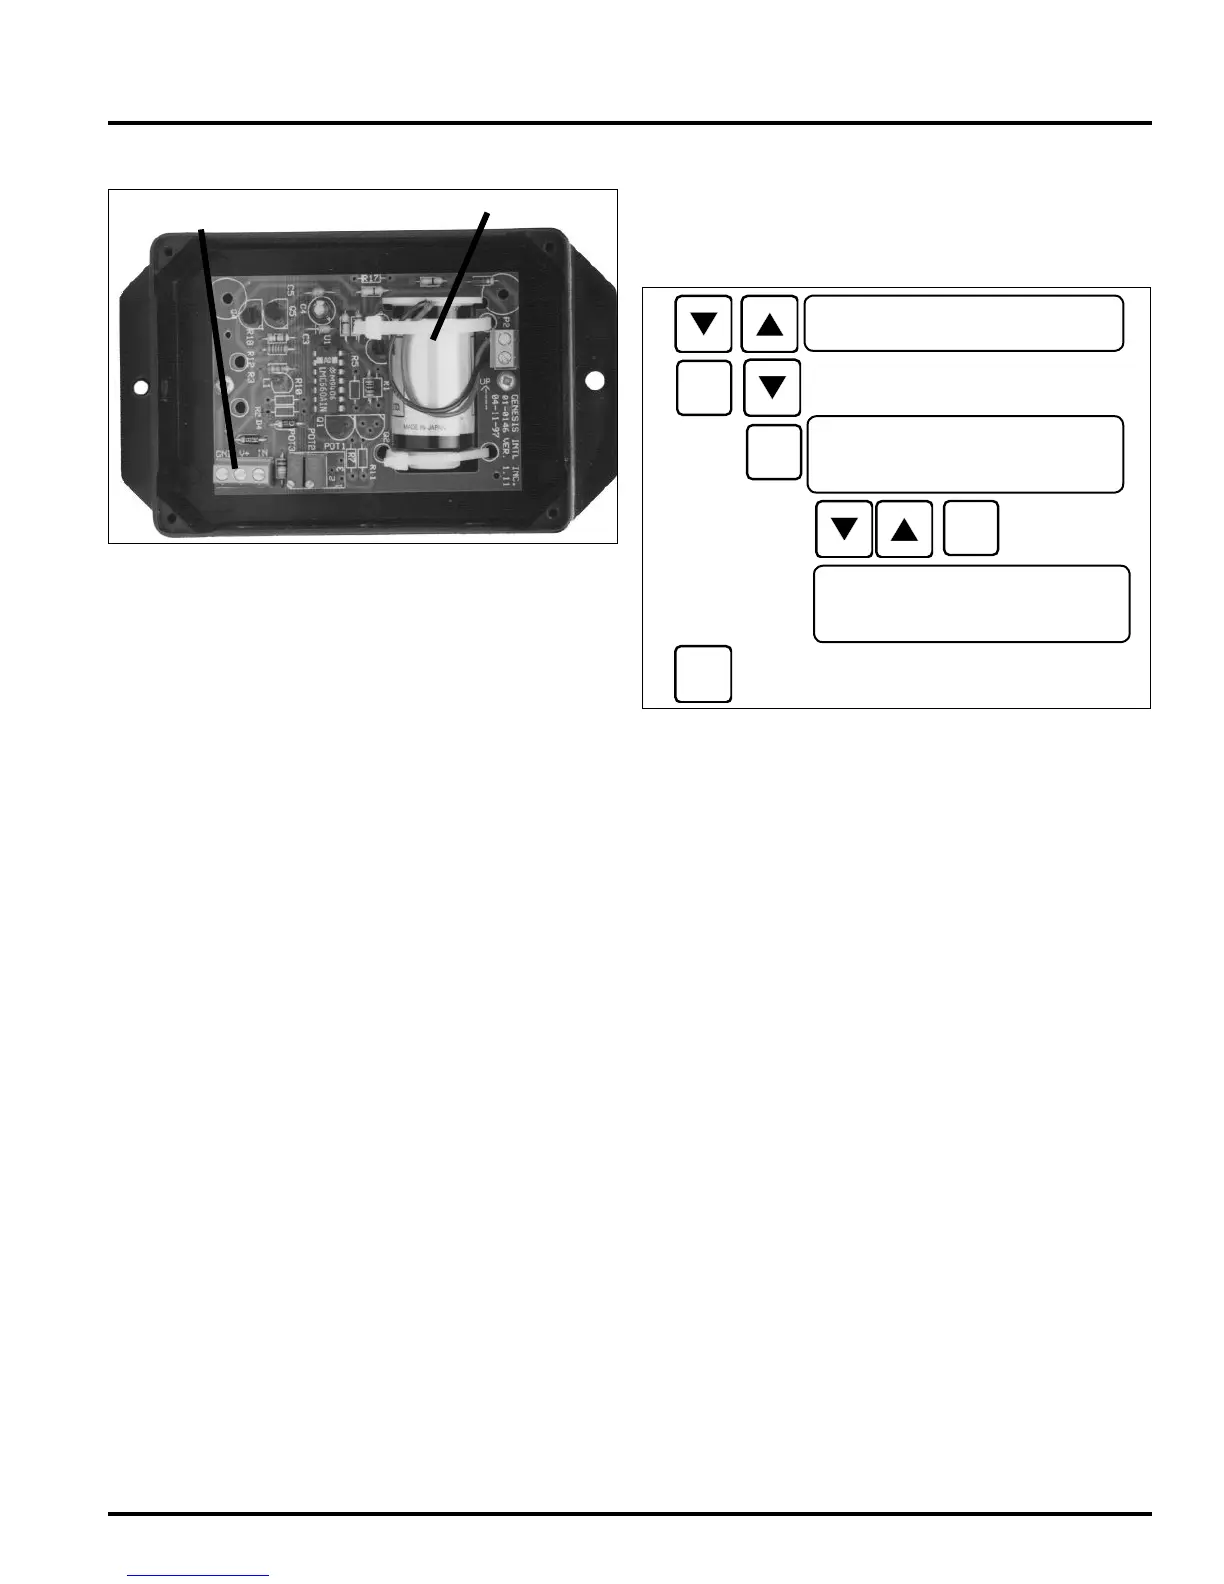
CALIBRATION
PROPER MOUNTING OF THE
ELECTROCHEMICAL SENSOR
b. Wait 5 minutes.
c. Open the valve again for 2 minutes.
d. Wait 5 minutes.
2) Follow these programming procedures.:
Ensure that the control access in "IN CHANGE MODE" or
"ALL ACCESS" mode.
Using UP/DOWN arrow buttons, place the Sherlock into the
“CALIBRATION MENU”. Press SELECT button.
Using UP/DOWN arrow buttons, locate the function "CALI-
BRATE SNR O2"
Press SELECT button. The value should start blinking.
Use UP/DOWN arrow buttons to change the values to 20.9%.
Press SELECT button to accept the value.
The screen will show "CALIBRATION DONE" message.
Exit this menu and return to DEFAULT SCREEN
3) You can now test the sensor using the 17% Oxygen / 83%
Nitrogen tank. Follow the Calibration procedure step 1 "Filling
The Chamber" using the span gas and record the value.
Offset Calibration
If the Oxygen sensor reading is too low to calibrate to 20.9%:
1) Make sure the air in the room is not contaminated and the
oxygen content is not at a dangerous level.
2) Has the sensor been warmed up for at least 3 hours?
3) Is the SHERLOCK control set to monitor an oxygen sensor?
4) Is the sensor receiving 12 VDC between V+ and Ground from
the Sherlock.
If so,
1) Undo all calibration at the control and then open the sensor
cover and look for the two potentiometers located next to the
wiring terminal. They are labeled POT 2 and POT 3.
2) Turn POT 3 Clockwise to raise the reading until it reads appro
xi mat ley 20.
3) If POT 3 has no effect, then try POT 2.
4) If still no change the sensor is bad.
SENSOR
WIRING TERMINAL
<CALIBRATION MENU>
<CAL> CALIBRATE
O2 SENSR,%: 15.0
<CAL> CALIBRATE
CALIBRATE DONE