21
For Help, call 1-800-35-GENIE or visit www.geniecompany.com
D Test Door Opener:
• Run door up and down a few times using Wall Console
and observe door travel.
• Repeat steps above as needed to set Limit
Switch positions.
E Adjust Open Force to minimum needed:
• Place door in closed position using Wall Console.
• Gently adjust Open Force fully counterclockwise
(minimum force).
• Run Opener using Wall Console.
• Observe that door runs to Open Limit Switch.
–If not, adjust Open Force Control slightly clockwise,
close garage door, and open it again.
• Repeat steps above until garage door runs smoothly
from Close Limit Switch to Open Limit Switch.
F Adjust Close Force to minimum needed:
• Place door in open position using Wall Console.
• Gently adjust Close Force fully counterclockwise
(minimum force).
• Run Opener using Wall Console.
• Observe that door runs to Close Limit Switch.
–If not, adjust Close Force Control slightly clockwise,
open garage door, and close it again.
• Repeat steps above until garage door runs smoothly
from Open Limit Switch to Close Limit Switch.
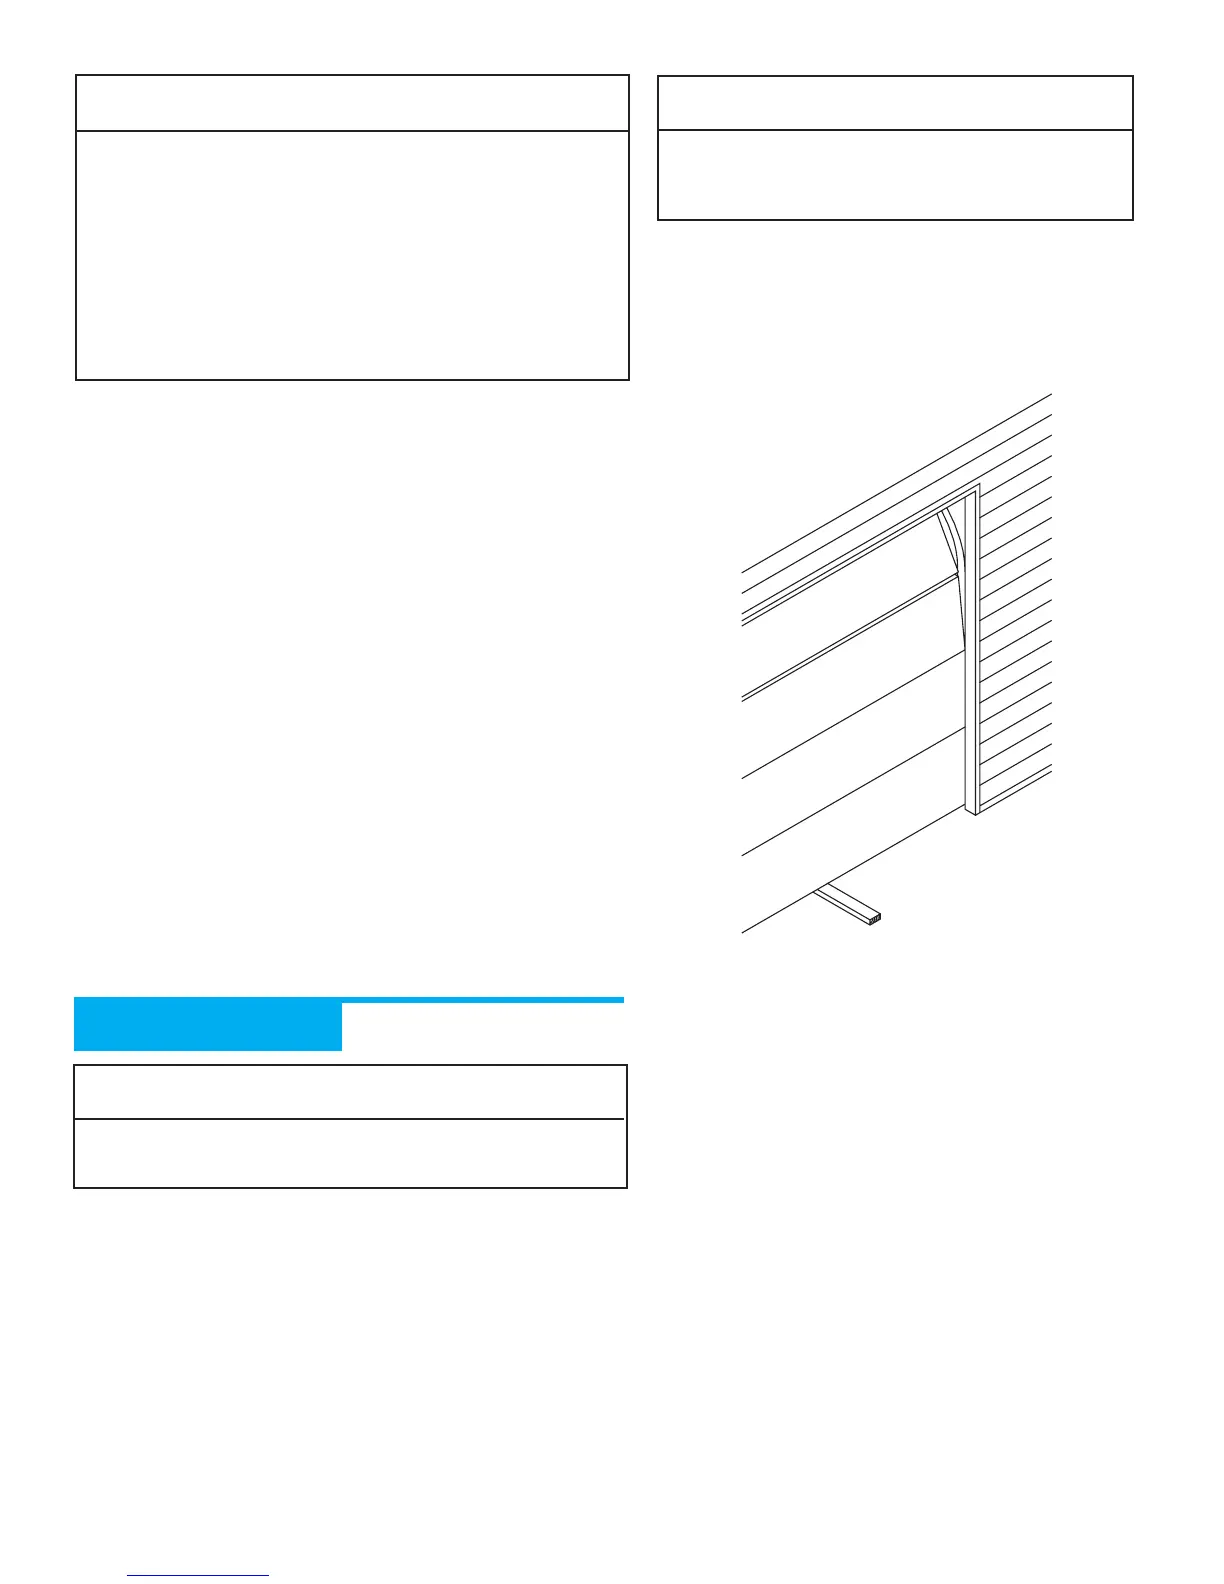
A Open garage door using Wall Console.
B Lay a 2" x 4" board flat in center of doorway.
C Close door using Wall Console.
D Check that door stops and reverses within 2 seconds after it
contacts board:
•If door does not reverse, decrease Close Force until
door reverses.
•If door still does not reverse, move Limit Switch
toward door.
E Check Safe-T-Beam® System operation:
•If beam is blocked, door will not close.
NOTE
• To protect your new investment, your Excelerator® is
equipped with a Timer and Cycle Counter which work
together to prevent any chance of heat damage to
electrical circuits caused by too many cycles in too short
a time. If your Opener suddenly stops responding to the
Wall Console - Do Not Unplug the Unit - simply wait
10 minutes for the Timer/Cycle Counter to reset itself
and try again.
• Unplugging the unit will prevent the Timer/Cycle
Counter from resetting.
NOTE
The door must contact the 2" x 4" board before the
Carriage activates the Close Limit Switch. If not,
readjust the Close Limit Switch.
C
H
SETTING CONTACT
REVERSE FUNCTION
Installation Step 10:
NOTE
Limit Switch and Force Adjustments must be completed
before checking the contact reverse function (Figure 36).
2" x 4" board
laid flat
Figure 36 Checking Contact Reverse