24
For Help, call 1-800-35-GENIE or visit www.geniecompany.com
Programming for 2 or 3 Door Openers
(Continued)
A Operating 2 or 3 Door Openers:
• To move one of the doors.
• Enter your PIN.
• Press .
• Press door opener number ( or or ).
SEE NOTE AT TOP OF PREVIOUS COLUMN
MOUNTING INSTRUCTIONS
The Keypad must be mounted in sight of the door(s), at least 5 feet
above the ground and clear of any moving door parts.
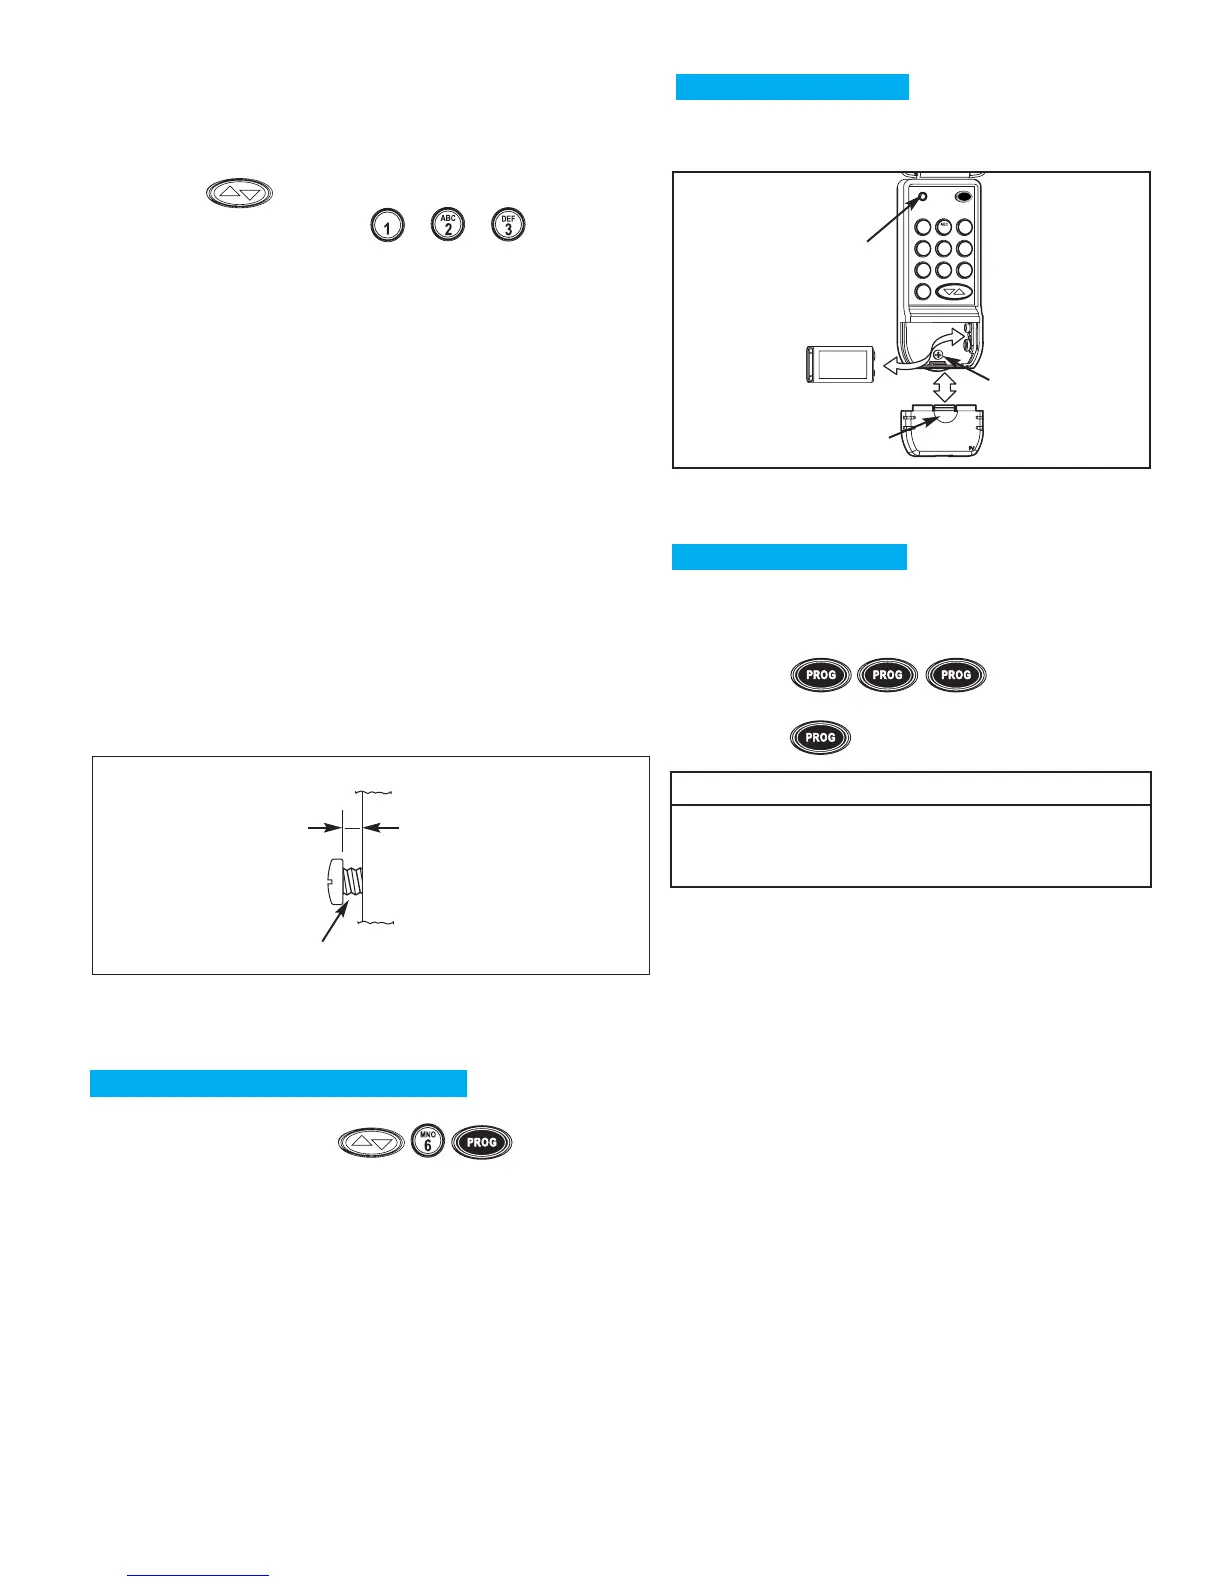
A Mount Keypad. (Mounting screws located inside
battery compartment.)
• Remove Battery Cover. See Figure 3.
•
Drill a 1/16”pilot hole for the top mounting screw.
• Install a screw into the drilled hole,
leaving a 1/8" gap between the
screw head and the wall.
See Figure 2.
• Hook the Keypad over the screw.
• Mark, drill pilot hole and fasten
bottom screw.
• Reinstall Battery Cover.
Wall
screw head gap
Figure 2
1"
8
BASIC ADDITIONAL INSTRUCTIONS
FORGOT YOUR PIN OR CHANGING YOUR PIN.
A
Erase old PIN :
• Press and hold in order .
–Red LED will blink once and turn off.
• Release all buttons.
B Programming Door Opener(s).
• Return to “Programming for 1 Door Opener”or
“Programming for 2 or 3 Door Openers.”
USING A TEMPORARY PIN.
A temporary PIN allows temporary access to your home by
repair persons, meter readers, etc.
A
Enter your PIN
•
Press .
B
Enter the Temporary PIN (from 3 to 8 characters).
• Press .
NOTE
•
DO NOT reprogram the Door Opener(s).
•
Temporary PIN remains active until the next time your
normal PIN is entered.
BATTERY CHANGES.
If the red LED does NOT blink during use,the battery
needs to be changed.