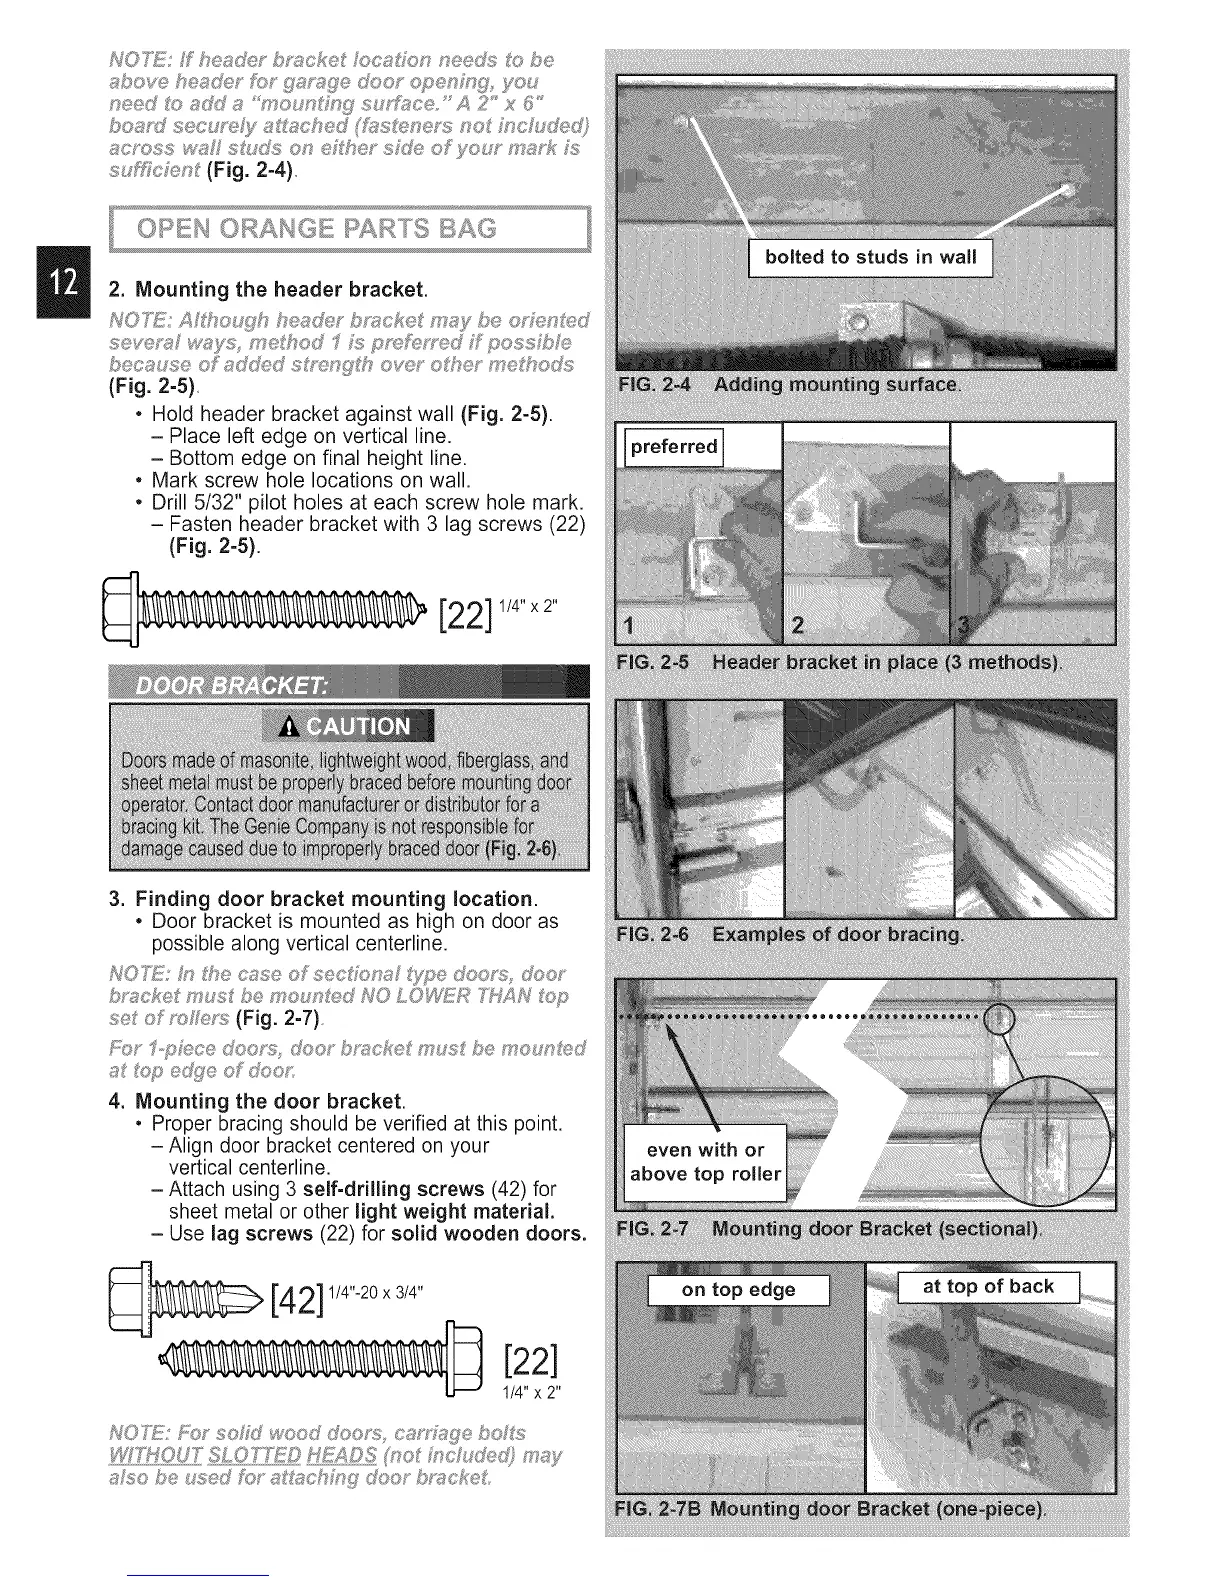
NO7_iF;f he_-_oq;)b;"scke ocs_Fo_*_needs o be
_;_bovehesde;' fb;' !is_'_!_!_i'ech::_o openh, W you
£;,oud seco_,e@ _sched i'@s_one;'s no h_c/ @d}
_;_c;'oss w_d/suo%; o_ eFhe, sM_, of;/o mu£ £_
s f?Ycien (Fig. 2-4)
2. Mounting the header bracket.
seye_x,_ w_ys, mehod _I M pmM_,"_d f_poss b _
bec_se of _d@d s_,ng_h ore;' o_he me hodxs
(Fig, 2-5)
• Hold header bracket against wall (Fig. 2-5).
- Place left edge on vertical line.
- Bottom edge on final height line.
• Mark screw hole locations on wall.
• Drill 5/32" pilot holes at each screw hole mark.
- Fasten header bracket with 3 lag screws (22)
(Fig. 2-5).
[22]
1/4" x2"
3. Finding door bracket mounting location.
• Door bracket is mounted as high on door as
possible along vertical centerline.
b_'_cke mus be moun_s_d NO LOWFZ£ N _op
set of _s_e_s (Fig. 2-7)
_ @ e@e oF @us
4. Mounting the door bracket.
• Proper bracing should be verified at this point,
- Align door bracket centered on your
vertical centerline.
-Attach using 3 self-drilling screws (42) for
sheet metal or other light weight material.
- Use lag screws (22) for solid wooden doors.
[42] 1/4"-20x3/4"
[22]
1/4"x 2"
NO'h_: F;OY' sohaJ wood do@'s c_' ,,_s£ebosLs
X/YYHOUT"SLOTXE© H£A©S pso{ ;_,s*cudis@ m#_y
atso be used fbr a _:_sch#'_!_doo_" b_s!_ceL
 Loading...