Mobile Phone Connection
67
5
Activating the GV-iView Function
To allow remote access to GV-NVR System Lite V2, you must enable the Create JPEG/GIF
file(s) function on the WebCam Server (Figure 5-23).
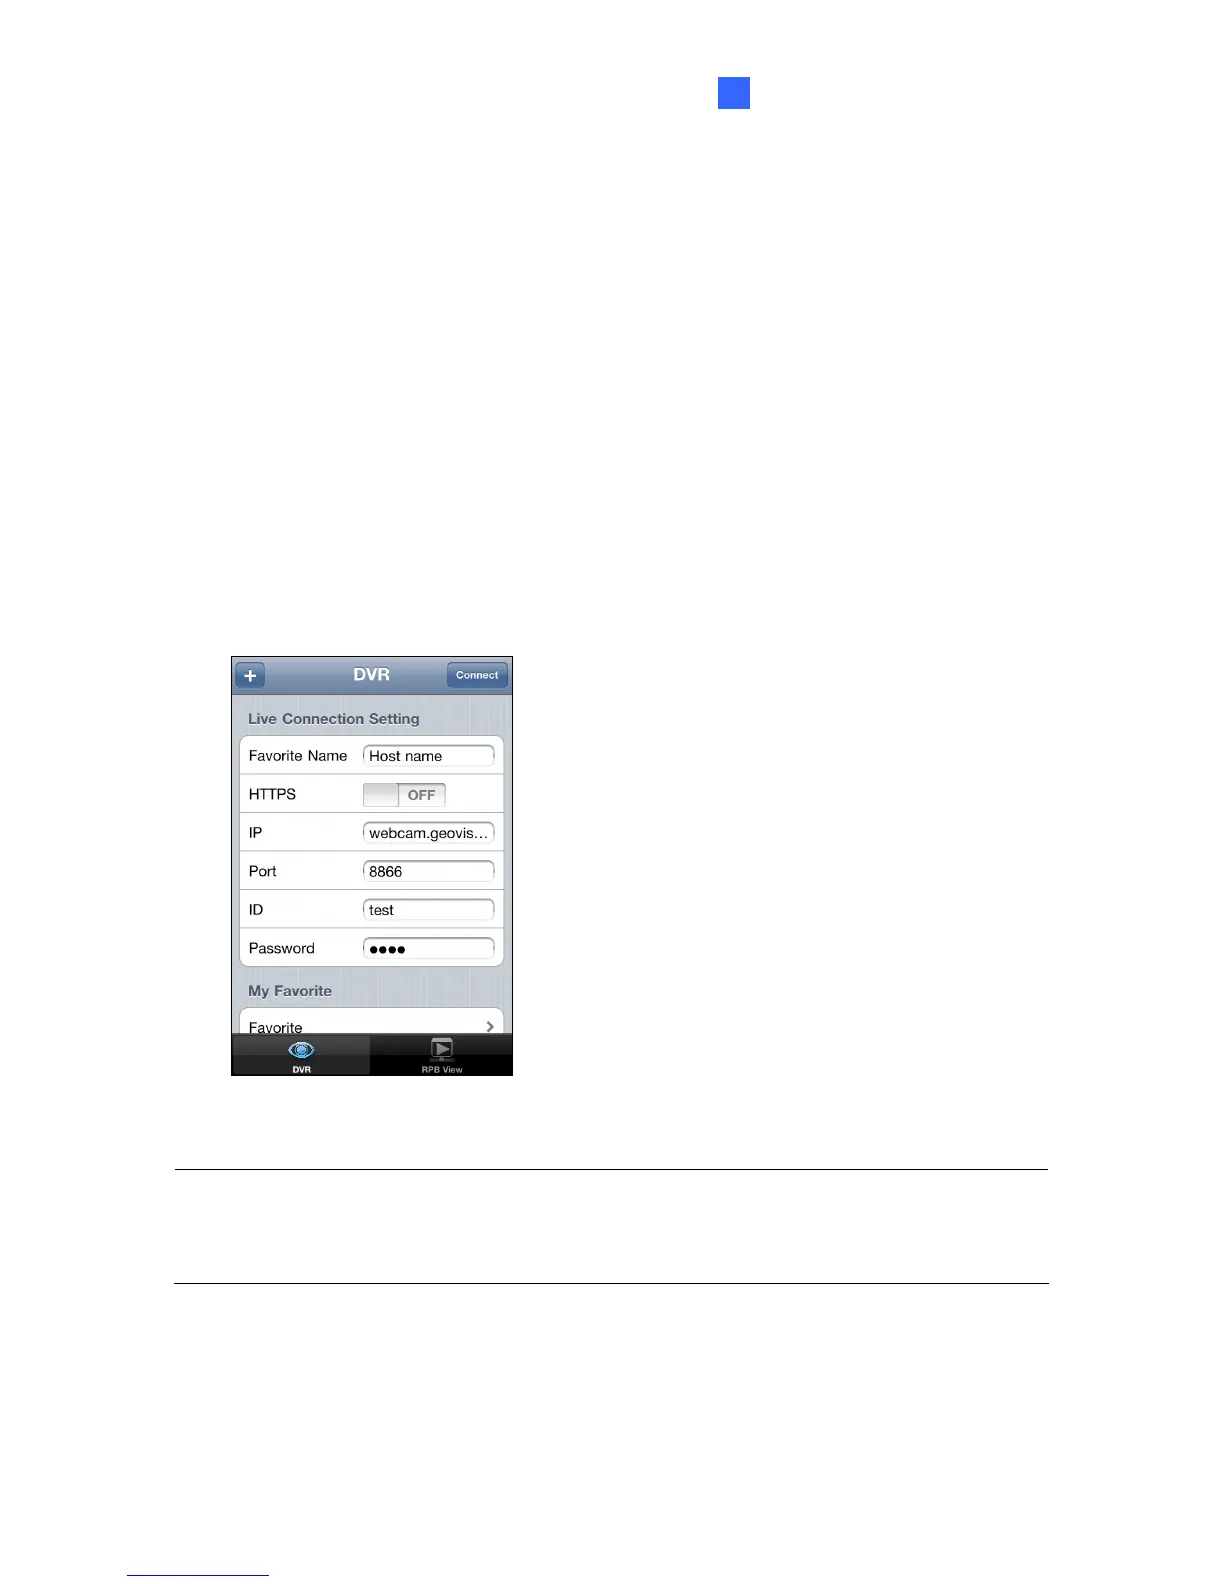
Connecting to GV-NVR System Lite V2
1. Activate GV-iView on the mobile device.
2. On the login screen enter the IP address of the GV-NVR System Lite V2, port value
(default value is 8866), ID and Password.
3. Press Connect. Once the connection is established, the live display of 6 cameras will
appear.
4. Select ON for HTTPS if SSL is enabled for WebCam Server. If the default SSL port of 443
on the WebCam Server is modified, specify the new port number used for HTTPS
connection at the end of the IP address, e.g., webcam.geovision.com.tw:445.
Figure 5-39
Note: If the default HTTP port of 80 on the WebCam Server is modified, specify the new port
number used for HTTP connection at the end of the IP address, e.g.,
webcam.geovision.com.tw:81.
 Loading...