EasyManua.ls Logo

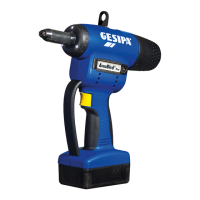
Gesipa FireBird Pro - User Manual

Gesipa FireBird Pro
19 pages
Print Icon
To Next Page IconTo Next Page
Loading...
GESIPA Blindniettechnik GmbH
Nordendstraße 13-39
64546 Mörfelden-Walldorf
Germany
FireBird
®
Pro
FireBird
®
Pro GE
Akku-Blindnietmutternsetzgerät
Betriebsanleitung mit Ersatzteilliste
Battery powered blind rivet nut setting
tool
Operating instructions with spare parts list
Outil de pose d‘écrous aveugles à batterie
Mode d‘emploi avec liste des pièces de
rechange
Remachadora a batería de tuercas
remachables
Manual de instrucciones con lista de
recambios
Inseritore di inserti filettati a batteria
Istruzioni per l‘uso con lista ricambi
Accu-blindklinkmoerpistool
Handleiding met onderdelenlijst
Συσκευή τοποθέτησης παξιμαδιών τυφλών
πριτσινιών με επαναφορτιζόμενη μπαταρία
Οδηγίες χρήσης με κατάλογο ανταλλακτικών
Akkumulátoros vakszegecs anya beültető készülék
Üzemeltetési útmutató alkatrészlistával
Nitownica akumulatorowa do nitonakrętek
Instrukcja obsługi z wykazem części zamiennych
充电式铆螺母枪
操作说明书及备件目录
Аккумуляторный заклепочник для заклепок-гаек
Инструкция по эксплуатации и ведомость запасных
частей
Ledningsfrit blindnittemøt-
rik-isætningsapparat
Brugsanvisning med
reservedelsliste
Batteridriven blindnitmutterpistol
Bruksanvisning med reservdelslista
Oppladbart batteri for pistol til setting
av blindnaglemuttere
Brukerhåndbok med reservedelsliste
Akkukäyttöinen niittimutterityökalu
Käyttöohje ja varaosaluettelo
Rebitador sem fios
Instruções de serviço com lista
de peças sobressalentes
Akumulátorové nýtovací nářadí pro
nýtovací matice
Návod k obsluze se seznamem
náhradních dílů
T +49 (0) 6105 962 0
F +49 (0) 6105 962 287
info@gesipa.com
www.gesipa.com

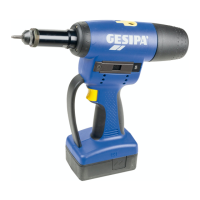
Other manuals for Gesipa FireBird Pro

Questions and Answers

  • D
    Drew MedinaSep 10, 2025
    Why Gesipa Power Tool set blind rivet nut is not completely set?
    • V
      Veronica BrooksSep 12, 2025
      If the set blind rivet nut is not completely set, it could be due to a numerical value that is set too low. Set the correct numerical value. Alternatively, the set numerical value might not have been reached, or the setting stroke might be too short, with error E1 displayed. In this case, reset the blind rivet nut in ReSet mode. Also, check if the battery is discharged (Error E4). If so, charge the battery.
  • D
    Diana Stein DDSSep 12, 2025
    How to fix Gesipa Rivet Tools blind rivet nut that does not screw on?
    • A
      Andrea CannonSep 12, 2025
      If the blind rivet nut does not screw on, there are several potential causes. The nut thread may be defective, in which case you should use a new nut. Alternatively, the threaded mandrel could be defective, requiring a change of the threaded mandrel. Also, the nut might not be resting against the nosepiece; in this case, the threaded mandrel length x should be adapted to the nut length. If the nut unscrews again, keep switch 9 pressed until the tool stops. Finally, if there's no battery and the display shows error E4, charge the battery.
  • M
    martinamySep 13, 2025
    What to do if Gesipa Power Tool blind rivet nut is not unscrewed?
    • D
      deborah19Sep 14, 2025
      If the blind rivet nut is not unscrewed, it may be due to the nut thread being deformed because of excessive setting force. Try reducing the setting force. You can also remove it using a hexagon screwdriver. Another cause could be a completely destroyed nut thread, which is indicated by error E1 on the display. In this case, reduce the numerical value and acknowledge the error.
  • H
    Holly EllisonSep 16, 2025
    How to fix Gesipa Power Tool if blind rivet nut is not screwed on?
    • M
      Michael ValentineSep 16, 2025
      If the blind rivet nut is not screwed on, one potential reason is a defective nut thread. Another reason may be a defective threaded mandrel. Also, the nut might not be resting against the nose-piece, so you should adapt the threaded mandrel length to the nut length. Finally, check if the battery is discharged (Error E4). If it is, charge the battery.

Summary

1. Overview of the Blind Rivet Nut Setting Tool

2. Product Information and Safety

Defines the tool's purpose and outlines essential safety rules to prevent hazards.

2.2 Working Range and Technical Data

Specifies rivet compatibility and lists key technical specifications like weight and traction power.

2.5 Equipment and Accessories

Details the nosepieces, mandrels, tools, and accessories included or compatible with the tool.

3. Setting Up the Rivet Tool

3.1 Changing the Threaded Mandrel

Provides step-by-step instructions for replacing the threaded mandrel on the tool.

3.2 Setting Mandrel Length and Force

Explains how to adjust mandrel length and setting force for optimal rivet performance.

3.4 Saving and Loading Setting Force

Describes how to save and recall configured setting force values for future use.

4. Functional Principles and Operation

4.1 Screwing On and Setting Rivets

Guides the user on how to correctly screw on and set blind rivet nuts.

4.2 Manual Screw-off and Error Handling

Explains manual screw-off and handling of error messages like E1 and E3.

4.4 Lighting, Maintenance, and Repairs

Details integrated LED lights, maintenance, and professional repair procedures.

5. Charger and Battery Management

5.1 Technical Data and Safety Instructions

Lists technical specifications for the charger/battery and outlines essential safety precautions.

5.3 Charging Procedure and Battery Handling

Guides through the charging procedure, battery handling, and function lights.

5.5 Environmental Protection

Provides information on the proper disposal and recycling of used batteries.

6. Troubleshooting Common Issues

6.1 Nut Does Not Screw On

Lists causes and corrective measures when a nut fails to screw onto the mandrel.

6.2 Nut Is Not Screwed Off

Addresses problems where the nut cannot be unscrewed, usually related to setting force.

6.3 Set Blind Rivet Nut Is Loose

Explains why a set nut might be loose and how to correct it, often related to setting force.

7. Warranty and Compliance

7.1 Warranty Terms

States the warranty terms and provides a link to view them.

8. Declaration of Conformity

Declares the tool's compliance with relevant EU health and safety directives.

Gesipa FireBird Pro Specifications

General IconGeneral
TypeCordless Rivet Tool
Battery Voltage18 V
Charging Time60 minutes
Stroke20 mm
Pulling Force12 kN
Noise Level75 dB

Related product manuals