12
3. Move the tripod legs to centre the circular level. The instrument is now roughly
leveled-up.
4. Center the bubble in the circular level]
5. Center the surveying point again
Loosen the centering screw slightly. Looking through the optical plummet eyepiece,
slide the instrument over the tripod head until the surveying point is exactly centered
in the reticle. Re-tighten the centering screw securely.
6. Check again to make sure the bubble in the plate level is centered.
If not, repeat procedure 4.
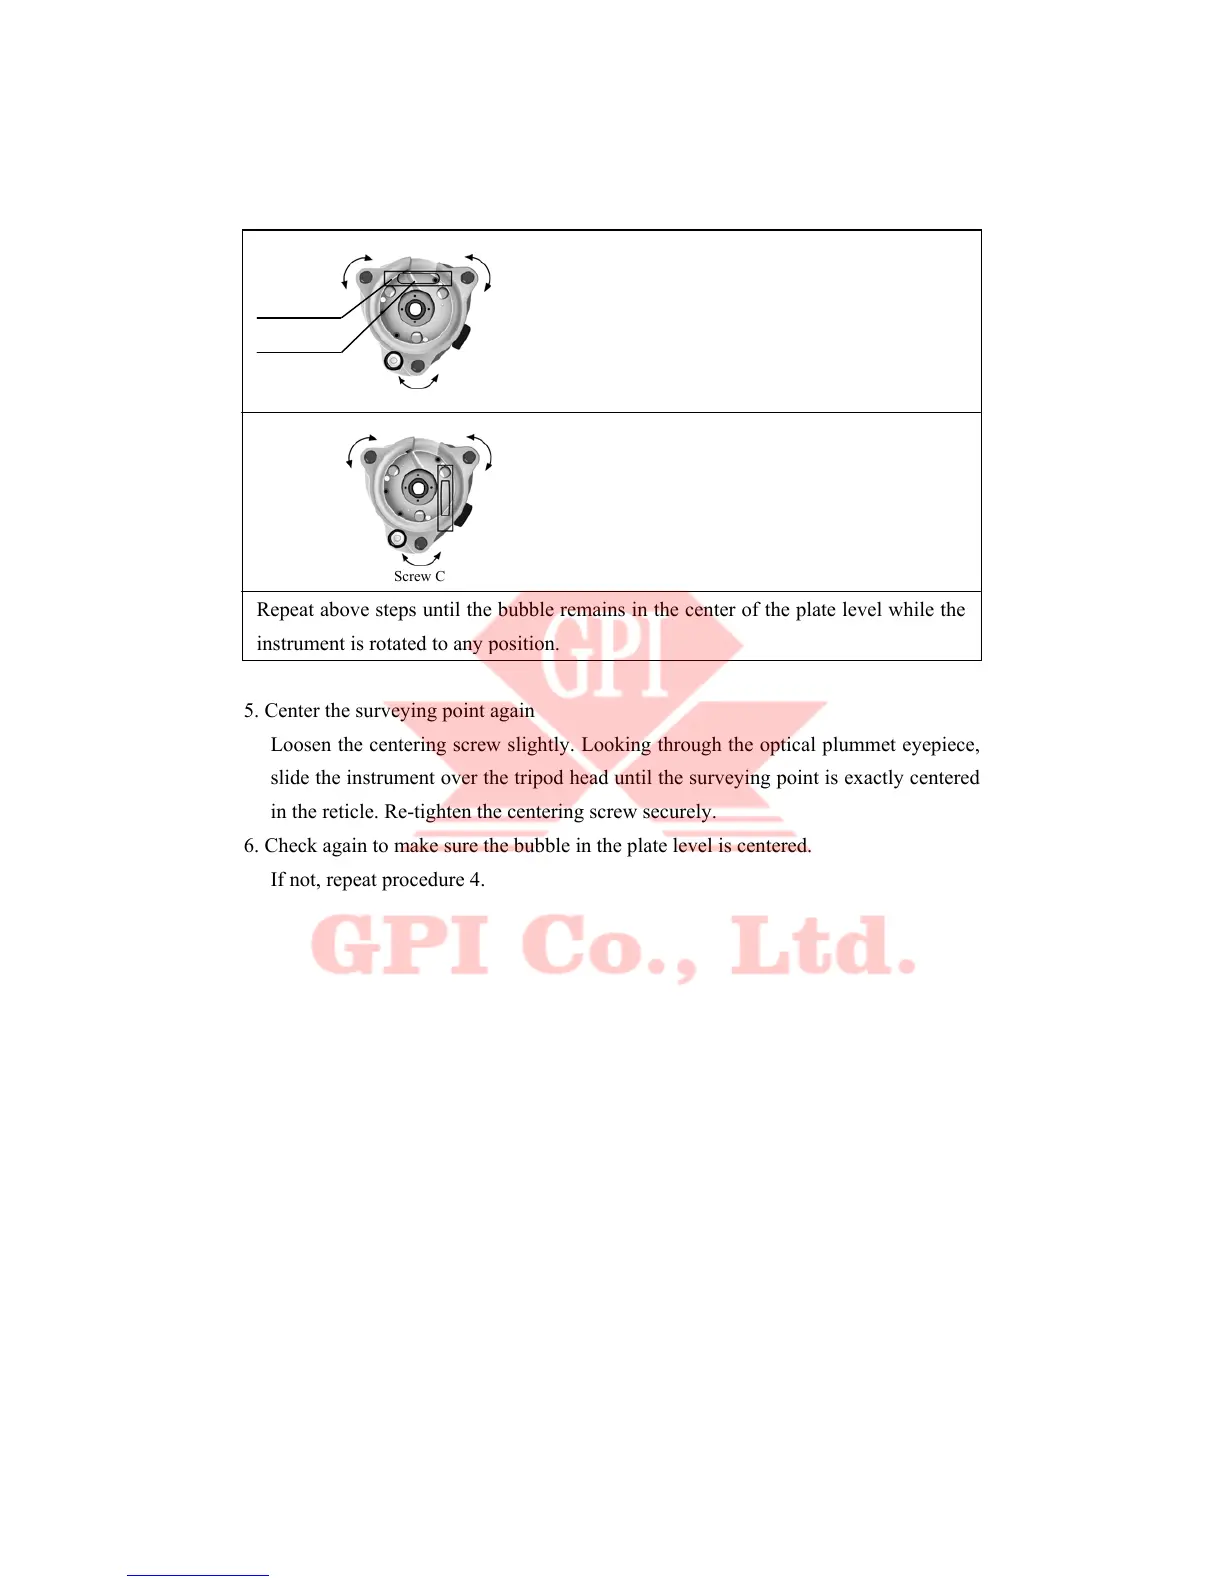
Screw A Screw B
Screw C
Bubble
Plate level
Loosen the horizontal motion clamp, and turn the
instrument till the plate level is perpendicular to a
line shaped with screws A and B. Adjust the
screws A and B to make the bubble in the center
of the level.
Turn the instrument approximately 90 °Adjust
screw C, till the bubble in the center of the level.
Repeat above steps until the bubble remains in the center of the plate level while the
instrument is rotated to an
 Loading...