Service
6 3A6584A
6. Unscrew piston valve from piston rod. Clean and
inspect parts. The piston has a special thread
locking/sealing patch. Do not remove the patch. The
patch allows four disassembly/assembly procedures
before it is necessary to apply thread sealant to the
threads.
7. Remove packings and glands from piston rod.
8. Remove throat packings and glands from cylinder.
Discard throat packings and glands.
Assembling the Pump
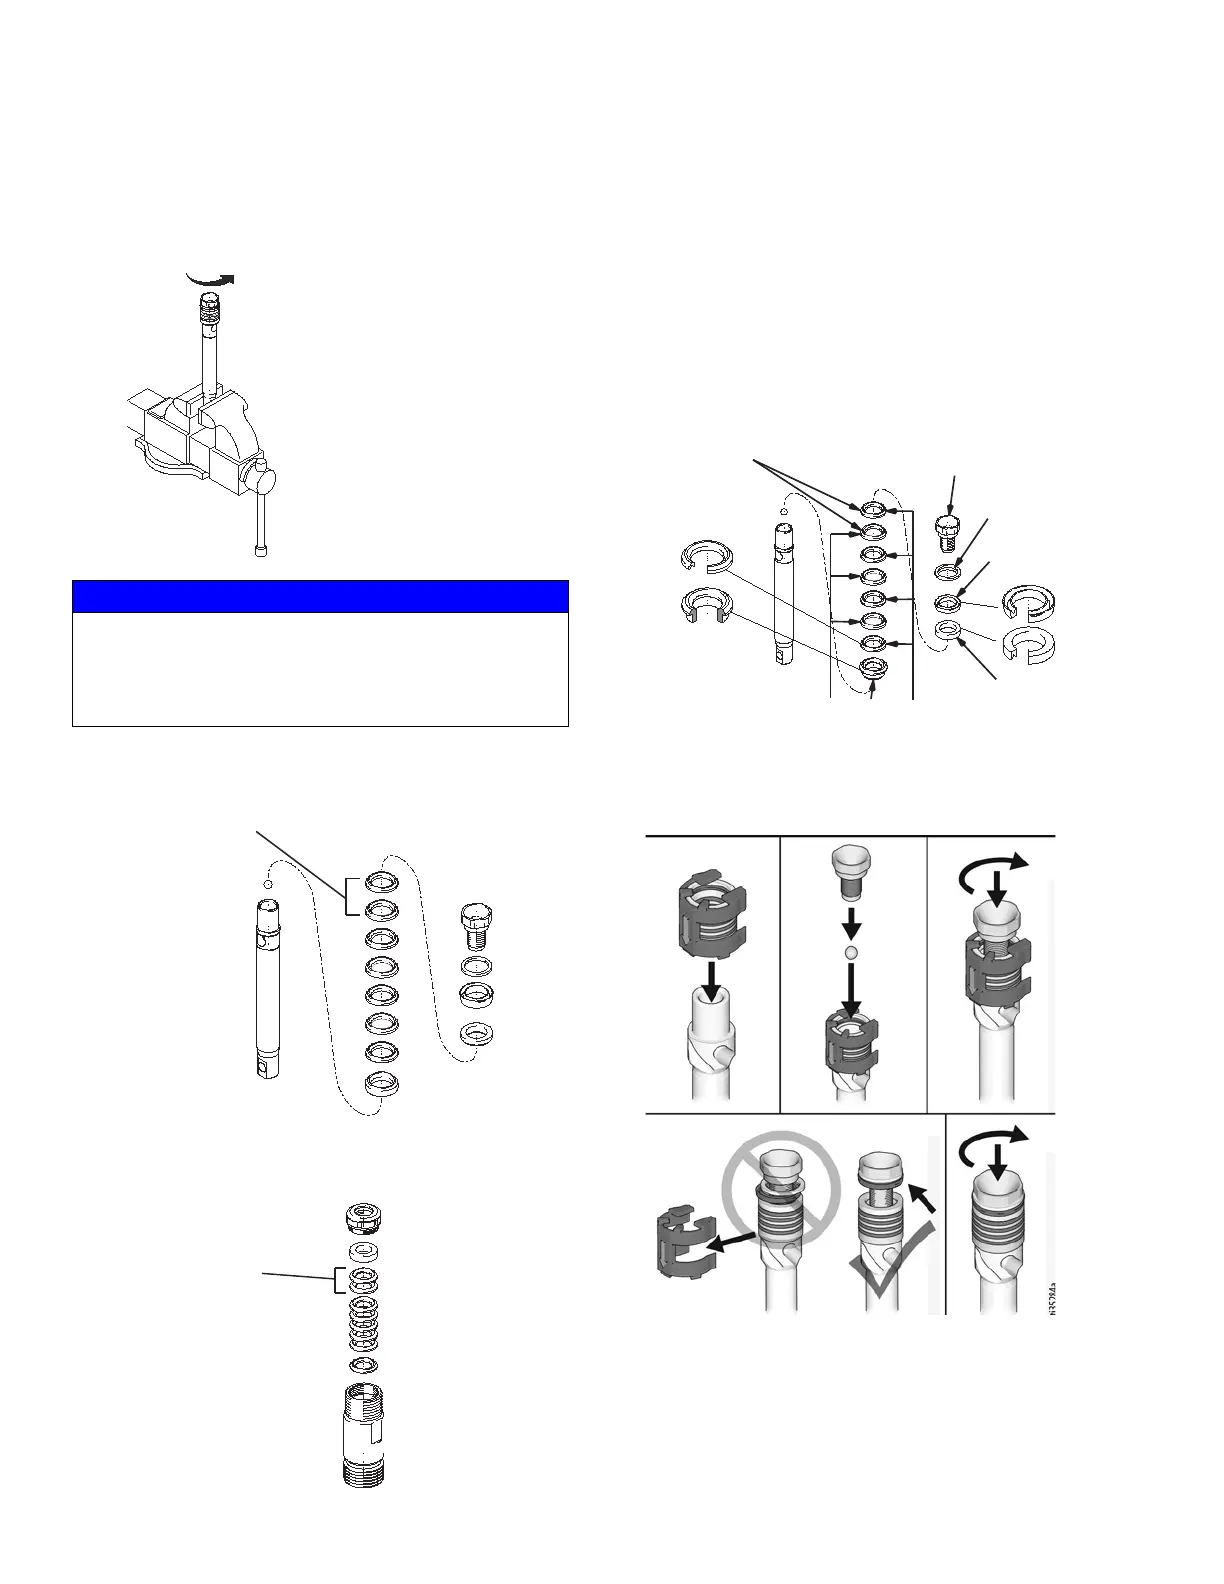
1. A) For all non-QuikPak™ Repair Kits.
Soak all leather packings in SAE 30W oil for 1 hour
minimum prior to assembly. Stack male gland (204)
on piston rod. Alternately stack UHMWPE (208) and
leather (218) packings (note orientation) on piston
rod. Install female gland (217). Install piston wiper
(216) (note orientation) and backup washer (229) on
piston valve, threads are good for four repackings.
Use thread sealant on piston valve threads after
four repackings.
B) For all QuikPak Piston Repair Kits (provided
pre-soaked in oil). Note directional arrow on clip.
NOTICE
To avoid damage to pump and sprayer, do not clean or wipe the
piston threads. Cleaning the piston threads could destroy the
special sealing patch and cause the piston to come loose
during operation. Use thread sealant if unsure about the
effectiveness of the thread patch.
ti3940b
Not
used on
16Y598,
17H828
ti7573b
Not
used on
16Y598,
17H828
210
ti7574d
Not
used on
16Y598,
17H828
 Loading...


