Repair
Replace Throat Packings
Note
The throat packings are available as a
preassembled kit.
Pump Part No.
Throat Seal Repair
Kit
24W152 24V752
24W153 24V753
24W150 24V752
24W151 24V753
1. Relieve the pressure. See
Pressure Relief Procedure, page 8 .
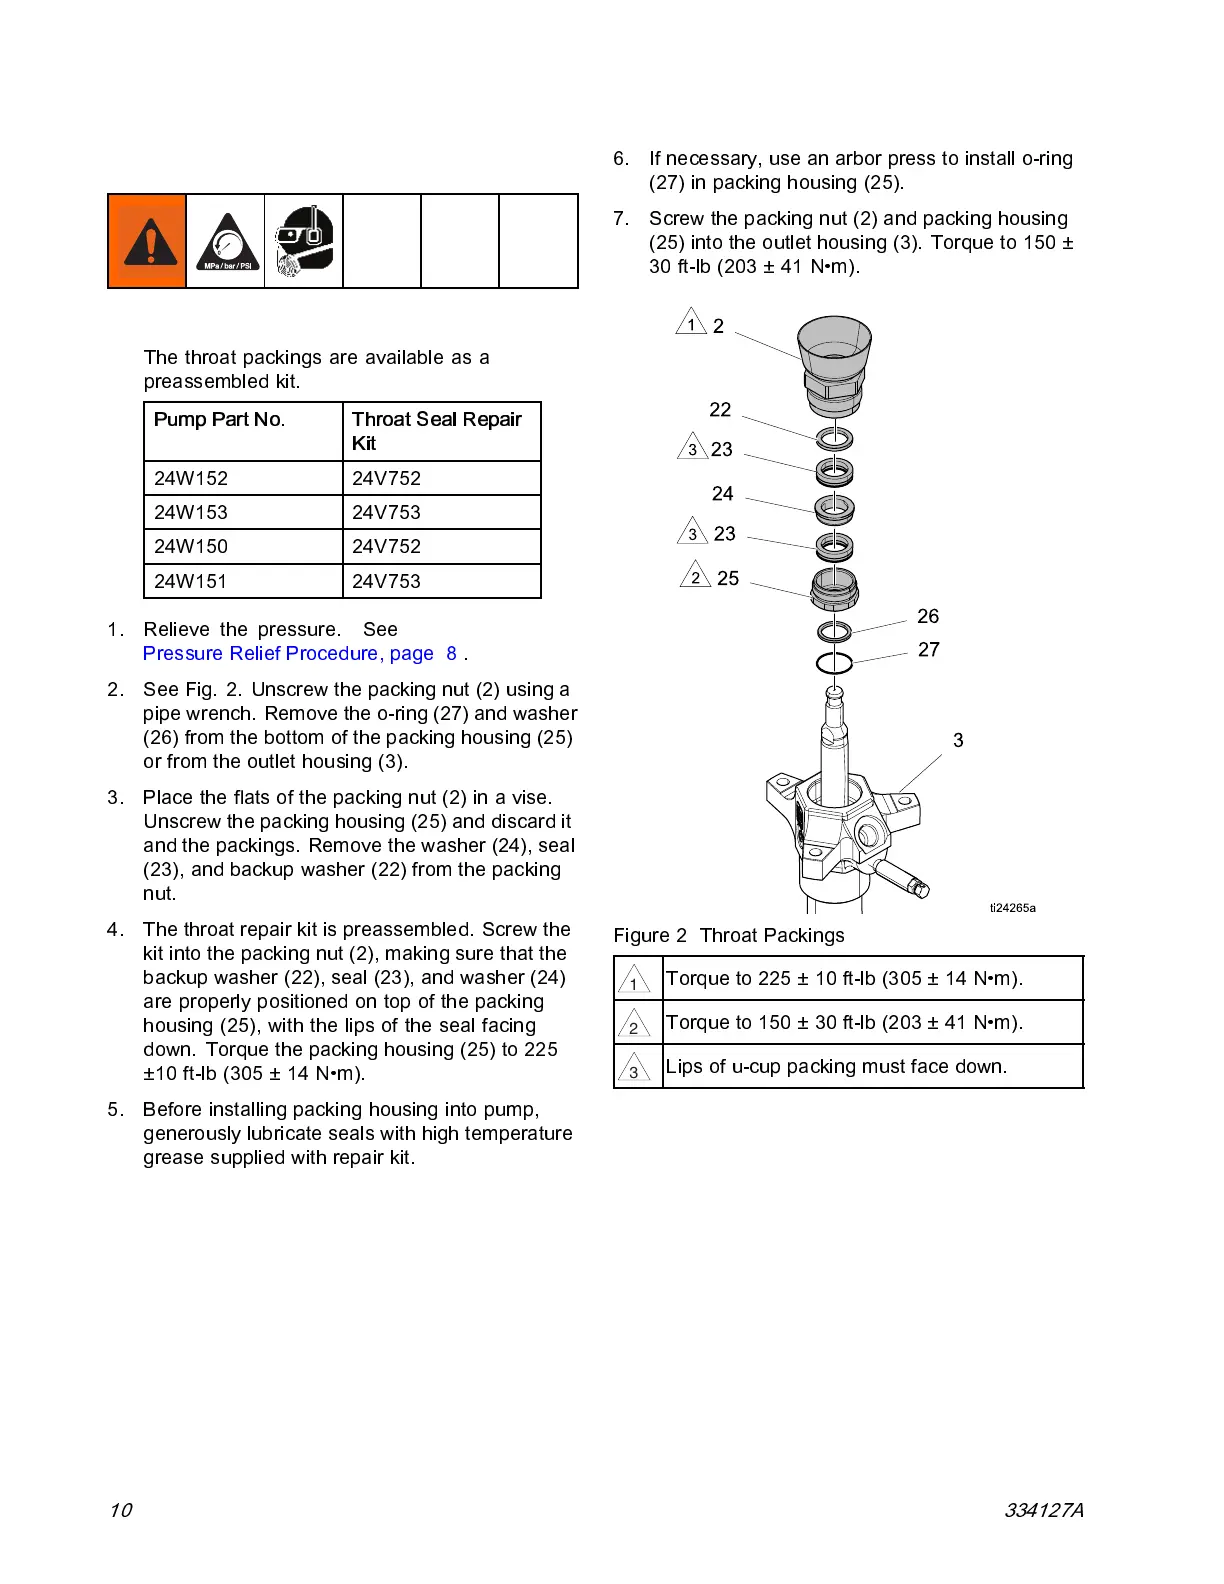
2. See Fig. 2. Unscrew the packing nut (2) using a
pipe wrench. Remove the o-ring (27) and washer
(26) from the bottom of the packing housing (25)
or from the outlet housing (3).
3. Place the flats of the packing nut (2) in a vise.
Uns crew the packing housing (25) and discard it
and the pa ckings. Remove the washer (24), seal
(23), and backup washer (22) from the packing
nut.
4. The throat repair kit is preassembled. Screw the
kit into the packing nut (2), making sure that the
backup washer (22), seal (23), and washer (24)
are properly positioned on top of the packing
housing (25), wi th the lips of the seal facing
down. Torque the packing housing (25) to 225
±10 ft-lb (305 ± 14 N•m).
5. Before installing packing housing into pump,
generously lubricate seals with high temperature
grease supplied with repair kit.
6. If necessary, use an arbor pres s to ins tall o-ring
(27) in pa cking housing (25).
7. Screw the packing nut (2) and packing housing
(25) in to the outl e t housing (3). Torque to 150 ±
30 ft-lb (203 ± 41 N•m).
Figure 2 Throat Packings
1
Torque t o 225 ± 10 ft-lb (305 ± 14 N•m).
2
Torque t o 150 ± 30 ft-lb (203 ± 41 N•m).
3
Lips of u-cup packing must face down.
10 334127A