SPIN
TEST
WARNING
Pressure Relief Procedure
5.
Hold a metal part of the gun firmly
to
the side of a
To reduce the risk of serious bodily injury, including
fluid injection,
injury from splashing fluid or solvent in
grounded metal pail, and trigger the
gu.n to relieve
oressure.
the eyes or on the skin, moving park or electric shock,
6,
Engage
the
gun
safety
latch,
always follow this procedure whenever you shut
off
the
sprayer, when checking or servicing any
part of the
7.
Open the Pressure drain valve, having acontainer
spray system, when installing, cleaning or changing ready to catch the drainage.
spray tips, and whenever
youstop spraying.
8.
Leave the pressure drain valve open until you are
..
ready to spray again.
1.
Engage the gun safety latch.
2.
Turn the ON/OFF switch to OFF.
3.
Unplug the power supply cord.
4.
Disengage the gun safety latch.
If
you suspect that the spray tip or hose
is
completely
clogged,
or
thatpressure has not been fullyrelievedaf-
ter following the steps above, wrap a rag around the tip
guard retaining nut or hose end coupling and VERY
SLOWLY loosen the
partto relieve pressure gradually,
then loosen completely. Now clear the tip or hose
ob
-
struction.
cal continuity.
For checking armature, motor winding
Grid brush electri-
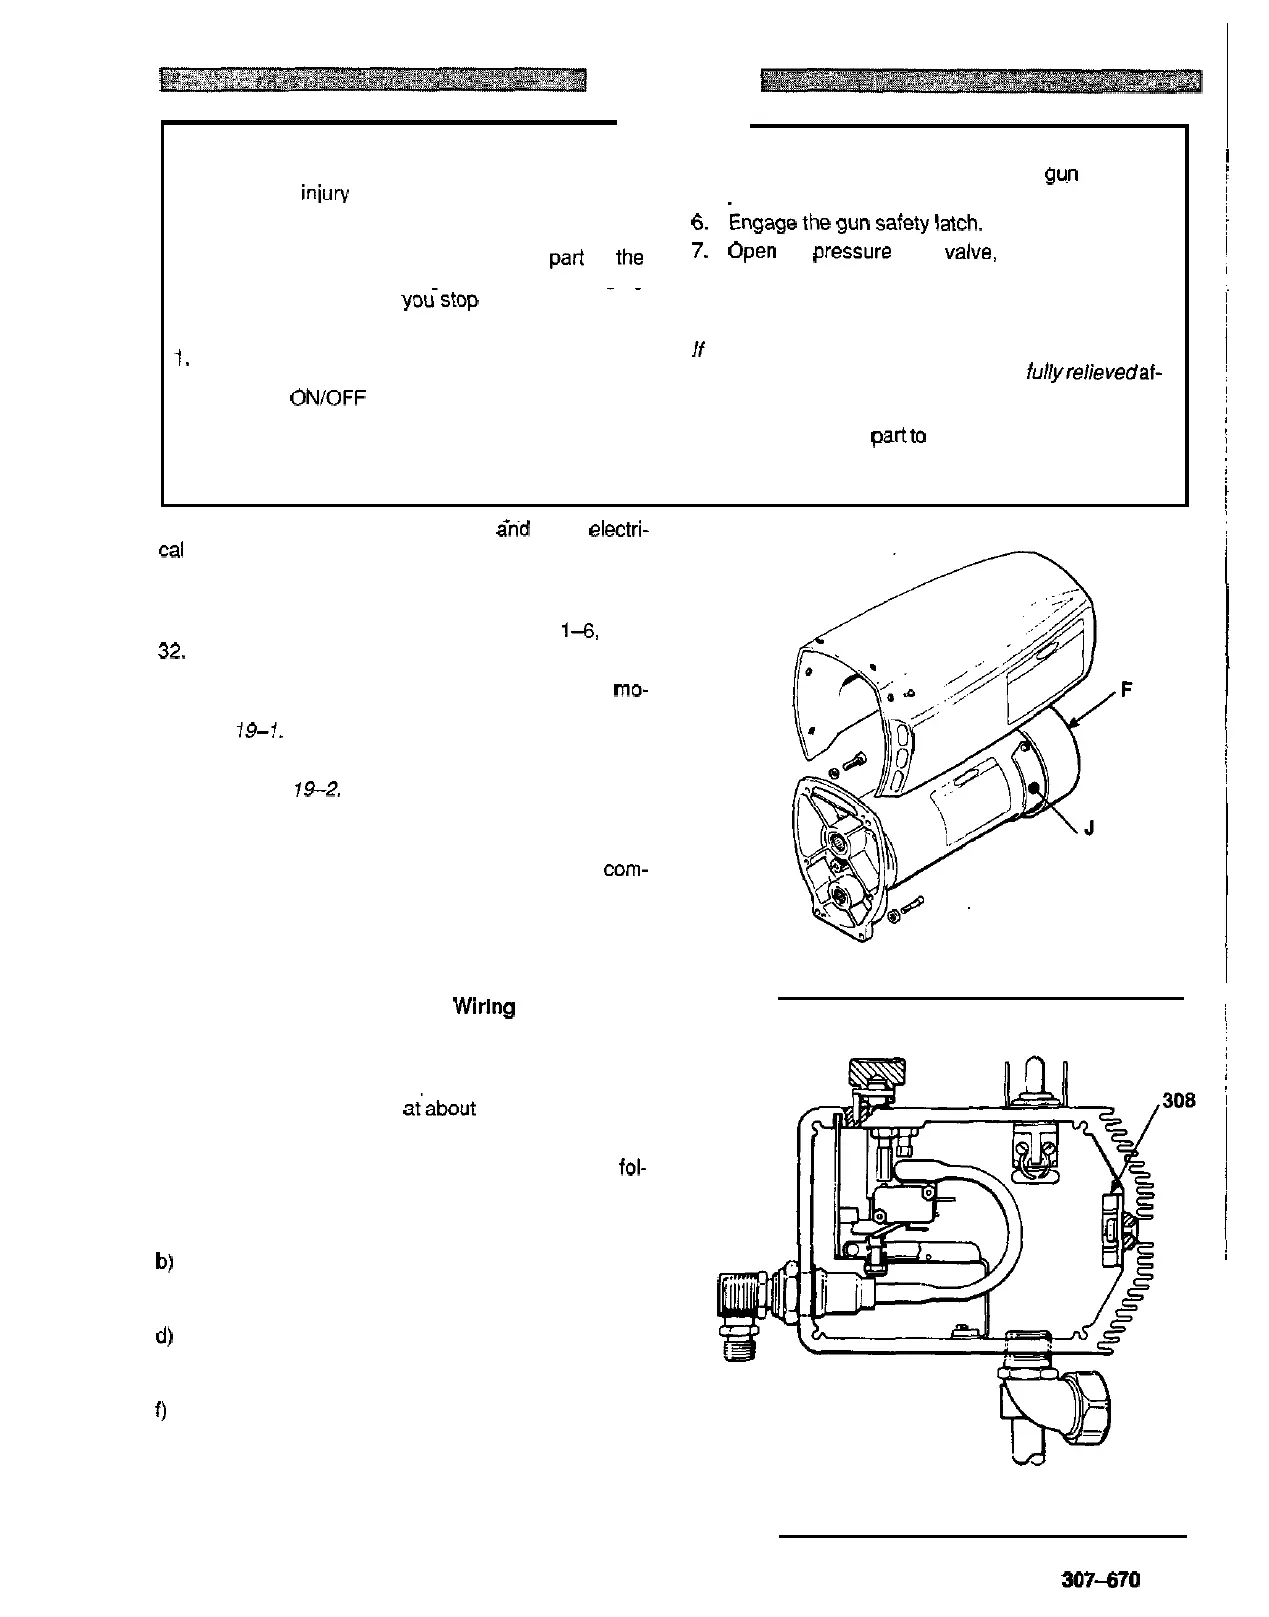
Setup
Remove the drive housing from the sprayer as described
32.
in DRIVE
HOUSING
REPLACEMENT, Steps
1-6,
page
tor cover, the fan cover (F), and the inspection covers
(J).
Remove the pressure control cover and screws, the mo-
See
Fig
19-1.
Disconnect the
two
leads from the motor
to
the bridge
(308).
See
fig
19-2.
Armature Short Circuit Test
the motor will coast
two
or three revolutions before com-
Quickly turn the motor fan by hand.
If
there are no shorts,
ing
to
a complete stop.
armature
is
shorted and the motor must be replaced. See
If
the motor does not spin freely and resists rotation, the
page
35.
Armature; Brushes, and Motor Wiring Open Circuit
Test (Continuity)
Connect the two black motor leads together with a test
lead.
Turn the motor fan by hand
atabout
two
revolutions per
second.
lowing and repair parts
as
needed. See page
33.
If there
is
uneven or
no
turning resistance, check the
fol-
a)
broken brush springs
b) broken brush leads
c) loose brush terminal screws
d) worn brushes
e)
broken motor leads
f) loose motor lead terminals
If
there is still uneven or no turning resistance, replace the
motor. See page
35.
Fig
19
-
1
Fig
19
-
2
307-670
19