Repair
3A3489T 35
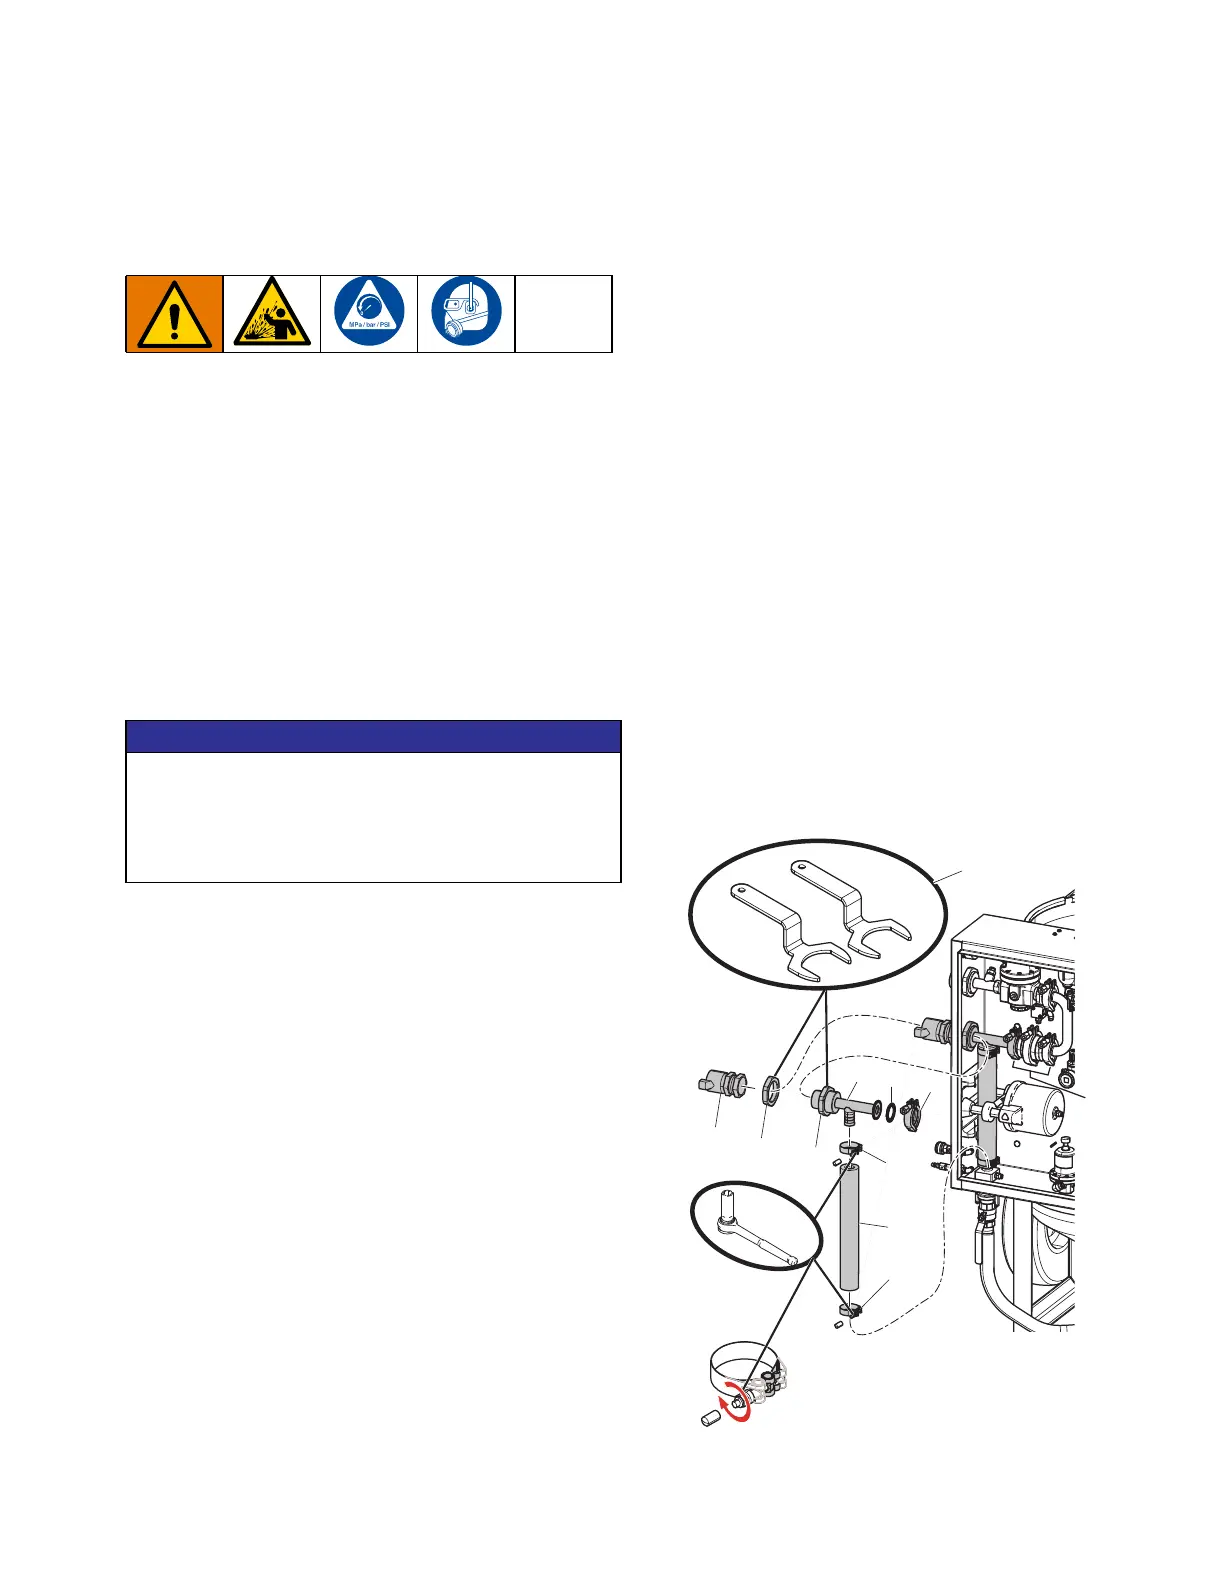
Replace the Pinch Hose
Remove the Pinch Hose
1. Perform Pressure Relief Procedure, page 17.
2. Remove the claw coupler (CP) at the swivel
connection.
3. Use the supplied 2-7/8 in. wrenches (WR) to loosen
the lock nuts (S1, S2) on the inside and outside of
the box.
4. Remove the clamp (HC) connecting the blast circuit
(BC) to the check valve.
5. Remove check valve assembly (CV) and clean all
abrasive that may be stuck to the check valve
components.
6. Remove the bottom hose clamp (C2).
7. Pull the pinch hose (PH) out of the box.
NOTE: Use the blast circuit (BC) as a handle, and twist
while pulling.
8. Loosen the remaining hose clamp and remove the
pinch hose from the circuit.
Install the Pinch Hose
1. Reinstall the check valve, ensuring proper
orientation. Assemble the valve with the plunger
facing the bent manifold.
2. Place both hose clamps (C1, C2) on the pinch hose
(PH). Leave 1/4 in. of hose exposed on the ends.
3. Slide the pinch hose (PH) into the box through the
pinch valve.
4. Reinstall the blast circuit (BC) and pinch hose (PH)
into the box through the pinch valve.
5. Install and tighten the clamp (HC) to 15ft-lb (20.3
N•m) to connect the blast circuit to the check valve.
NOTE: If necessary, loosen the inside nut (S2) to
provide room for gasket (G) installation. Inspect the
gasket (G) and replace if necessary.
6. Apply anti-seize to threads on clamps (C1, C2).
Align the nuts pointing towards the front of the
enclosure. Torque to 85 +/- 5 in-lb (9.6 +/- 0.5 N•m).
7. Tighten the lock nuts (S1, S2).
8. Install the claw coupler (CP).
NOTICE
Check valve components coated in abrasive can
allow abrasive to enter the main air regulator and
lead to improper operation. Clean off all abrasive
material that may be stuck to the check valve
components to allow for proper operation.
WLH
+&
6
6
&3
3+
&
&
*
%&
:5
&9
 Loading...