Motor
NOTE: The
motor must be removed from
the cart before
the Field, Clamp or Clutch Housing can be re-
moved. The Field, Clamp and Clutch Housing
must
be removed in order to replace the motor
.
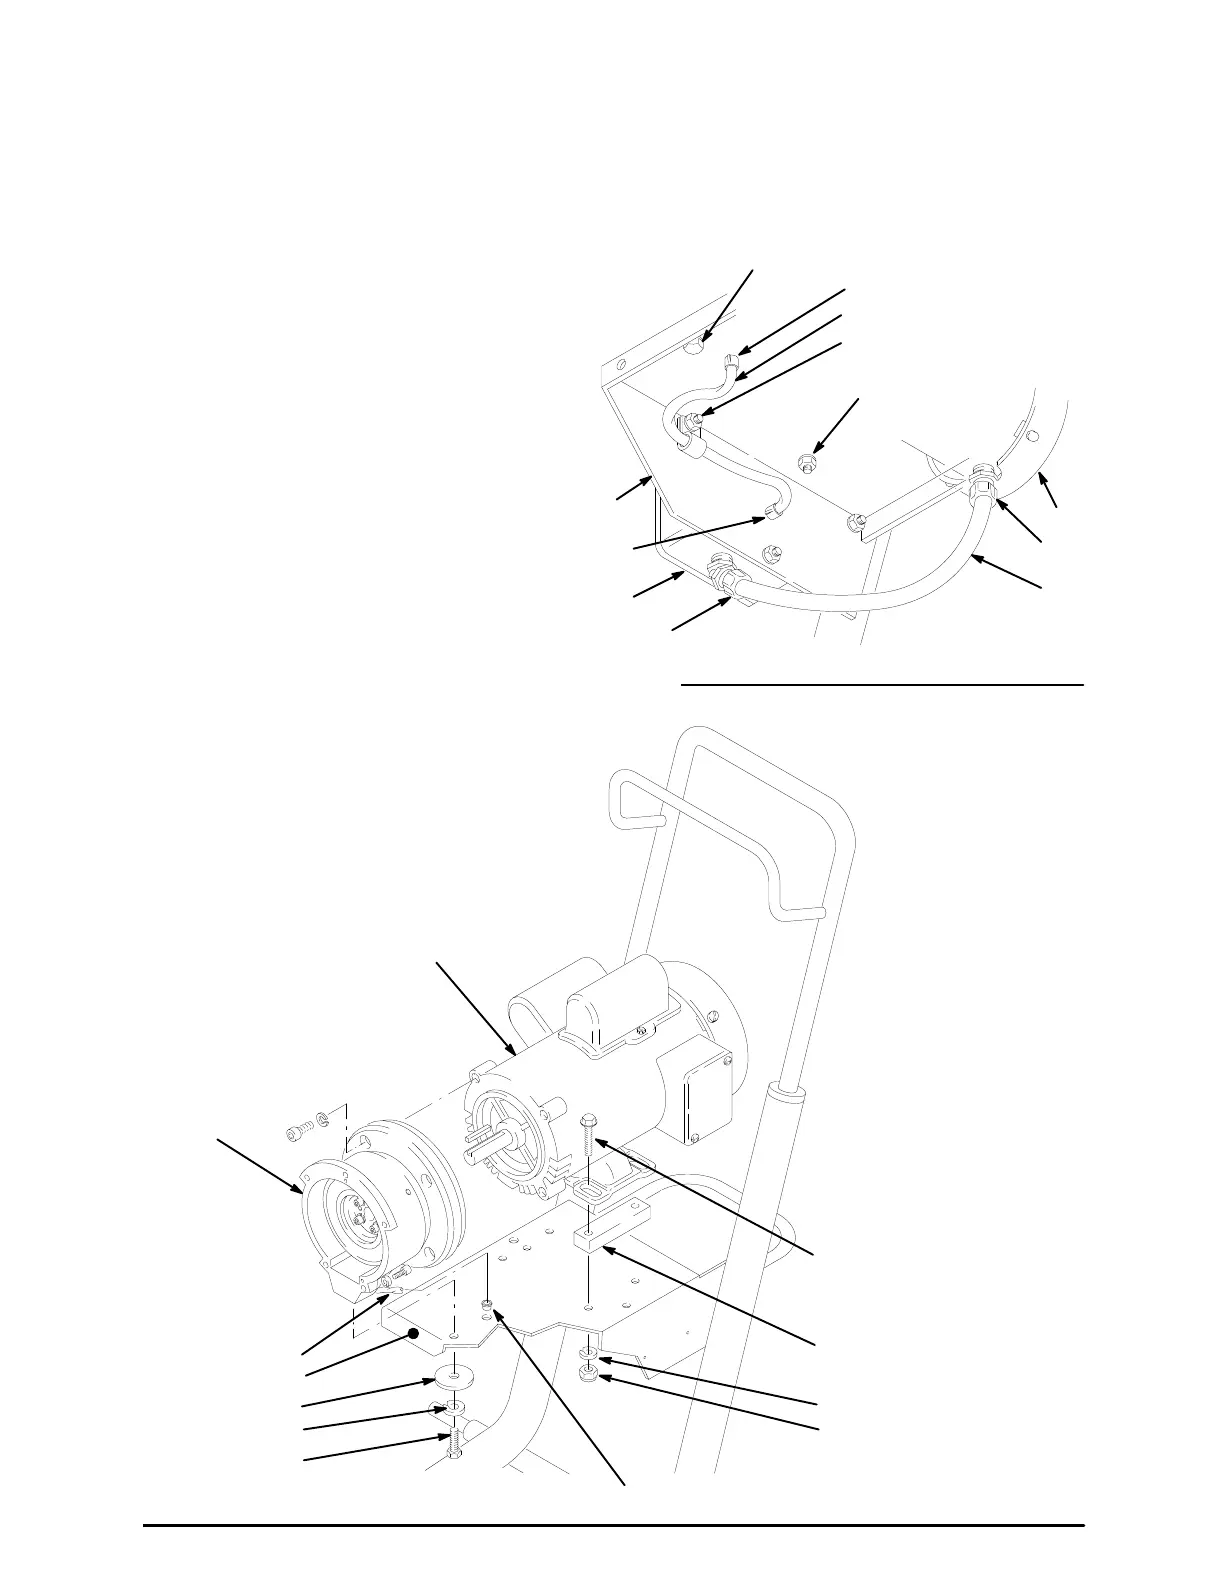
1. Working
under the mounting plate
(A) of the cart, re
-
move the screw (15), lockwasher (80) and washer
(33)
which
hold the clutch housing (2) to the cart. See
Fig.
27.
2. Remove
the four
locknuts (107) and lockwashers (9),
and
then pull the flange screws (14) out of the base
of the motor (1). See Fig. 26 and Fig. 27.
3.
Remove the pressure
control
cover. Disconnect the
four
motor leads. Disconnect the + and – leads from
the
rectifier (310). See Fig. 15, page 16.
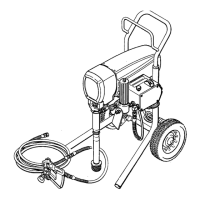
4. Push the grommet (86A) out of the frame (A). Re-
move
the screw
, lockwasher and nut (62, 9, 61) and
the clamp (85). Push the grommet (86B) out of the
frame.
See Fig. 26.
5. Fully loosen the nut of the connector (308). Pull the
wires
carefully through the connector
. See Fig. 26.
6. Carefully remove the motor and clutch housing as-
sembly.
Place the motor on a work bench.
7. Remove
the
Field
and W
iring Harness, Clamp
and
Clutch
Housing
, as instructed
on pages 26 and 27.
8. Skip
ahead to
Reassembly
,
page 29, Step 1..
VIEW
FROM UNDER ENGINE MOUNTING
62,
9, 107
308
1
87
90
94
86B
33,80,15
A
86A
62,9,62,85
63
Fig. 26
14
9
107
33
80
15
2
1
66
REF 86B
REF 90
A
Fig. 27