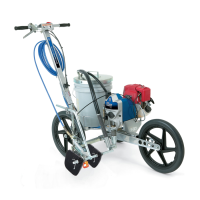
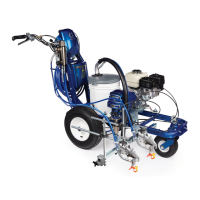
Trigger
C
abl
e & D
ual Gu
n S
elector Operation
C
1
or 402
E
E
D
0021
Fig. 18
Shown
in
three positions
How
the Dual Gun Selector W
orks
See
Fig. 18.
The
gun is remotely triggered with the dual gun selector
on
the right handlebar
.
The gun is mounted in the holder
so its trigger rests on a trigger lever which is connected
to
the dual gun selector by a trigger cable.
The
main gun cable is black. In a
two–gun operation, the
second
gun cable (402) is black with a light red cover
at
each end. Use the color coding to determine how each
trigger cable is routed to the dual gun selector
.
CAUTION
Always note to which gun and position on the dual
gun
selector (C) each
of the cables goes so that the
correct gun is triggered.
To
trigger the main gun only
, move the selector (125) left
until the spool (1
18d) protrudes through the plate (122B)
and
disengages from the other plate (122A).
To
trigger the
optional second gun only
,
move the selec
-
tor (125) right until the spool protrudes through the plate
(122A)
and disengages from the other plate (122B).
T
o trigger both guns
, center the selector (125).
How to Release the Dual Gun Selector
Cable
WARNING
The
gun is remotely triggered with a dual gun selector
on
the handle bar
.
To
reduce the risk of an injection injury due to
remote
-
ly triggering the gun by accident, always disengage
the trigger cable from the block before handling the
gun. See DET AIL A. The gun will trigger briefly
when releasing the cable! Before you remove the
gun
from the holder
, engage the
gun’
s trigger safety
latch.
1. To disengage the cable, grasp the cable (1or 402)
just
behind the block (48). Pull the cable back about
1/2 inch (13 mm) and then up and out of the block.
The
gun will trigger briefly
! See Fig. 19.
2. To
engage
the cable,
slide the cable (1) into the block
(48), making sure the end of the cable jacket seats
firmly in the seat of the block. The gun will trigger
briefly!
See Fig. 19.
CAUTION
Keep
the seat in the gun cable block (48) and the end
of the cable jacket clean at all times to be sure the
cable
functions properly
.
CAUTION
A loose cable prevents the gun from being fully trig-
gered, which causes premature wear of the gun
needle.
A tight cable prevents the gun from being fully
untriggered,
which results in dripping and premature
tip
wear
. Follow
Trigger
cable tension adjustment
,
as
needed.
Trigger
Cable T
ension Adjustment
See
Fig.
19
1. Relieve
pressure. See page 4.
2. Be
sure the gun is properly mounted in the holder as
instructed
on page 21.
3. Pull
the actuator lever (94) forward and hold it. Lift up
on
the gun trigger (A) until there is slight
resistance.
Visually
check to see if there is about 1/32
to 1/16 in.
gap
between the trigger lever (B) and where the gun
trigger
touches the bar
.
4. To adjust the tension, loosen the screw (A) in the
block (48). Slide the block forward to increase the
gap
and backward to decrease the gap. T
ighten the
screw.
5. Recheck the gap and continue adjusting as
needed.
CAUTION
Do
not allow the cable (402) to
rub against the outside edges
of
the slot
(H) in the block (48),
to prevent premature wear of
the cable. Rotate the block
slightly
to eliminate rubbing.
H
402
48
0022
1 or 402
48
1/32
– 1/16”
(1–2 mm)
94
A
B
FORWARD
Be sure end jacket of cable
seats here. keep jacket and
seat clean
1
or 402
48
45
45
A
DET
AIL A
0023
0024
Fig. 19
 Loading...