Hydraulic Motor Replacement
3A3394E Repair - Parts 23
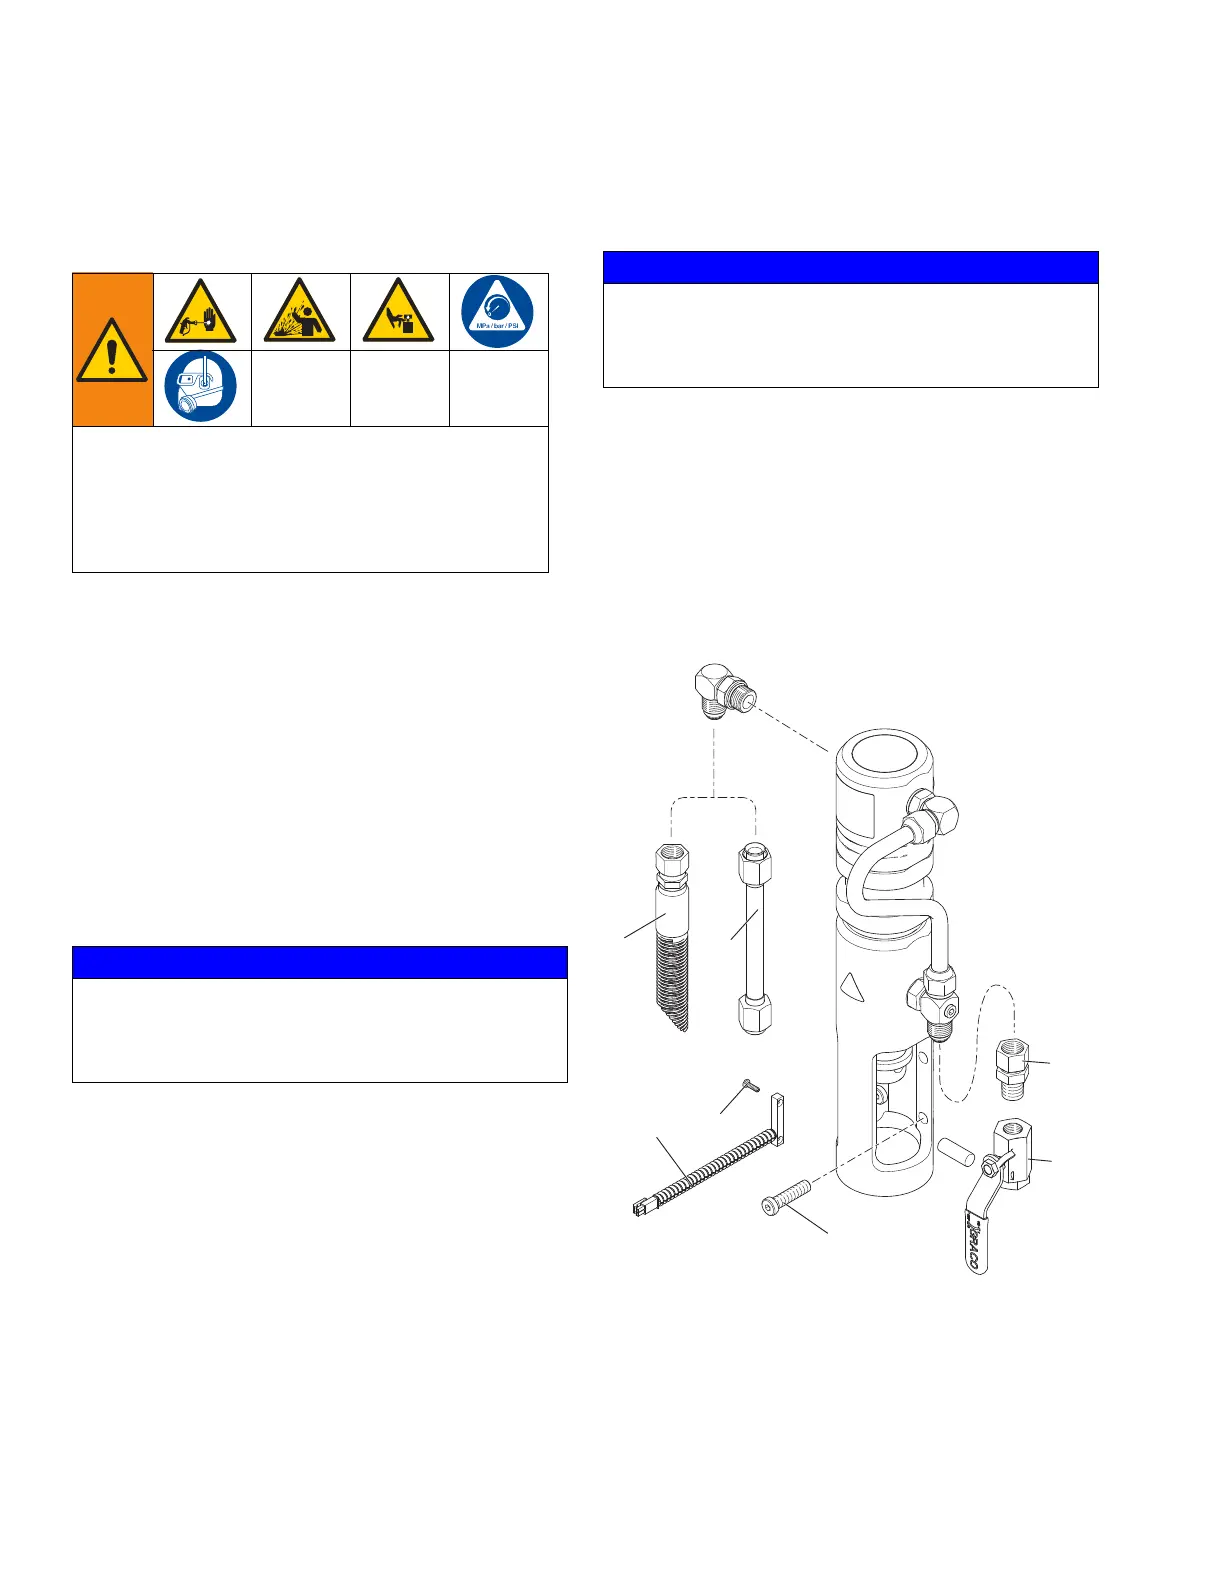
Hydraulic Motor
Replacement
Removal
1. Perform Pressure Relief Procedure, page 10.
2. Remove paint pump, see Paint Pump Replace-
ment, page 22.
3. Disconnect fitting (108) above ball valve (109).
NOTE: Oil will spill out of hoses. Have rags and
waste pail nearby.
4. Disconnect hose (74) for pump 1 or tube (98) for
pump 2.
5. Disconnect pump counter (112) with 2 screws (113).
6. Remove four mounting bolts (116) from hydraulic
motor and remove motor from sprayer.
Installation
1. Install hydraulic motor with four mounting bolts (116).
2. Install pump counter (112) with two screws (113).
3. Connect hose (74) or tube (98) to fitting.
4. Connect fitting (108) above ball valve (109).
5. Install paint pump, see Paint Pump Replacement,
page 22.
6. Purge hydraulic system, see Hydraulic System
Purging, page 13.
This equipment stays pressurized until pressure is
manually relieved. To help prevent serious injury from
pressurized fluid, such as skin injection, splashing
fluid and moving parts, follow the Pressure Relief
Procedure when you stop dispensing and before
cleaning, checking, or servicing the equipment.
NOTICE
Use a screwdriver to lift pump piston up to gain access
to mounting bolts and avoid contact with piston. Con-
tact with pump mounting bolts can scratch and damage
the pump piston.
NOTICE
Use a screwdriver to lift pump piston up to gain access
to mounting bolts and avoid contact with piston. Con-
tact with pump mounting bolts can scratch and damage
the pump piston.
74
109

 Loading...