Repair
332245G 17
Repair
General Information
• Reference numbers and letters in parentheses in
the text refer to the callouts in the figures and the
parts drawing.
• Always use Genuine Graco Parts and Accessories,
available from your Graco distributor. If you supply
your own accessories, be sure they are adequately
sized and pressure rated for your system.
Disconnect the Displacement
Pump
1. Stop the pump in the middle of the stroke.
2. Flush the pump, if possible. See Flush, page 11.
Relieve the pressure. See Pressure Relief Proce-
dure, page 10.
3. Disconnect the air and fluid hoses and the ground
wire (109).
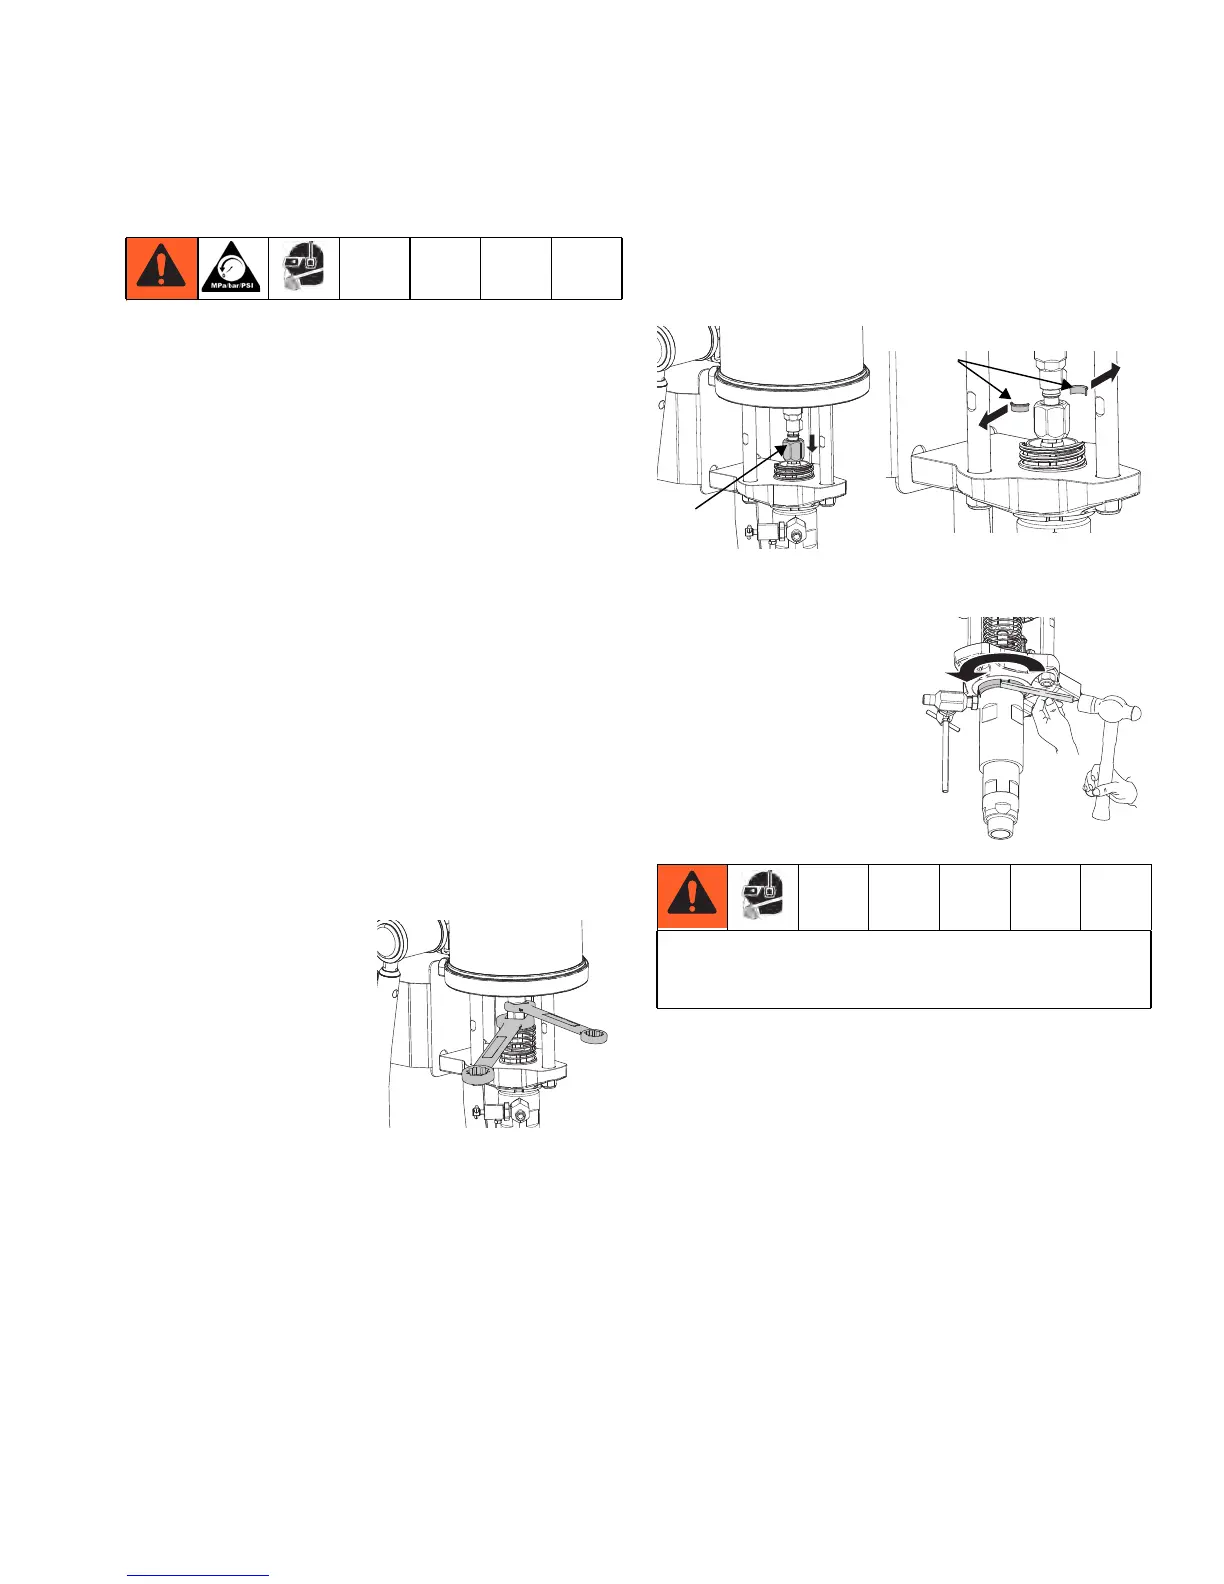
4. Move the spring guard
(118) upwards or
downwards. Hold the
flats of the air motor
piston rod with a
wrench. Use another
wrench to loosen the
coupling nut (106).
5. Lower the coupling nut (106) enough to remove the
coupling collars (107), and then remove the cou-
pling nut (106).
6. Use a hammer and
brass rod to loosen the
jam nut (105). Unscrew
the jam nut as far as
possible.
7. Unscrew the displace-
ment pump by hand
and place on work
bench.
ti21112a
Threads are very sharp. To avoid cuts, use a rag to
protect hands when hand turning or carrying the dis-
placement pump.
ti21113a
ti21114a
106
107
ti21115a
 Loading...