EasyManua.ls Logo

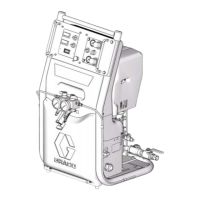
Graco Reactor E-10

Graco Reactor E-10
72 pages
To Next Page IconTo Next Page
Loading...
Instructions - Parts List
For spraying or dispensing 1:1 mix ratio materials, including epoxies,
polyurethane foam, and polyurea coatings. For professional use only.
Not approved for use in European explosive atmosphere locations.
See page 4 for a list of models and maximum working pressures.
Important Safety Instructions
Read all warnings and instructions in
this manual. Save these instructions.
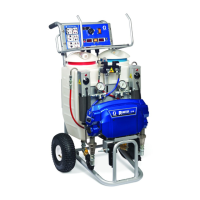
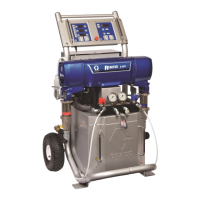
Nonheated Package, with 2K
Ultra-Lite
Gun and Cold
Spray disposable mixer
TI6989b
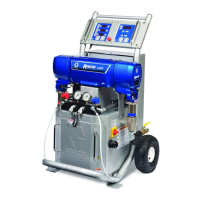
Heated
Package, with
Fusion
Gun
TI6987b
311075R
EN

Other manuals for Graco Reactor E-10

Questions and Answers:

Graco Reactor E-10 Specifications

General IconGeneral
BrandGraco
ModelReactor E-10
CategoryPaint Sprayer
LanguageEnglish

Summary

Related Manuals

Systems

Models

Warnings

ELECTRIC SHOCK HAZARD

General warnings about electrical hazards and precautions to prevent electric shock during operation and servicing.

TOXIC FLUID OR FUMES HAZARD

Hazards associated with toxic fluids and fumes, emphasizing proper PPE and handling.

PERSONAL PROTECTIVE EQUIPMENT

Requirements for wearing appropriate protective equipment to prevent serious injury during operation and servicing.

Overview

Slow Recirculation

Describes the function and use of slow recirculation mode for temperature transfer and heating.

Fast Recirculation

Explains the use of fast recirculation for higher flow rates and tank heating.

Pressure Adjust

Details the automatic pressure adjustment feature for dispensing and spraying.

Component Identification

Controls and Indicators

MotorPump Control Function Knob

Explains the function knob used to select operational modes like Stop/Park, Recirculation, and Pressure Adjust.

STATUS Indicator

Describes the status indicator light's function for indicating operational status and error codes.

Setup

Locate Reactor E-10

Instructions for properly positioning the Reactor E-10 unit on a level surface and avoiding rain exposure.

Electrical requirements

Guidelines for connecting the unit to the correct power source and ensuring proper electrical installation.

Ground system

Importance of grounding the equipment to prevent static and electric shock hazards.

Startup of Heated Units

Heatup Guidelines

Heat Management Tips

SprayingDispensing

Set function knob to StopPark

Initial step to set the function knob to the Stop/Park position before spraying.

Set RecircSpray valves to Spray.

Instructions to set the recirculation/spray valves to the spray position for operation.

Turn function knob to Pressure Adjust

How to adjust the function knob to set the desired fluid pressure for spraying.

Check fluid pressure gauges...

Verifying pressure balance between components A and B using gauges before spraying.

Open gun fluid manifold valves...

Procedure for opening gun fluid manifold valves on impingement mix guns for spraying.

Pause (Heated Units)

Engage piston safety lock or trigger safety lock.

Engaging safety locks on the gun to pause operation safely.

Set function knob to Slow Recirc

Setting the function knob to Slow Recirc to maintain temperature during a break.

Set RecircSpray valves to Recirc...

Setting valves to Recirc to bring temperatures back up after a pause.

Refilling Tanks

Instructions for safely refilling fluid tanks while maintaining system pressure.

Pressure Relief Procedure

Engage piston safety lock or trigger safety lock.

Engaging safety locks on the gun as the first step in relieving system pressure.

Set function knob to StopPark

Setting the function knob to Stop/Park as part of the pressure relief process.

Turn RecircSpray valves to Recirc.

Turning valves to Recirc to dump fluid back to tanks and drop gauge pressure.

Shutdown

Follow all steps of Pressure Relief Procedure...

Recommends following the pressure relief steps before shutting down the unit for breaks.

If using an impingement mix gun...

Specific shutdown step for impingement mix guns to keep internal parts clean.

Shut off Heater Power...

Turning off the heater power for heated units as part of the shutdown procedure.

Maintenance

Flushing

Engage piston safety lock or trigger safety lock.

Engaging safety locks as the initial step for flushing the equipment.

Set function knob to StopPark

Setting the function knob to Stop/Park during the flushing process.

Shut off Heater Power...

Turning off heater power for heated units to allow the system to cool during flushing.

Remove recirculation tubes...

Removing recirculation tubes and placing them in waste containers for flushing.

Turn RecircSpray valves to Recirc.

Setting the recirculation/spray valves to Recirc to begin the flushing sequence.

Set function knob to Fast Recirc

Using Fast Recirc to pump solvent or new fluid through the system.

Troubleshooting

Status Codes

Explanation of how to interpret status codes by counting the blinks of the status indicator (ST).

Status Code 1 and 2 Settings

Troubleshooting Chart

Repair

Before Beginning Repair

Critical safety precautions and preparation steps before starting any repair work on the equipment.

Removing Supply Tanks

Step-by-step instructions for safely removing the fluid supply tanks from the unit.

RecircSpray Valves

Displacement Pump

Control Module

Change Display Temperature Units (FC)

How to switch temperature displays between Fahrenheit and Celsius.

Calibrate Temperature Displays

Procedure to adjust calibration screws for accurate temperature readings on the displays.

Replace Function KnobPotentiometer

Control Board

Fluid Heaters (if supplied)

Pressure Transducers

Drive Housing

Cycle Counter Switch Replacement

Electric Motor

Motor Brushes

Fan

Parts

Heated Proportioners

Part numbers and descriptions for heated proportioner models.

Nonheated Proportioner

Part numbers and descriptions for nonheated proportioner models.

Suggested Spare Replacement Parts

All Units

List of common spare parts recommended for keeping on hand for all units.

Heated Units Only

List of specific spare parts recommended for heated unit models.

Dimensions

Technical Data

Graco Standard Warranty

Graco Information

Contact information and resources for obtaining the latest product information and support from Graco.

Related product manuals