12
NOTE: The IP Address, Net Mask and Gateway must be corresponding with your network settings for
you to access the camera. You can follow the steps below to get your network information.
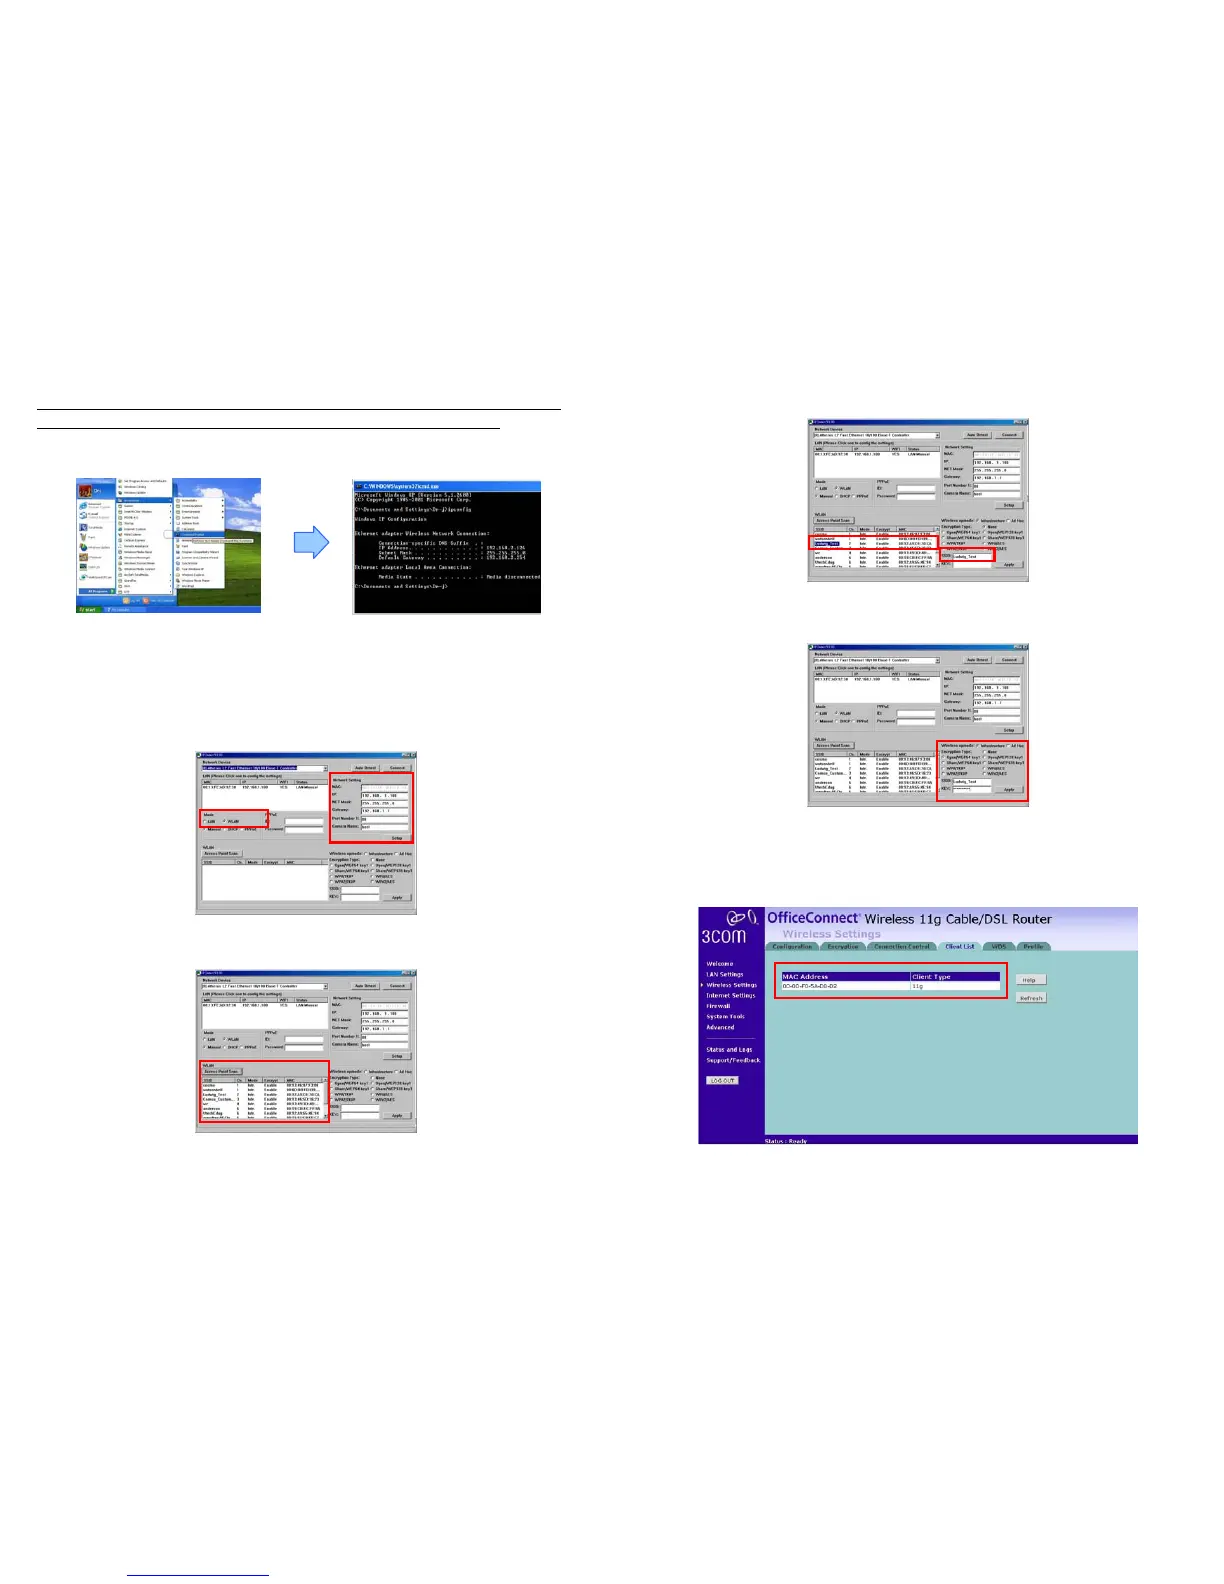
- Click “Start” → “All Programs” → “Accessories” → “Command Prompt”. A MS-DOS window will
appear. Type “ipconfig” and then press “Enter” to get your network information.
- Assign IP Address, Netmask (Subnet Mask) and Gateway (Default Gateway) for the Mega Pixel
Wi-Fi Camera. (You must use the same Net Mask (ex. 255.255.255.0) and Gateway
(192.168.2.254). You can use any IP address between 192.168.2.1-254, but make sure that the
IP Address has never been used or is used by another IP addressable device.)
Step 4: Select “WLAN” in the “Mode” selection. Directly modify the “IP”, “Net Mask” and “Gateway”, and
click “Setup” to save.
Step 5: Click on the “Access Point Search” button and all available access points will be listed.
13
Step 6: Select the access point you want to use and the corresponding SSID will show in the “SSID”.
Step 7: Then input your wireless configuration, include “Wireless op mode”, “Encryption Type” and
corresponding “Key”. Click on “Apply” button for saving the configuration.
Step 8: Turn off Mega Pixel Wi-Fi Camera, unplug the crossover cable, set the “WLAN/LAN” switch to
“WLAN”, and then restart Mega Pixel Wi-Fi Camera.
Step 9: Check your access point to see if the configuration works.