120
Detail program description - Control adjust
Deleting reference points
To delete one of the reference points (1 to max. 4), use
the joystick to move the vertical line into the vicinity
of the reference point in question. As soon as the
reference point number and its associated value is
shown on the "Point" line (see screen image above),
you can activate the value fi eld on the "Point" line to
highlight it by simultaneously tapping the or
keys on the right touch pad (CLEAR) and then delete
the value. Complete the operation by briefl y tapping the
center key
ESC on the left touch pad.
Changing reference point values
Move the joystick into the range of the reference point
that is to be changed: "L" (low), 1 … 4 or "H" (high).
The number and current curve value of this point are
displayed. Activate the value fi eld by briefl y tapping
the center SET key on the right touch pad. The point
value fi eld is now highlighted and can be set within the
range -125% to +125%, and without infl uencing the
neighboring reference points.
Example:
2
+50%
–75%
–75%
Normal
off
Input
Output
Point
C1 Curve
Curve
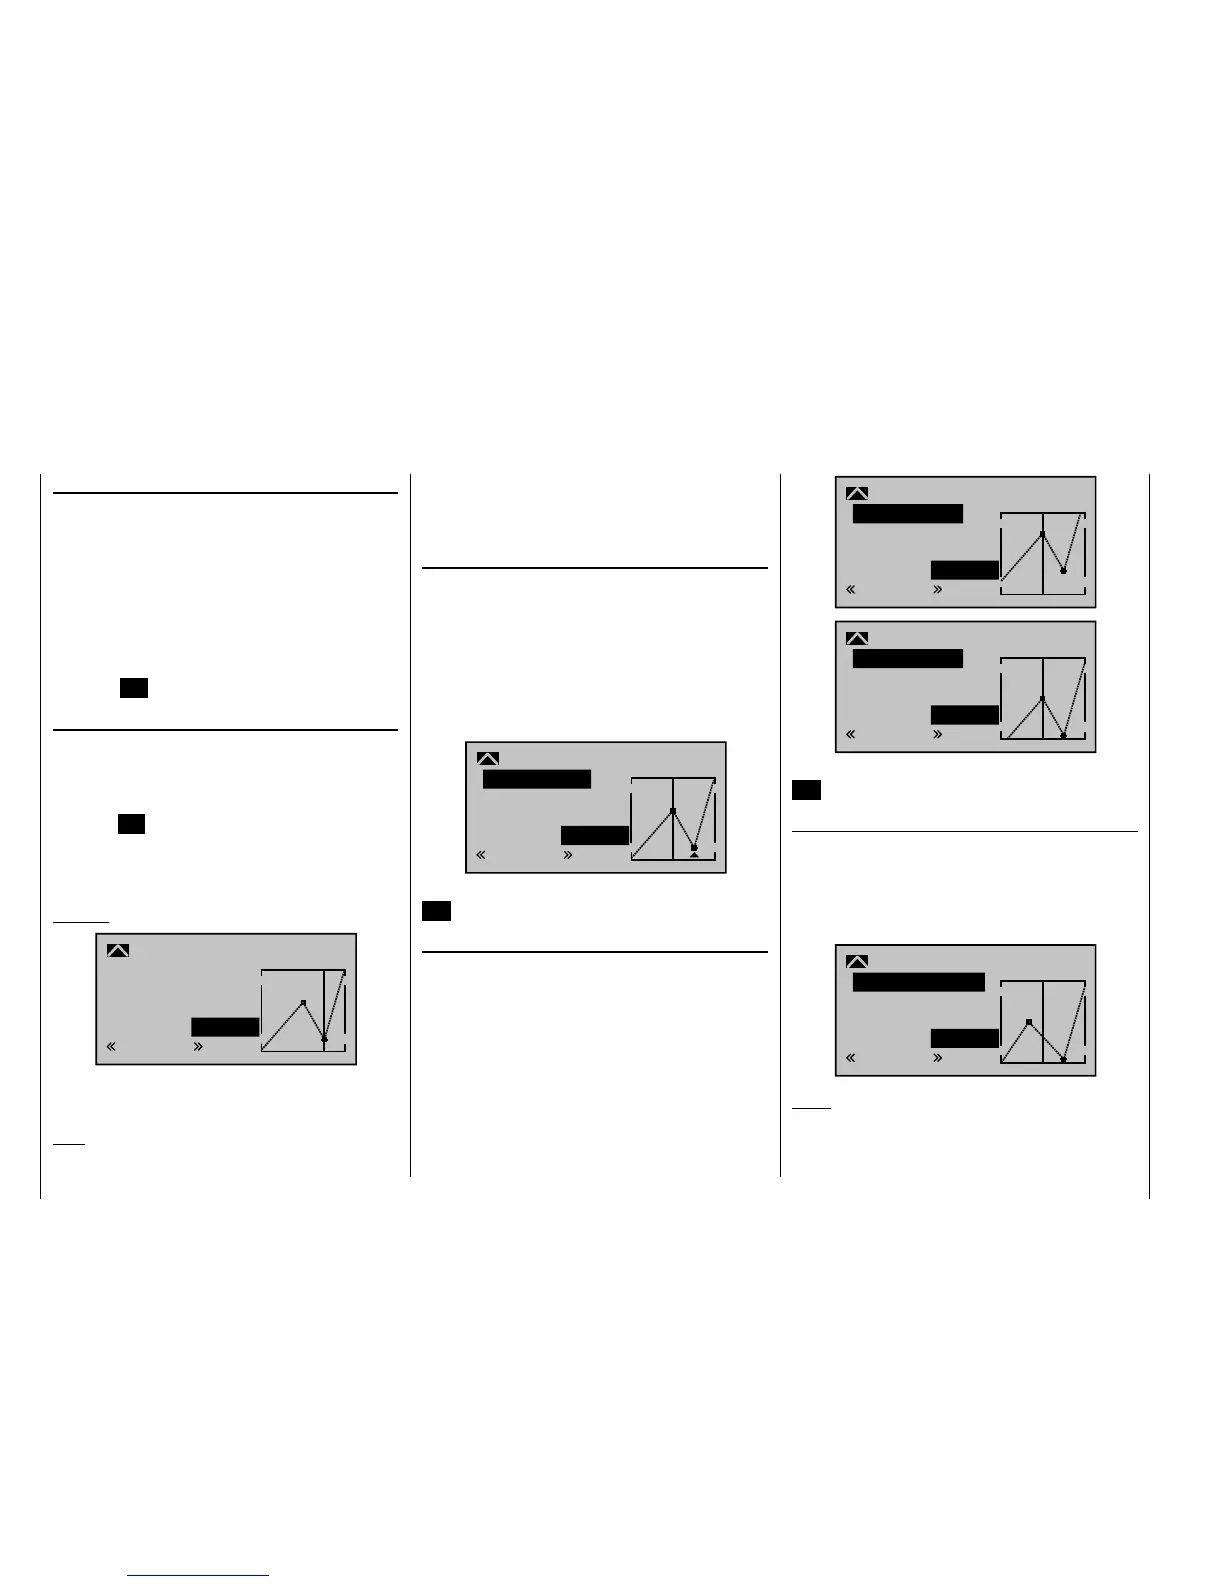
In this sample screen image, reference point "2" has
been set to -75%.
Note:
If the joystick does not coincide with the exact reference
point, please note that the percentage value on the
"Output" line always relates to the current joystick
position.
Trim point function
Alternatively, assuming the value fi eld is active, i. e.
highlighted, you can use the up or down arrow keys
on the left touch pad to jump to reference points
already set. In this case, a triangle is shown on the
graph to indicate each point jumped to. The arrow keys
on the right touch pad can then be used to change the
reference point jumped to as described above, entirely
independently of the control position:
2
+50%
–75%
–75%
Trim point
Normal
Input
Output
Point
C1 Curve
Exit from trim point function setting by tapping the center
ESC key on the left touch pad.
Trim offset function
Assuming the value fi eld is active, i. e. highlighted, you
can not only use the up or down arrow keys on the
left touch pad to jump to reference points already set
and change their values, but you can also use the
keys on the left touch pad to vertically reposition an
existing curve within the range ±25%:
1
0%
+50%
+50%
Trim offset
Normal
Input
Output
Point
C1 Curve
1
0%
0%
0%
Trim offset
Normal
Input
Output
Point
C1 Curve
You can also exit from this function by tapping the center
ESC key on the left touch pad.
Trim x-axis function
This function is activated by tapping the left () or right
() arrow key n the right touch pad with an active (i. e.
highlighted) value fi eld. You can then use the arrow
keys on the right touch pad to reposition the active point
horizontally or vertically as you wish.
?
0%
–33%
0%
Trim X-axis
Normal
Input
Output
Point
C1 Curve
Notes:
If you reposition the point horizontally further away •
from the current control position than approx. ±25%,
a "?" sign re-appears in the line. This question mark