Do you have a question about the GRAUPNER HoTT mz-8P and is the answer not in the manual?
Provides contact details for Graupner Service Centers in Germany and USA, including hotline and email.
Specifies the transmitter's intended use for remote control models without passengers and warns against misuse.
States the product is not a toy, unsuitable for children under 14, and requires experienced modellers.
Lists the items included in the transmitter package.
Lists technical specifications for the mz-8P HoTT transmitter, including frequency, modulation, and dimensions.
Explains warning symbols (Caution, Warning, Note, Attention) and their meanings regarding injury and damage.
Provides essential safety instructions to protect the product and ensure user safety before operation.
Warns about accidental motor start, short-circuits, and unauthorized modification of the transmitter.
Advises protecting batteries from moisture, heat, and vibration, and not using damaged batteries.
Details precautions against heating, burning, short-circuiting, and handling leaked electrolyte.
Instructs on proper battery storage and responsible disposal according to regulations.
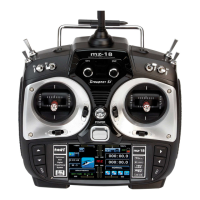
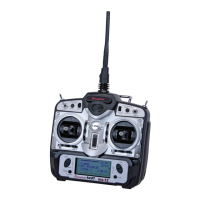
Identifies and describes the buttons, sticks, and LEDs on the front of the mz-8P HoTT transmitter.
Illustrates and labels the components on the rear of the transmitter, including screws, data socket, and battery case.
Explains how to install batteries and indicates how the voltage level is monitored via the status LED.
Describes the function of the data socket for connecting modules and updating the transmitter.
Lists optional accessories such as SMART-BOX, Bluetooth module, and USB interface for telemetry and programming.
Explains the procedure to reset the transmitter to its factory default settings by holding trims and powering on.
Details the steps to power on the transmitter and describes the initial LED and buzzer feedback indicating status.
Mentions the default highest control sensitivity after binding and how to adjust it using the "SPEED" button.
Warns against performing a range test during normal model operation.
Illustrates the control movements for a drone in "MODE 2" configuration, showing climb, sink, turn, and roll actions.
Explains the "MODE 2" flight control configuration for throttle, pitch, yaw, and roll functions.
Describes how to change the transmitter's control mode from the default Mode 2 to Mode 4 via firmware update.
Explains the transmitter's behavior during radio connection interruption, including holding or switching off controls.
Explains the safety function of the motor OFF button and how to engage/disengage motors.
Describes how to switch between Attitude and Rate flight modes and the corresponding LED/sound feedback.
Details the functions of the LED button for binding, controlling front LEDs, and cycling FPV channels.
Explains how the SPEED button cycles through three preset path settings for Pitch, Roll/Nick/Yaw.
Describes the SNAP button's function for taking snapshots or switching channel 8 on compatible copters.
Details how to start and stop video recording on compatible copters using the RECORD button.
Explains how to trigger a self-rollover or flip maneuver using the control sticks in Attitude mode.
Advises that the copter's position might need manual correction after a rollover due to potential loss of exact starting position.
Warns that repeated use of auto-flip can cause loss of attitude information and uncontrolled movement.
Declares that the transmitter system complies with EU Directive 2014/53/EU, with a link to the full text.
Lists the manufacturer's name and address details for the transmitter system.
Explains the meaning of the recycling symbol and advises on proper disposal of the product and batteries.
States the product needs no maintenance and how to clean it using a dry cloth.
Outlines the 24-month warranty terms, exclusions, and instructions for claims.
The Graupner mz-8P HoTT is a 4-channel 2.4 GHz HoTT transmitter, model number S1032, designed for remote control models without passengers. It operates on a frequency band of 2.4 to 2.4835 GHz using FHSS modulation, with a transmitting power greater than 25 mW EIRP. The transmitter supports 8 functions, 4 of which can be trimmed, and operates within a temperature range of -10 to +55 °C. Its operating voltage is 3.4 to 4.5V, with a power consumption of approximately 70mA. The dimensions are approximately 151 x 134 x 65 mm, and it weighs about 190g without batteries, or 260g with batteries.
The mz-8P HoTT transmitter is used to control radio-controlled models. It features various buttons and sticks for precise control and mode selection. The front side includes a motor "ON/OFF" switch, an "Attitude / Rate mode" pushbutton, "Snapshot / C8-switching" pushbutton, "Video ON/OFF" pushbutton, ON/OFF switch, "Binding / Video channel switching" pushbutton, and a "Control sensitivity" pushbutton. It also has left-hand and right-hand control sticks with trims. LEDs indicate various statuses such as motor OFF, camera recording, Attitude/Rate mode, receiver connection, and battery voltage levels.
| Brand | GRAUPNER |
|---|---|
| Model | HoTT mz-8P |
| Category | Remote Control |
| Language | English |

