135
Program description:
Mixers
Free mixers
Linear and curve mixers
Eight linear mixers …
LinearMIX
type
SEL
SEL
??
??
----
----
----
----
??
??
??
??
??
??
1
LinearMIX
LinearMIX
LinearMIX
2
3
4
from to Adjust
… and four curve mixers for non-linear characteristic
curves are available in each model memory (1 to 40):
SEL
SEL
??
??
----
----
----
----
??
??
??
??
??
??
type
from to Adjust
Curve MIX 9
Curve MIX10
Curve MIX11
Curve MIX12
In addition, the »MIX active in phase« menu (page
142) enables you to activate and disable particular
mixers separately for specifi c fl ight phases. In the in-
terests of clarity the blocked mixers are then sup-
pressed in the “Free mixers” menu in the corres-
ponding fl ight phase. If a mixer is not shown, ple-
ase switch to the appropriate fl ight phase!
In this fi rst section we will concentrate on the pro-
gramming procedure for the fi rst screen page of the
“free mixers”. We will then move on to the method of
programming mixer ratios, both for linear mixers and
curve mixers, as found on the second screen page of
this menu.
Basic programming procedure:
1. Select mixer 1 … 12 with the rotary control
pressed in.
2. Defi ne the mixer input “from” and the mixer output
“to”.
3. If required, enter a serial mixer link (Type column).
4. Optionally: include the trim levers of the sticks 1 …
4 for the mixer input signal (Type column).
5. Assign a mixer switch if required.
6. Defi ne the mixer ratios on the second screen
page.
7. Switch back to the fi rst page by pressing ESC.
“from …” column
After selecting a mixer line and briefl y pressing the ro-
tary control, enter one of the control functions 1 … 12
or S in the selected mixer line in the highlighted fi eld
of the “from” column, using the rotary control.
In the interests of clarity, the control functions 1 … 4
are abbreviated as follows when dealing with the wing
mixers:
C1 Throttle / airbrake stick
AI Aileron stick
EL Elevator stick
RU Rudder stick
… and in the Helicopter program:
1 Throttle / collective pitch stick
2 Roll stick
3 Pitch-axis (elevator) stick
4 Tail rotor stick
Note:
Don’t forget to assign a transmitter control to the se-
lected control function 5 … 12 in the »Transmitter
control adjust« menu, as all inputs (with one excep-
tion in the “Helicopter” model type) are set to “free” by
default.
Switch channel “S”
The letter “S” (Switch channel) in the “from” column
has the effect of passing a constant input signal to
the mixer input, e. g. in order to add a little more “up-
elevator” trim when the aero-tow release is closed, as
mentioned on the previous page.
After assigning a control function or the letter “S” we
move on to the …
“… to” column
… where an additional SEL fi eld now appears. At this
point you can defi ne the destination of the mixer, i. e.
the mixer output, as one of the control channels. At
the same time additional fi elds also appear in the bot-
tom line of the screen.
Example:
SEL
EL
6
=>
=>
C1
8
S
EL
10
EL
Tr
4I
C4
7
on
off
=>
=>
SEL
SEL
SEL
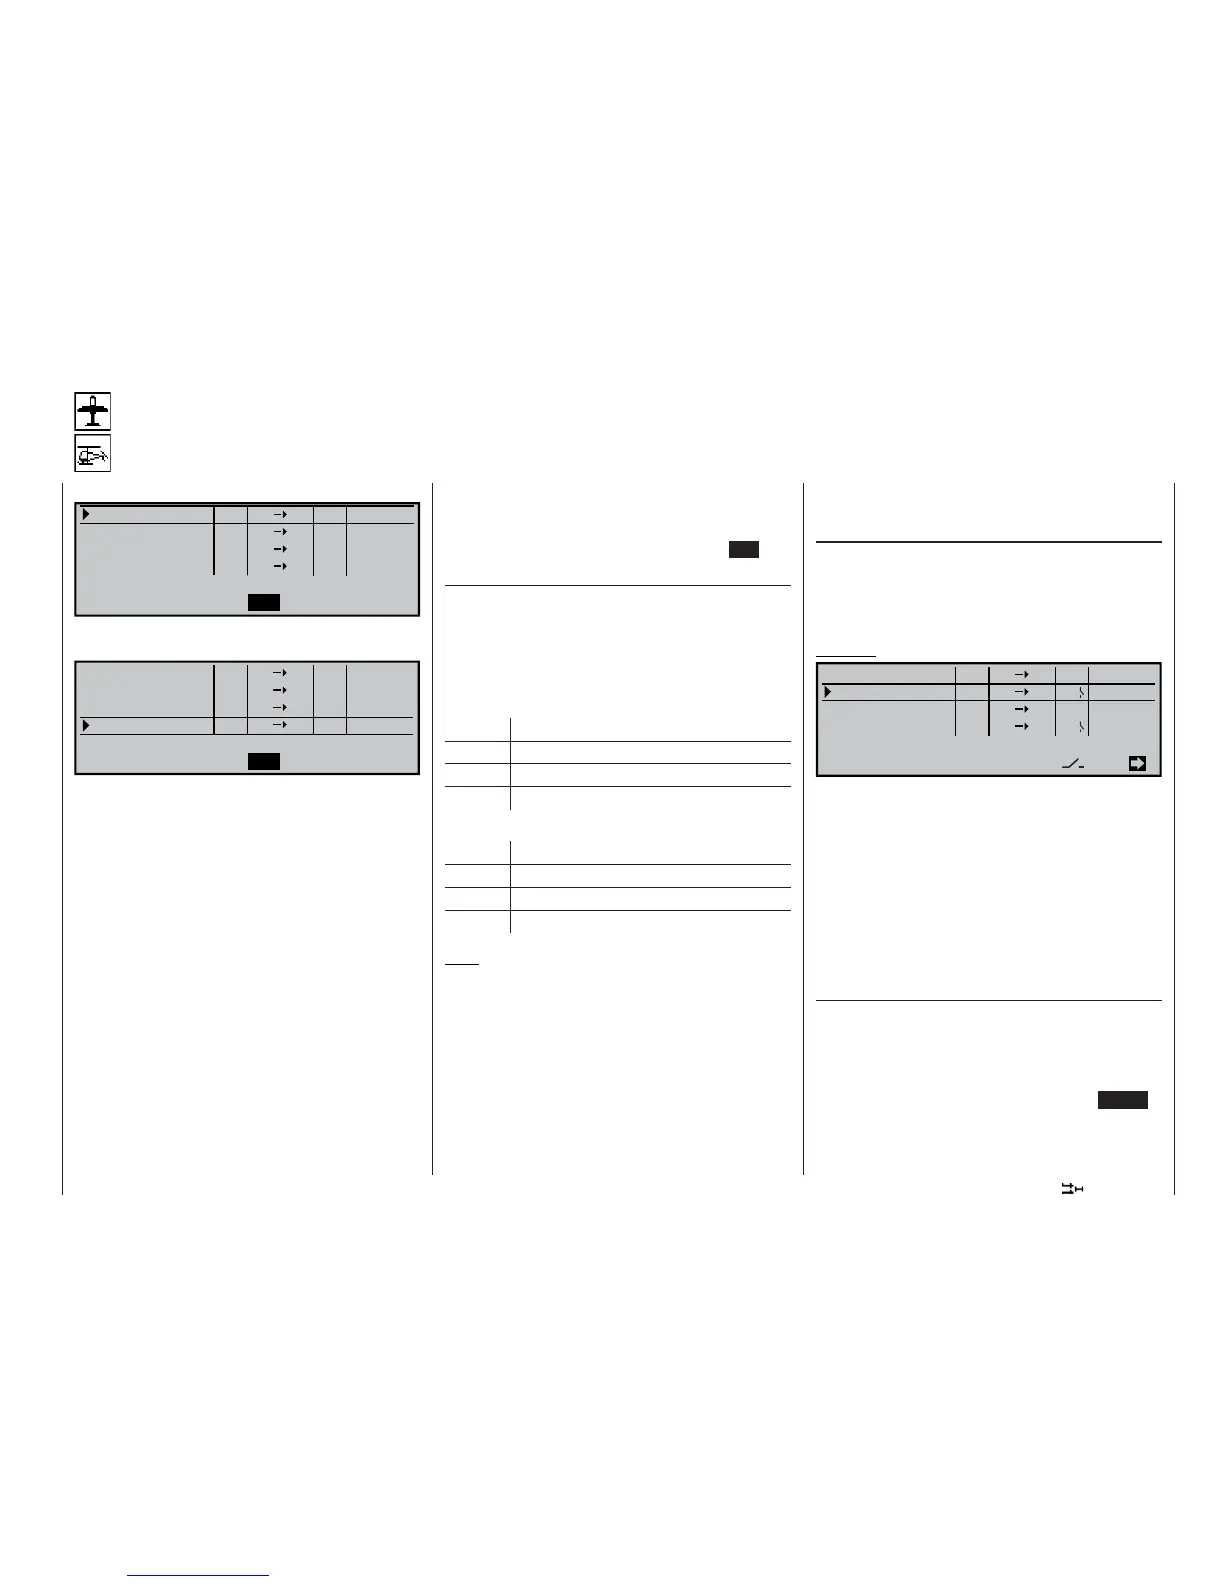
LinearMIX
type
1
LinearMIX
LinearMIX
LinearMIX
2
3
4
from to Adjust
In this example four mixers have been defi ned. The
second mixer is already familiar to us from the “Bra-
ke settings” sub-menu of the »Wing mixers« menu
under the name “Elev. curve”. As a general rule you
should always use these pre-programmed mixers fi rst
if possible. Admittedly, if you need asymmetrical mi-
xer ratios on both sides of centre, or wish to program
a non-linear curve, or need to offset the mixer neu-
tral point, then you should leave the pre-programmed
mixers at “0%” and set up one of the free mixers in-
stead.
Erasing mixers
If you need to erase a mixer that you have already
defi ned, select the appropriate line and use the rota-
ry control to move to the SEL fi eld below the “from”
column. Activate this with a brief press on the rotary
control, so that the highlighted fi eld jumps to the se-
lected mixer line, and then simply press the CLEAR
button.