66
Base setup model
Basic model-specifi c settings
BASIC SETTINGS, MODEL
Model name
Info
Stick mode
Modulation
Volume
Auto timer reset
Power on warning
<>
<>
Auto trim
SPCM20
Autorot. C1 Pos.
Autorotation
Marker key
0%
1
6
yes
Before you start programming fl ight-specifi c parame-
ters, some basic settings must be entered which app-
ly only to the currently active model memory. Start by
selecting the menu line in the usual way with the rota-
ry control pressed in.
Model name
You can enter up to ten characters to defi ne a mo-
del name. Switch to the next screen page (
) with
a brief press of the rotary control; here you can enter
the model name by selecting characters from a sym-
bol list:
Model name
>
--
!“#$%&´( )*+,-./0123456789:;<=>?
@ABCDEFGHIJKLMNOPQRSTUVWXYZ[¥]^_
`abcdefghijklmnopqrstuvwxyz{}~
c
N
ÇüéâäàåçêëèïîìÄÅÉæÆôöòûùÿÖÜ
<
Starle
Use the rotary control to select the fi rst character in
the symbol fi eld, which is shown highlighted (black
background). A brief press on the rotary control (or
turning it when pressed in) shifts to the next position
in the name, where you can select the following cha-
racter.
Pressing CLEAR inserts a space at that point.
Hold the rotary control pressed in to move to each
character within the name. The next space is indica-
ted by a double arrow <--> in the bottom line.
The model name appears in the basic display, and
also in the »Model select« and »Copy / Erase« me-
nus.
Info
A brief item of extra information – maximum length fi f-
teen characters – can also be entered for each mo-
del, using the same procedure as described under
“Model name”. This information then appears as a
supplement in the revised »Model select« menu.
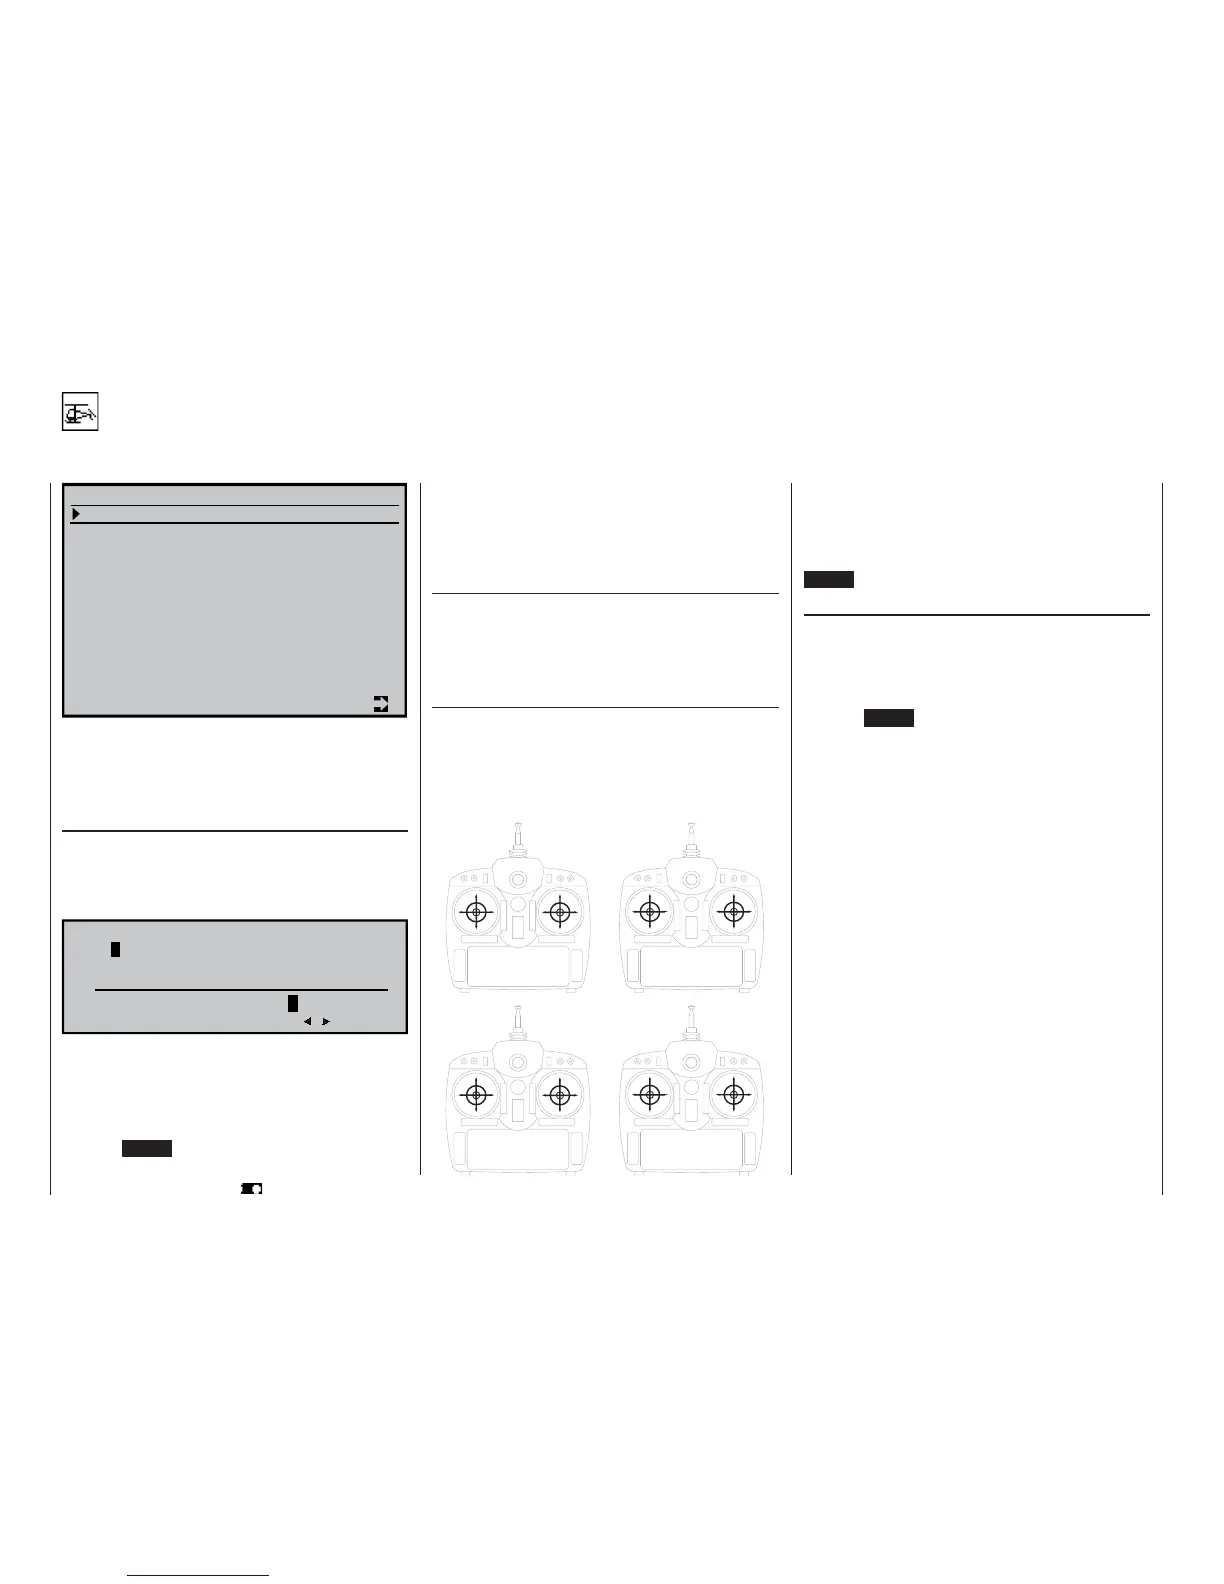
Stick mode
Basically there are four possible ways of arranging
the principal control functions on the two dual-axis
sticks: the primary functions are roll, pitch-axis (ele-
vator), tail rotor and throttle / collective pitch. Which of
these possible options you select depends on your in-
dividual preferences and fl ying style.
When you select “Stick mode” you will see SEL at the
bottom edge of the screen. Press the rotary control,
and the current stick mode appears highlighted. Now
use the rotary control to select one of the options 1 to
4.
CLEAR resets the function to stick mode “1”.
Modulation
Select this line, then press and turn the rotary cont-
rol to select the required transmission mode, or mo-
dulation. The modulation you set takes effect at once,
i. e. you can immediately test the signal transmission
to the receiver.
Pressing CLEAR switches to “SPCM20” modulation.
The
mx-24s differentiates between six different types
of modulation:
PCM20: System resolution of 512 steps per chan-
nel, for “mc” or “DS mc” type PCM recei-
vers, for up to ten servos.
SPCM20: Super PCM modulation with high system
resolution of 1024 steps per control func-
tion, for “smc” type receivers, for up to ten
servos.
PPM18: Most widely used transmission mode (FM
or FMsss) for all other GRAUPNER PPM-
FM receivers, for up to nine servos.
PPM24: PPM multi-servo transmission mode for
simultaneous operation of twelve servos;
for the “DS 24 FM S” receiver only.
PPM10: High-speed PPM transmission mode for
Pico receivers with up to fi ve servos, as
used in RC cars, slow-fl y models, small
helicopters, etc..
APCM24: Super PCM modulation with high system
resolution of 1024 steps per control func-
tion, for “amc” type receivers, for up to
twelve servos.
66
Program description:
Basic settings
min. Pitch
Tail rotor
Tail rotor
max. Pitch
Pitch-axis
Pitch-axis
Roll
Roll
Pitch-axis
Pitch-axis
Tail rotor
Tail rotor
min. Pitch
max. Pitch
Roll
Roll
min. Pitch
Roll
Roll
max. Pitch
Pitch-axis
Pitch-axis
Tail rotor
Tail rotor
Pitch-axis
Pitch-axis
Roll
Roll
min. Pitch
max. Pitch
Tail rotor
Tail rotor
»MODE 1«
(Pitch right)
»MODE 3«
(Pitch right)
»MODE 2«
(Pitch left)
»MODE 4«
(Pitch left)