CM220 Chipper 5. OPERATION 5-1
©GreenMechLtd 5-1 08/17
5.1 Pre-Work Checks:
Check machine is stationary, start key removed, and hand brake applied with support leg lowered
(fig 5.1.1) if separated from vehicle. Key in OFF position or removed, and hand brake applied if
separated from vehicle.
Check that machine is level and infeed chute is not less than 600mm from ground (fig 3.4.3).
CAUTION! Always work with chipper level, preferably with the infeed direction slightly down
the slope to minimise the risk of material falling back out.
Check engine oil level (See Section 6).
Check hydraulic oil level (See Section 6).
Check fasteners for tightness and hydraulic connections for
leaks.
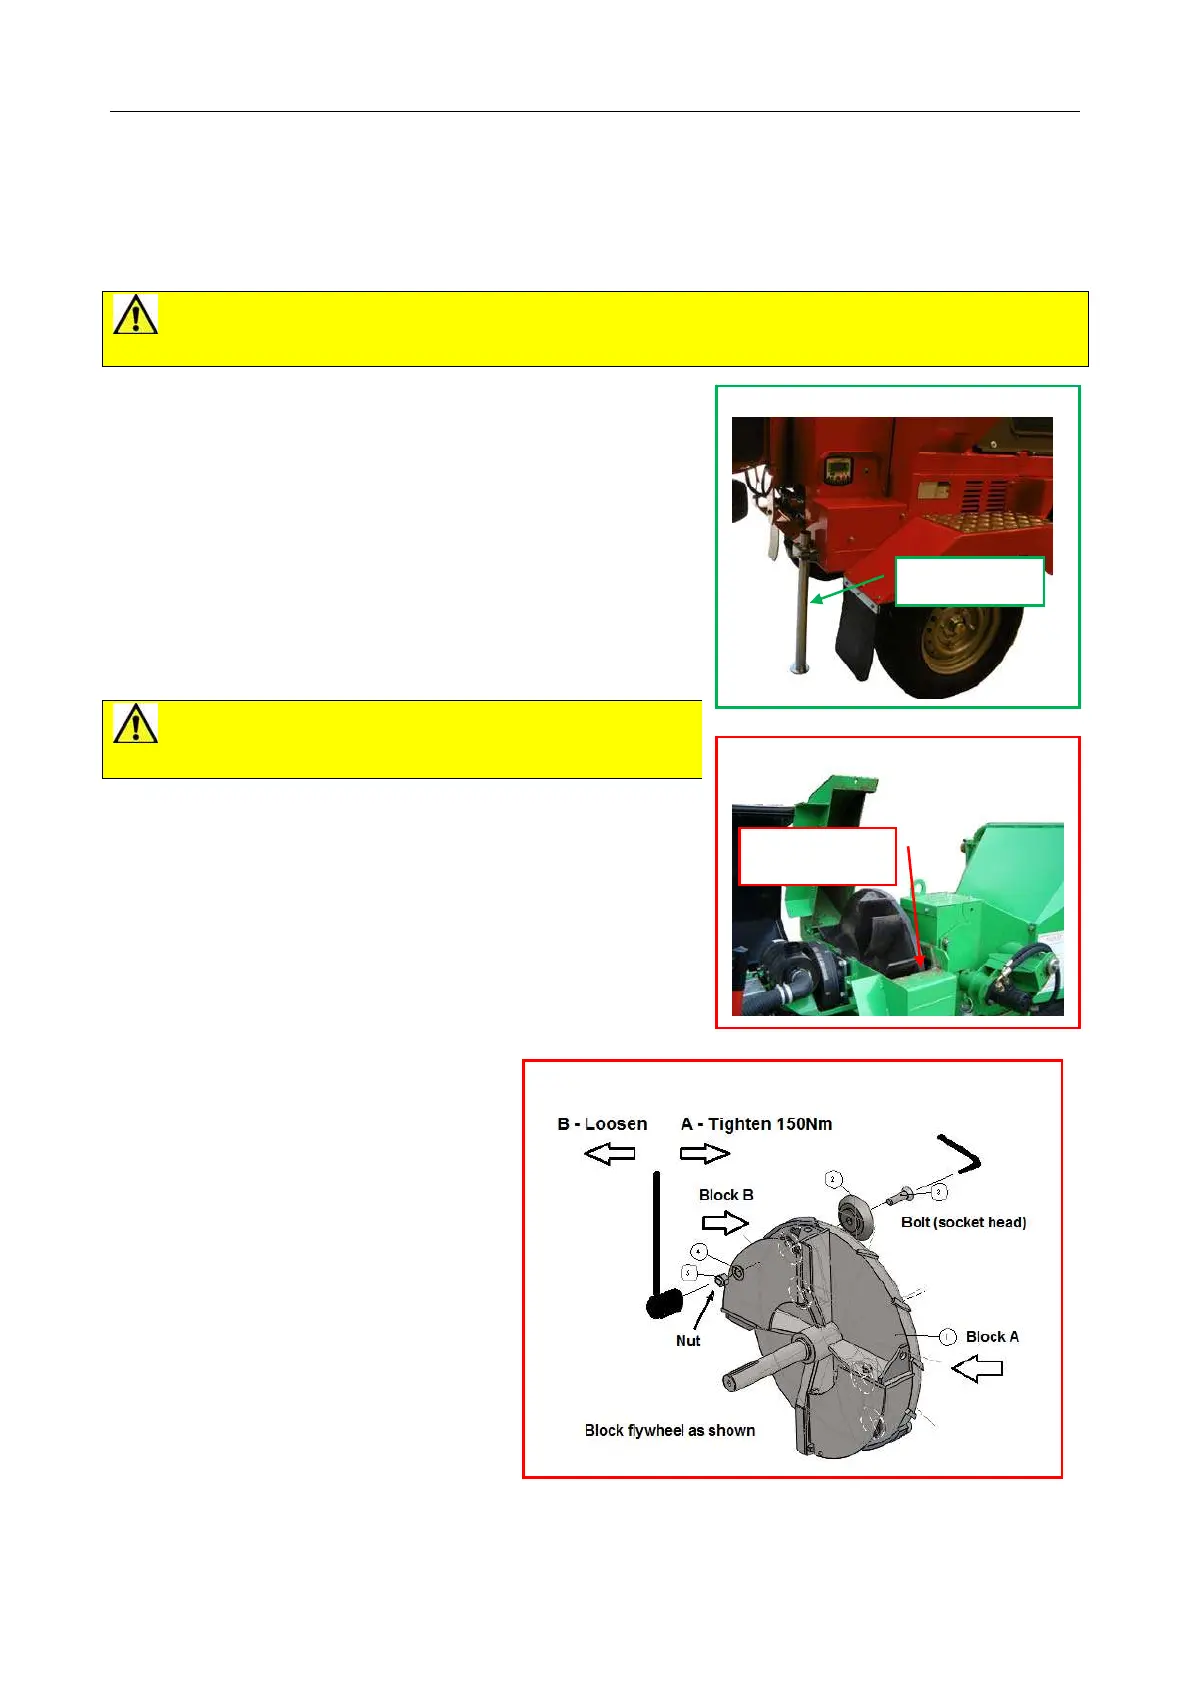
Check condition of disc blades as follows:
1 Raise engine cover. Check nothing is rotating.
2 Remove bolt retaining chipper flywheel cover.
3 Using discharge chute handle as a lever, swing back
cover onto stop to expose chipper flywheel and disc blades.
(fig 5.1.1)
CAUTION! Beware sharp edges of disc blades
and unexpected movement.
4 Remove any loose wood material.
5 Carefully rotate chipper flywheel and block (fig 5.1.2)
firmly to check tightness of blade bolts and condition of disc
blades
6 If any bolts are loose, refer to Maintenance Section 6.7
for further action.
7 Carefully remove block(s) and replace chipper flywheel
cover.
8 Tighten bolt securely.
9 Remove any loose material and dust from radiator and engine bay
10 Replace all covers and secure.
Check discharge chute is in desired
position pointing away from infeed and
all clamps are tight. (see Section 4.4)
Check work area and erect signs and
cone off discharge area if necessary.
Check ALL safety procedures have
been followed.
Fig 5.1.2. Flywheel and disc blades
Fig 5.1.1 Support Leg
Support Leg
Fig 5.1.2 Chipper Flywheel Cover
Flywheel Cover
locatin
bolt