44
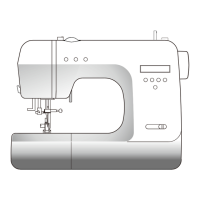
28. Changing the motor
Removal:
● Disconnect the plug from the electrical outlet.
● Fold up the carrying handle.
● Turn out both arm cover retaining screws and remove arm cover.
● Turn out stand cover retaining screw and remove stand cover.
● Remove the detachable work support (accessory box) by pulling it to the left.
● Lay the machine on its back.
● Turn out the five baseplate retaining screws and remove baseplate.
● Remove toothed belt 86 (fig. 28).
● Turn out both Phillips screws 82 of the motor bracket.
● Turn out both Phillips screws 76 of the plug 77.
● Remove plug cover 78 (fig. 28a).
● Turn out both Phillips screws 84 of the main switch (fig. 28).
● Remove the motor bracket.
● Pull out the main switch assembly a little to the front.
● Turn out both Phillips screws 83.
● Slide the main switch somewhat to the side.
● Turn out nuts 79 and 80 with a 5.5 mm socket wrench (fig. 28a).
● Disconnect both motor lead eyelets on plug and on main switch.
● Turn out both Phillips screws 81 (fig. 28).
● Pull out the motor cable from the cable clip and remove the motor assembly.
Refitting:
● Pull the motor cable through the cable clip and through the main switch plug
(replace the cable clip if necessary).
● Pull the blue motor cable through the protecting sleeve.
● Push both lead eyelets onto the threaded studs and fasten them using nuts 79 and 80 (fig. 28a).
● Fit and fasten the main switch cover with Phillips screws 83.
● Fasten the main switch assembly onto the motor bracket using both Phillips screws 84.
● Fit the motor assembly and fasten it with both Phillips screws 81 (fig. 28).
● Bring the machine in an upright position.
● Insert plug 77. At the same time fit plug cover 78 properly.
● Insert and tighten both Phillips screws 76.
● Fasten the motor bracket onto the housing using both Phillips screws 82.
● Mount toothed belt 86.
● Loosen both screws 85.
● Adjust the tension of the toothed belt and tighten both screws 85 securely.
● Refit stand cover, baseplate and arm cover.
● Carry out an electrical safety test in accordance with VDE 0701 using testing appliance
ABB Metrawatt 5013.