50
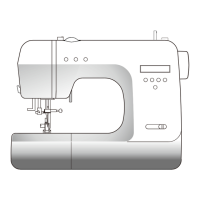
31. Changing the automatic mechanism
Removal:
● Disconnect the plug from the electrical outlet.
● Fold up the carrying handle.
● Turn out both arm cover retaining screws and remove arm cover.
● Turn out both stand cover retaining screws and remove stand cover.
● Loosen both face cover retaining screws and remove face cover.
● Turn out both Phillips screws of bobbin winder and remove bobbin winder.
● Take out lock washer 99 (fig. 31).
● Detach the connecting rod to the stitch length control by moving it to the front.
● Loosen lock nut 66 (fig. 31b) using a 5.5 mm socket wrench.
● Turn out adjusting screw 67.
● Loosen top nut 64 (fig. 31a) using a 5.5 mm socket wrench and turn out the nut.
● Take out bottom nut 55 with washer.
● Set zigzag control knob 100 (fig. 31) to the buttonhole seam “1” and loosen the 2 mm Allan screw.
● Turn zigzag control knob and set it to the buttonhole seam “4”. Loosen the second Allan screw.
● Take out zigzag control knob 100 by moving it to the front.
● Turn out the four retaining screws 101.
● Remove the entire automatic mechanism by moving it to the right and to the top.
Refitting:
● Refit the entire automatic mechanism. Observe the following points:
The guide pin of the automatic mechanism must be fitted into the connecting rod.
The feed reversing bar must be positioned in the tie rod of the connecting member (fig. 31a).
The adjusting screw 67 of the reversing bar must be positioned in the connector (fig. 31b).
● Insert the four retaining screws 101 (fig. 31).
● Hook the connecting rod of the stitch length control.
● Insert lock washer 99.
Now adjust the play between worm and worm gear as follows:
● Loosen the four retaining screws 101 slightly.
● Lift the automatic mechanism or lower it somewhat, to eliminate any play between worm
and worm gear.
● Tighten the four retaining screws 101.
● Fit the washer and both nuts 55 and 64 (fig. 31a) onto the tie rod.
● Turn lock and adjusting cam as much as possible to the left, until the lock spring engages.
● Fit zigzag control knob 100 (with buttonhole seam “4”) on top and tighten the Allan screw (fig. 31).
● Turn zigzag control knob and tighten the second Allan screw.
● Adjust the automatic mechanism as described in the service manual.
● Carry out an electrical safety test in accordance with VDE 0701 using testing appliance
ABB Metrawatt 5013.
 Loading...