-30-
G0890/G0891 (Mfd. Since 06/19)
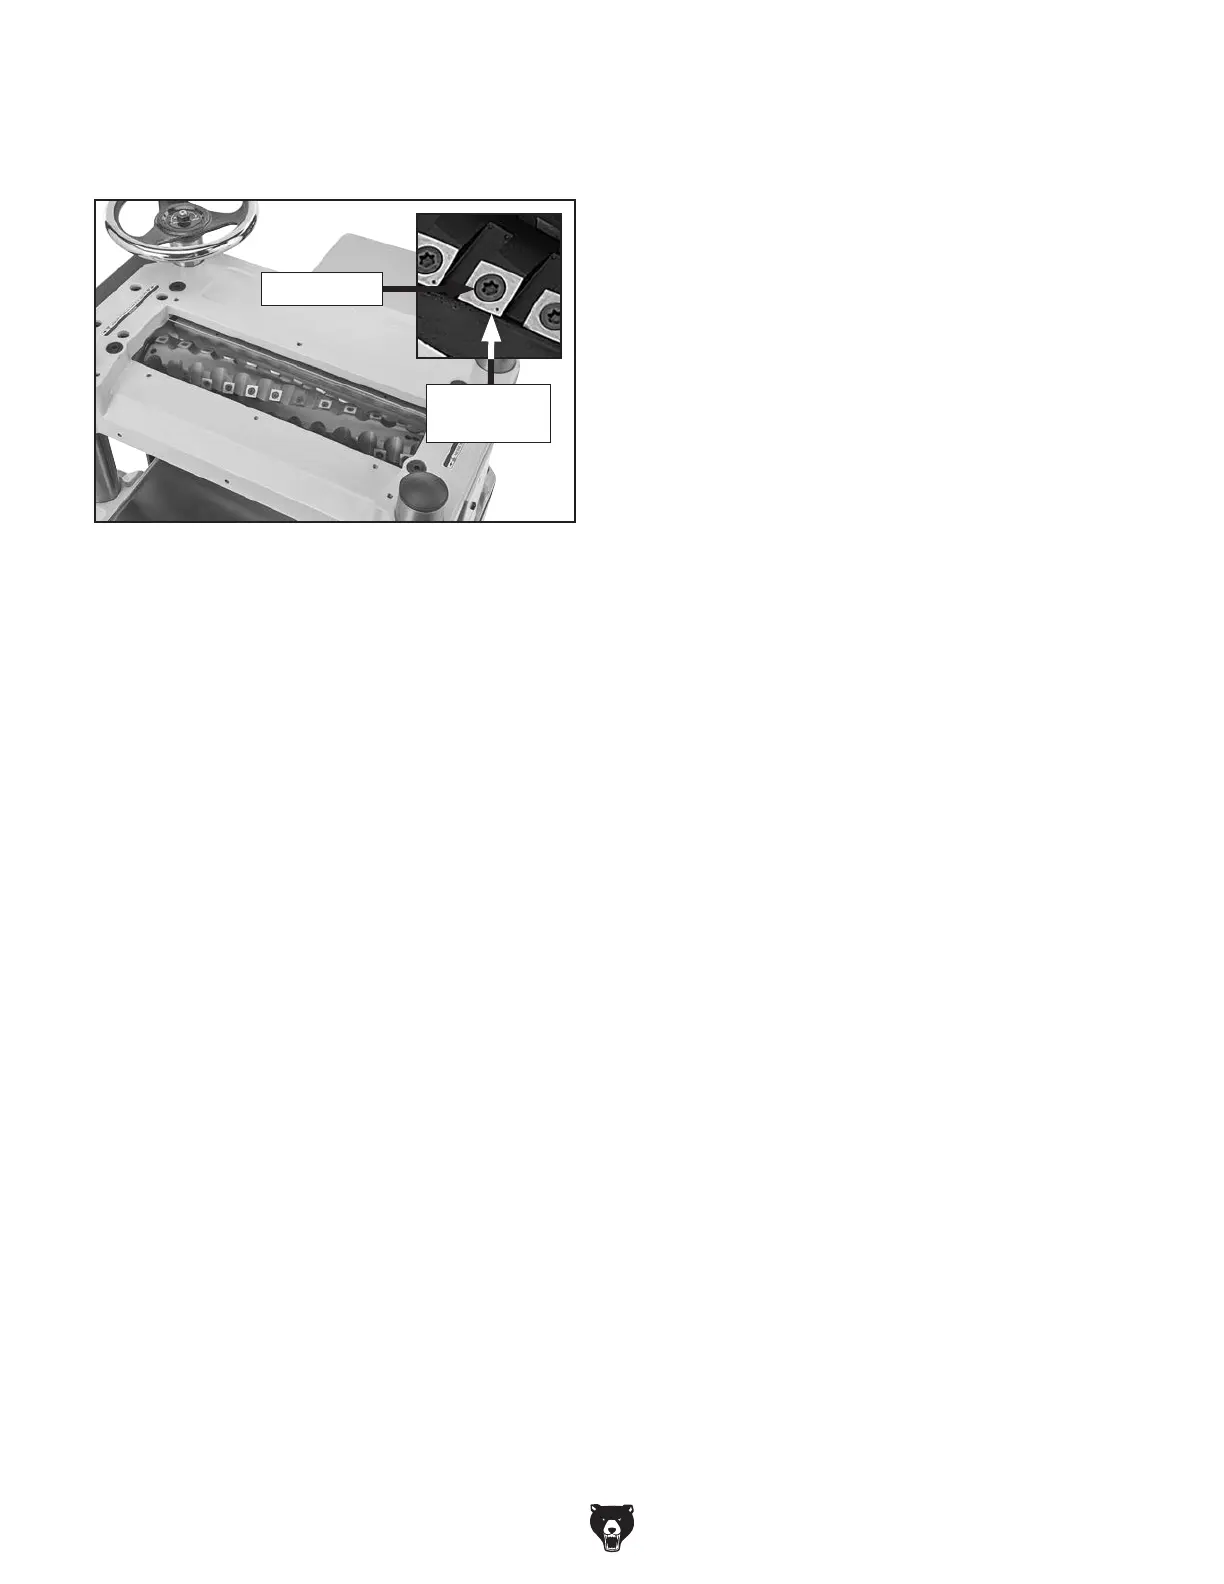
5. Remove Torx screw and insert, then clean all
dust and debris from both parts and pocket
they were removed from.
Note: Proper cleaning of insert, Torx screw,
and cutterhead pocket is critical to achieving
a smooth finish. Dirt or dust trapped between
insert and cutterhead will raise insert, and
make marks on your workpiece when planing.
Tip: Use low-pressure compressed air or
a vacuum nozzle to clean out cutterhead
pocket.
Figure 25. G0891 cutterhead inserts and Torx
screws.
4.
Remove any sawdust or debris from head of
insert, Torx screw, and surrounding area (see
Figure 25).
6.
Rotate insert 90° and install so that a fresh
cutting edge faces outward (see Figure 24).
— When all four insert cutting edges have
been used, replace insert with a new one.
Always position insert reference dot in
same position when installing a new insert
to aid in rotational sequencing.
7.
Lubricate Torx screw threads with a very
small amount of light machine oil, wipe
excess off, and torque screw to 50–55 inch/
pounds.
Note: If too much oil is applied to the threads,
excess oil will attempt to squeeze out of the
threaded hole and raise insert during installa-
tion, bringing it out of height alignment.
Cutterhead
Insert
Torx Screw
 Loading...