EasyManua.ls Logo

Grizzly G0815 - User Manual

Grizzly G0815
56 pages
Print Icon
To Next Page IconTo Next Page
Loading...
MODEL G0815
15" HEAVY-DUTY PLANER
OWNER'S MANUAL
(For models manufactured since 09/18)
COPYRIGHT © FEBRUARY, 2016 BY GRIZZLY INDUSTRIAL, INC., REVISED DECEMBER, 2018 (MN)
WARNING: NO PORTION OF THIS MANUAL MAY BE REPRODUCED IN ANY SHAPE
OR FORM WITHOUT THE WRITTEN APPROVAL OF GRIZZLY INDUSTRIAL, INC.
#WK17990 PRINTED IN TAIWAN
V2.12.18
Shown with optional stand:
Model T27650
177335

Questions and Answers

  • D
    darlenerogersAug 15, 2025
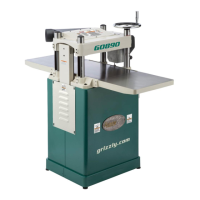
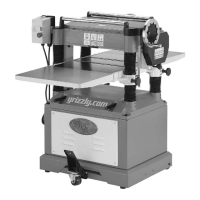
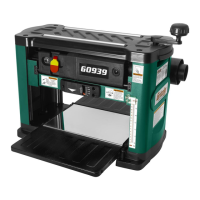
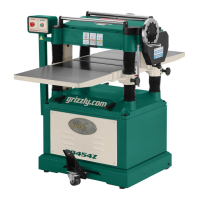
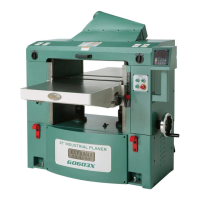
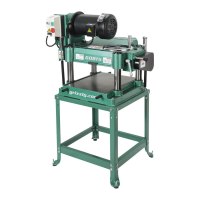
    Why does my Grizzly G0815 Planer leave uneven cutting marks or chatter marks?
    • N
      njohnsonAug 15, 2025
      Uneven cutting marks, a wavy surface, or chatter marks on your board can occur for several reasons: * The feed rate might be too fast, so try slowing it down. * The chipbreaker could be set unevenly or not low enough; adjust its height. * The knives might not be installed evenly in the cutterhead; use a knife-setting gauge to adjust them. * The cutterhead bearings could be worn, requiring replacement.
  • O
    owenangelaAug 18, 2025
    What to do if my Grizzly G0815 Planer causes chipping with a consistent pattern?
    • C
      Cynthia GutierrezAug 18, 2025
      Consistent chipping patterns are often due to: * Knots or conflicting grain direction in the wood. Inspect your workpiece and only use clean stock, cutting with the grain. * Taking too deep of a cut. Reduce the depth, especially with hardwoods. * The feed rate being too fast. * A mis-adjusted chipbreaker. Adjust both sides of the chipbreaker to the correct height. * A nicked or chipped knife. Replace or sharpen the affected knife.
  • T
    Todd GutierrezAug 21, 2025
    How to prevent excessive snipe with my Grizzly G0815 Planer?
    • J
      Jeffrey RichardsonAug 22, 2025
      Excessive snipe (gouges at the end of the board) can be addressed by: * Raising the height of the chipbreaker. * Supporting the workpiece as it leaves the outfeed end of the planer. * Planing lumber longer than needed and cutting off the snipe after planing.
  • P
    Paul PerezAug 25, 2025
    Why does the workpiece stop or slow down in the middle of a cut with my Grizzly G0815 Planer?
    • M
      Melissa RichardsonAug 25, 2025
      If your workpiece stops or slows down, it could be due to: * Taking too deep of a cut. Reduce the cutting depth, especially with hardwoods. * The chipbreaker being set too low. Raise its height. * The feed rollers being set too low or too high. Adjust them accordingly. * Pitch and glue buildup on the planer components. Clean them with a pitch/resin dissolving solvent.
  • G
    grossmiguelAug 28, 2025
    Why does my Grizzly G0815 Planer leave a glossy surface on the wood?
    • D
      danielcochranAug 28, 2025
      A glossy surface after planing can result from: * Dull knives. Replace or sharpen them. * A feed rate that is too slow. Increase it. * A cutting depth that is too shallow. Increase the depth of cut.
  • K
    Kelly EdwardsSep 1, 2025
    What causes fuzzy grain when using my Grizzly G0815 Planer?
    • S
      Sabrina OchoaSep 1, 2025
      Fuzzy grain can be caused by: * Wood with high moisture content or surface wetness. Ensure the moisture content is below 20% and allow the wood to dry if needed. * Dull knives. Replace or sharpen them.
  • K
    Kimberly McdanielSep 3, 2025
    What causes chipping or indentation in the workpiece surface with my Grizzly G0815 Planer?
    • S
      Scott SmithSep 4, 2025
      Inconsistent chipping or indentations on the workpiece surface are often caused by: * Chips not being properly expelled from the cutterhead. Use a proper dust collection system. * An incorrectly set chip breaker. Adjust the chip breaker correctly.
  • A
    Arthur KiddSep 7, 2025
    Why does my Grizzly G0815 Planer create long lines or ridges on the board?
    • J
      John WilliamsSep 7, 2025
      Long lines or ridges running along the length of the board are typically caused by a nicked or chipped knife. Replace or sharpen the knives.
  • J
    Jasmine EllisSep 12, 2025
    What if workpiece twists in Grizzly G0815?
    • B
      Brittney HinesSep 12, 2025
      If the workpiece twists in the machine, it is likely that the feed rollers are not parallel with the table. Adjust the feed rollers.

Summary

Machine Identification

Controls and Components

Component Descriptions

Detailed descriptions of the planer's main controls and components.

Internal Components

Machine Data Sheet

Section 1: Safety

General Machinery Safety

General safety guidelines for machinery operation.

Additional Planer Safety

Planer-Specific Hazards

Specific safety precautions and hazards for planer use.

Section 2: Power Supply

Power Supply Requirements

Details on required voltage, phase, and amperage for the machine.

Full-Load Current Rating

Explanation of machine's current draw and circuit sizing.

Grounding Requirements

Grounding Procedures

Importance and method of grounding for electrical safety.

Lifting and Placing

Safe Lifting Procedures

Instructions for installing lifting bars and safely moving the planer.

Mounting Options

Assembly and Dust Collection

Assembly Steps

Steps for assembling the planer, including feed knob and dust hood.

Dust Collection Setup

Guidelines for connecting a dust collection system to the planer.

Test Run Procedure

Performing the Test Run

Procedure for performing an initial test run of the assembled machine.

Section 4: Operations

Workpiece Preparation

Planing Tips and Cutting Problems

Depth of Cut Adjustment

Feed Rate and Knife Maintenance

Section 6: Maintenance

Maintenance Schedule

Recommended maintenance schedule based on operating hours.

Lubrication Procedures

Machine Lubrication Details

Details on recommended lubricants and lubrication procedures.

Component Lubrication

Drive Systems and Gearbox Maintenance

Section 7: Service

Troubleshooting Common Issues

Common problems, causes, and solutions for machine issues.

Tensioning and Replacing V-Belts

Tensioning Height Chain

Feed Rollers and Chip Breaker Adjustment

Using a Rotacator

Using Wood Blocks for Adjustment

Adjusting Roller Spring Tension

Chip Deflector and Anti-Kickback Fingers

Anti-Kickback Finger Safety

Explanation and importance of anti-kickback fingers for safety.

Section 8: Wiring

Wiring Safety Instructions

Crucial safety guidelines for working with electrical systems.

Wiring Diagram

Electrical Schematic

Schematic showing electrical connections for the machine.

Grizzly G0815 Specifications

General IconGeneral
Amperage15A
PhaseSingle-phase
Minimum Board Thickness1/4 inch
Feed Rate26 FPM
Number of Knives3
TypePlaner
Maximum Cutting Height6 inches
Maximum Depth of Cut1/8 inch
Cutterhead Diameter2 inches
Dimensions30-1/2 x 18-1/2 x 18 inches

Related product manuals