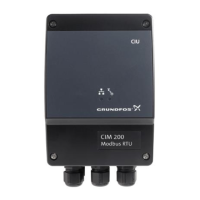
11.4 Hardware setup, CIU 260 data connection
Step Action
1 Connect the GENIbus cable from CIU 260 to the Grundfos product. See the CIU quick guide instruction.
2 Fit an antenna to the CIM module SMA connector.
3 Insert the SIM card in CIM 260.
4 Connect the mains cable to CIU 260, see the CIU quick-guide instruction, and power on CIU 260.
5 Power on the Grundfos product.
6 Observe that LED2 turns permanently green, indicating that the GENIbus connection is working.
7
Observe that LED1 blinks yellow and changes to yellow pulsing after approximately 30 seconds, indicating that the cellular network connection is
working.
8
To configure CIM 260 for a data connection, follow the instructions in the "CIM 260 SMS commands installation and operating instructions", which
you can download from Grundfos Product Center.
9
To verify the APN settings after completion, use the SMS command "APNSETTINGS".
To verify that the data connection is working, use the SMS command "APNSTATUS". The connection state must be "Context active" if ready and
"Connected" if a Modbus TCP master is already communicating.
CIU 260 is now ready to be accessed from a Modbus TCP master via a data connection, or via SMS commands.
Related information
6.1.1 Fitting a cellular antenna
6.1.2 Inserting the SIM card
6.2 Status LEDs
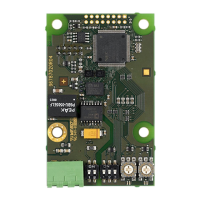
11.5 CIM 500 Modbus TCP communication setup
Step Action
1 Install CIM 500 in the Grundfos product according to the product documentation.
2 Select position 1 at the protocol rotary switch.
3 Power on the product, and observe LED2 turn permanently green and LED1 remaining off.
4 Complete the pump configuration, for example sensor configuration.
5 Connect one of the CIM 500 Ethernet ports (RJ45) to a PC using an Ethernet cable.
6 Configure the PC Ethernet port to the same subnetwork as CIM 500, for example 192.168.1.1, and the subnet mask to 255.255.255.0.
7
Open your internet browser and make contact to the CIM 500 webserver.
Default: 192.168.1.100
8
Log on to the webserver. Default:
User: admin
Password: Grundfos.
9 In the menu column to the left select: Configuration > Real time Ethernet protocol
10 Type in an IP address belonging to the same subnet as your PC, for example 192.168.1.2.
11 Type in the subnet mask 255.255.255.0, and leave the rest of the settings at their factory default values.
12 Click [Submit] to transfer the new settings, and close the internet browser.
CIM 500 is now ready to be accessed from a Modbus TCP master via one of its Ethernet ports. Use the IP address selected under step 9. The Modbus address
(Unit ID) in the Modbus TCP telegram is not used.
CIM 500 LED1 will be flashing green when Modbus TCP communication takes place.
You can use the two Ethernet ports to daisy chain CIM 500 modules.
It is possible to have connection to the webserver simultaneously with a connection to a Modbus TCP master.
It is possible to have connection to more Modbus TCP masters simultaneously, for example to have connection to PC Tool CIM/CIU while connected to another
Modbus TCP master.
Related information
7.2 Setting the Industrial Ethernet protocol
33
English (GB)
 Loading...