7.1.1 Setpoint setting
Set the desired setpoint of the pump by pressing or . The green
light fields on the operating panel indicate the setpoint set.
Pump in constant-pressure control mode
The following example applies to a pump in an application where a
pressure sensor gives a feedback to the pump. If the sensor is
retrofitted to the pump, you must set it up manually as the pump
does not automatically register a connected sensor. See the section
on analog inputs.
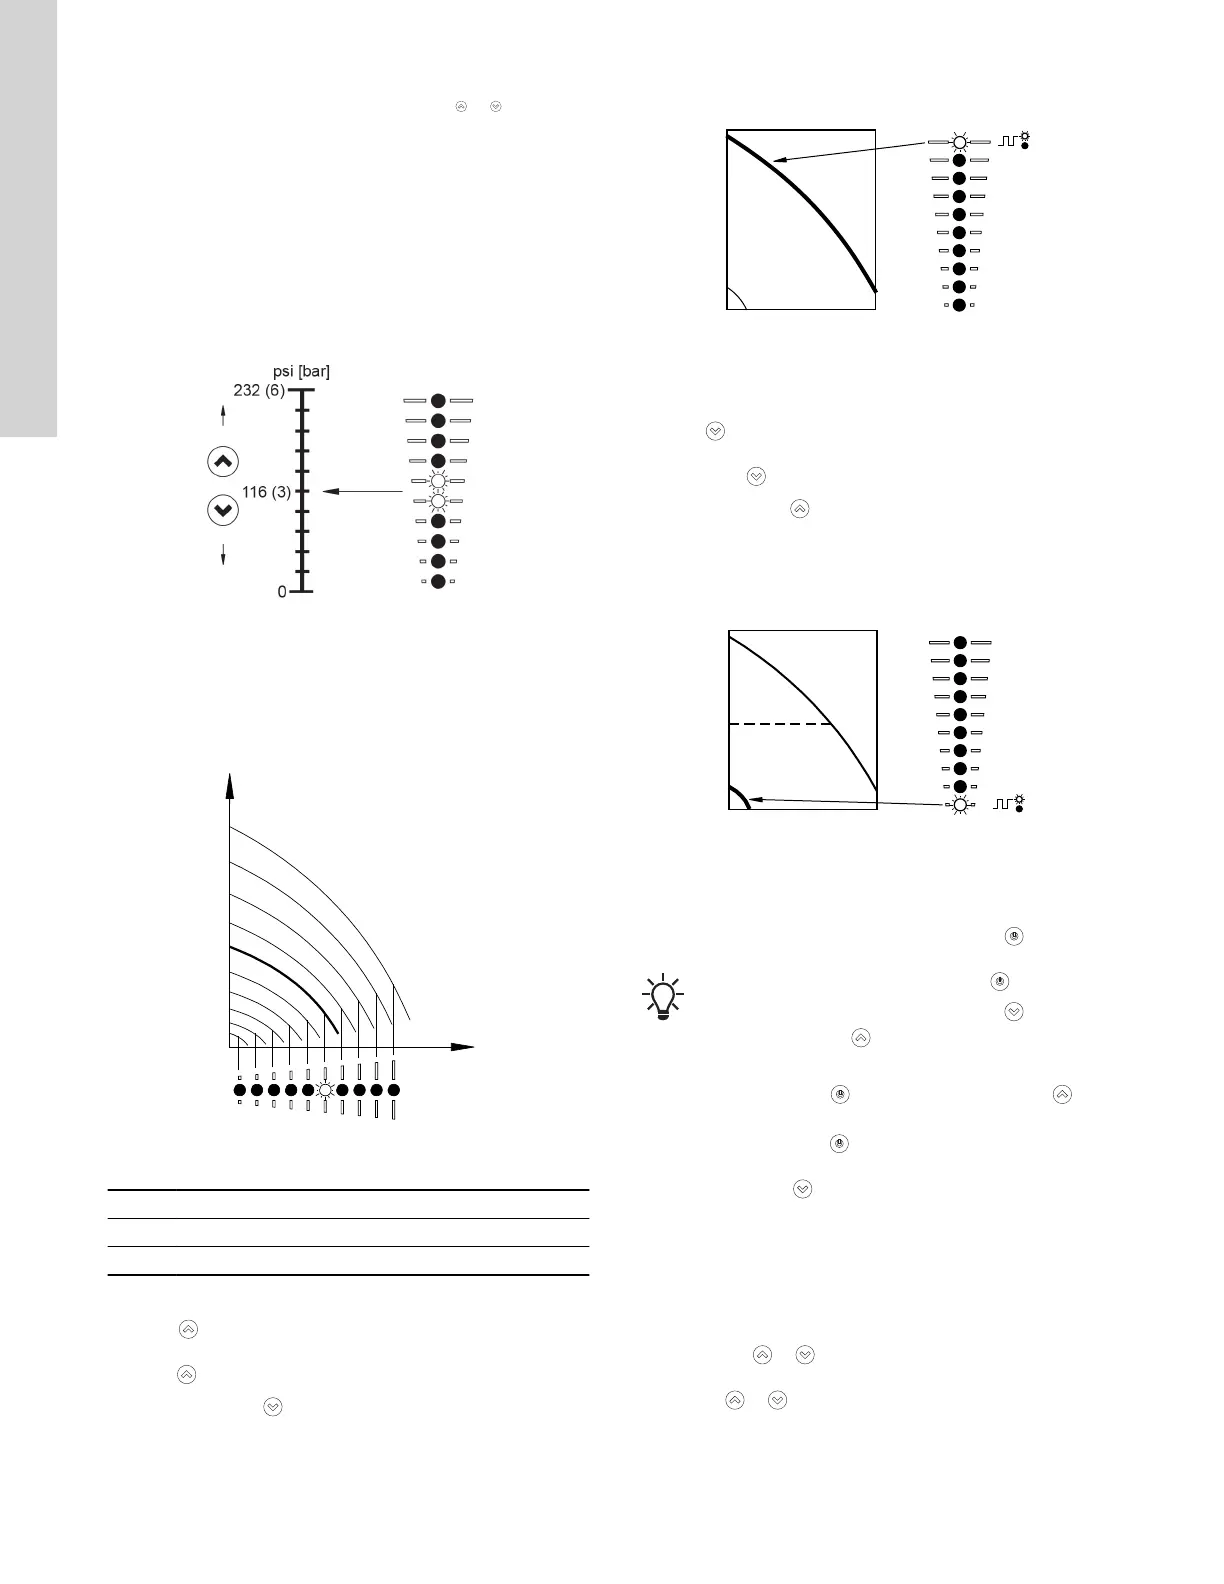
The figure below shows that the light fields 5 and 6 are activated,
indicating a desired setpoint of 116 psi (3 bar) with a sensor
measuring range from 0 to 232 psi (6 bar). The setting range is
equal to the sensor measuring range.
TM068914
Setpoint set to 116 psi (3 bar), constant pressure control
Pump in constant-curve control mode
In constant-curve control mode, the pump performance lies
between the maximum and minimum curve of the pump. See the
figure below.
TM054895
Pump in constant-curve control mode
Pos. Description
1 Max.
2 Min.
Setting to maximum curve:
• Press continuously to change over to the maximum curve of
the pump (top light field flashes). When the top light field is on,
press
for 3 seconds until the light field starts flashing.
• To go back, press
continuously until the desired setpoint is
indicated.
Example: Pump set to maximum curve.
The figure below shows that the top light field is flashing, indicating
the maximum curve.
TM054896
Maximum curve duty
Setting to minimum curve:
• Press
continuously to change over to the minimum curve of
the pump (bottom light field flashes). When the bottom light field
is on, press for 3 seconds until the light field starts flashing.
• To go back, press
continuously until the desired setpoint is
indicated.
Example: Pump set to minimum curve.
The figure below shows that the bottom light field is flashing,
indicating the minimum curve.
TM054897
Minimum curve duty
Start-stop of pump
If you have stopped the pump by pressing
and the
"Stop" text on the operating panel is illuminated, you can
only give it free to operation by pressing again.
If you have stopped the pump by pressing , you can
restart it by pressing or by using Grundfos
GO Remote.
Start the pump by pressing or by continuously pressing until
the desired setpoint is indicated.
Stop the pump by pressing
. When the pump is stopped, the
"Stop" text next to the button is on. You can also stop the pump by
continuously pressing until none of the light fields are on.
You can also stop the pump with Grundfos GO Remote or via a
digital input set to "External stop". See the section on the
description of settings.
Resetting of fault indications
You can reset a fault indication in one of the following ways:
• Via the digital input if you have set it to "Alarm resetting".
• Briefly press
or on the pump. This does not change the
setting of the pump. You cannot reset a fault indication by
pressing or if the buttons have been locked.
• Switch off the power supply until the indicator lights are off.
• Switch the external start-stop input off and then on again.
• With Grundfos GO Remote.
22
English (US)

 Loading...