24
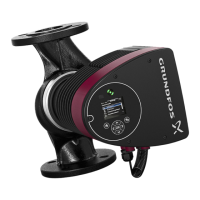
10.4 Diaphragm controller (optional)
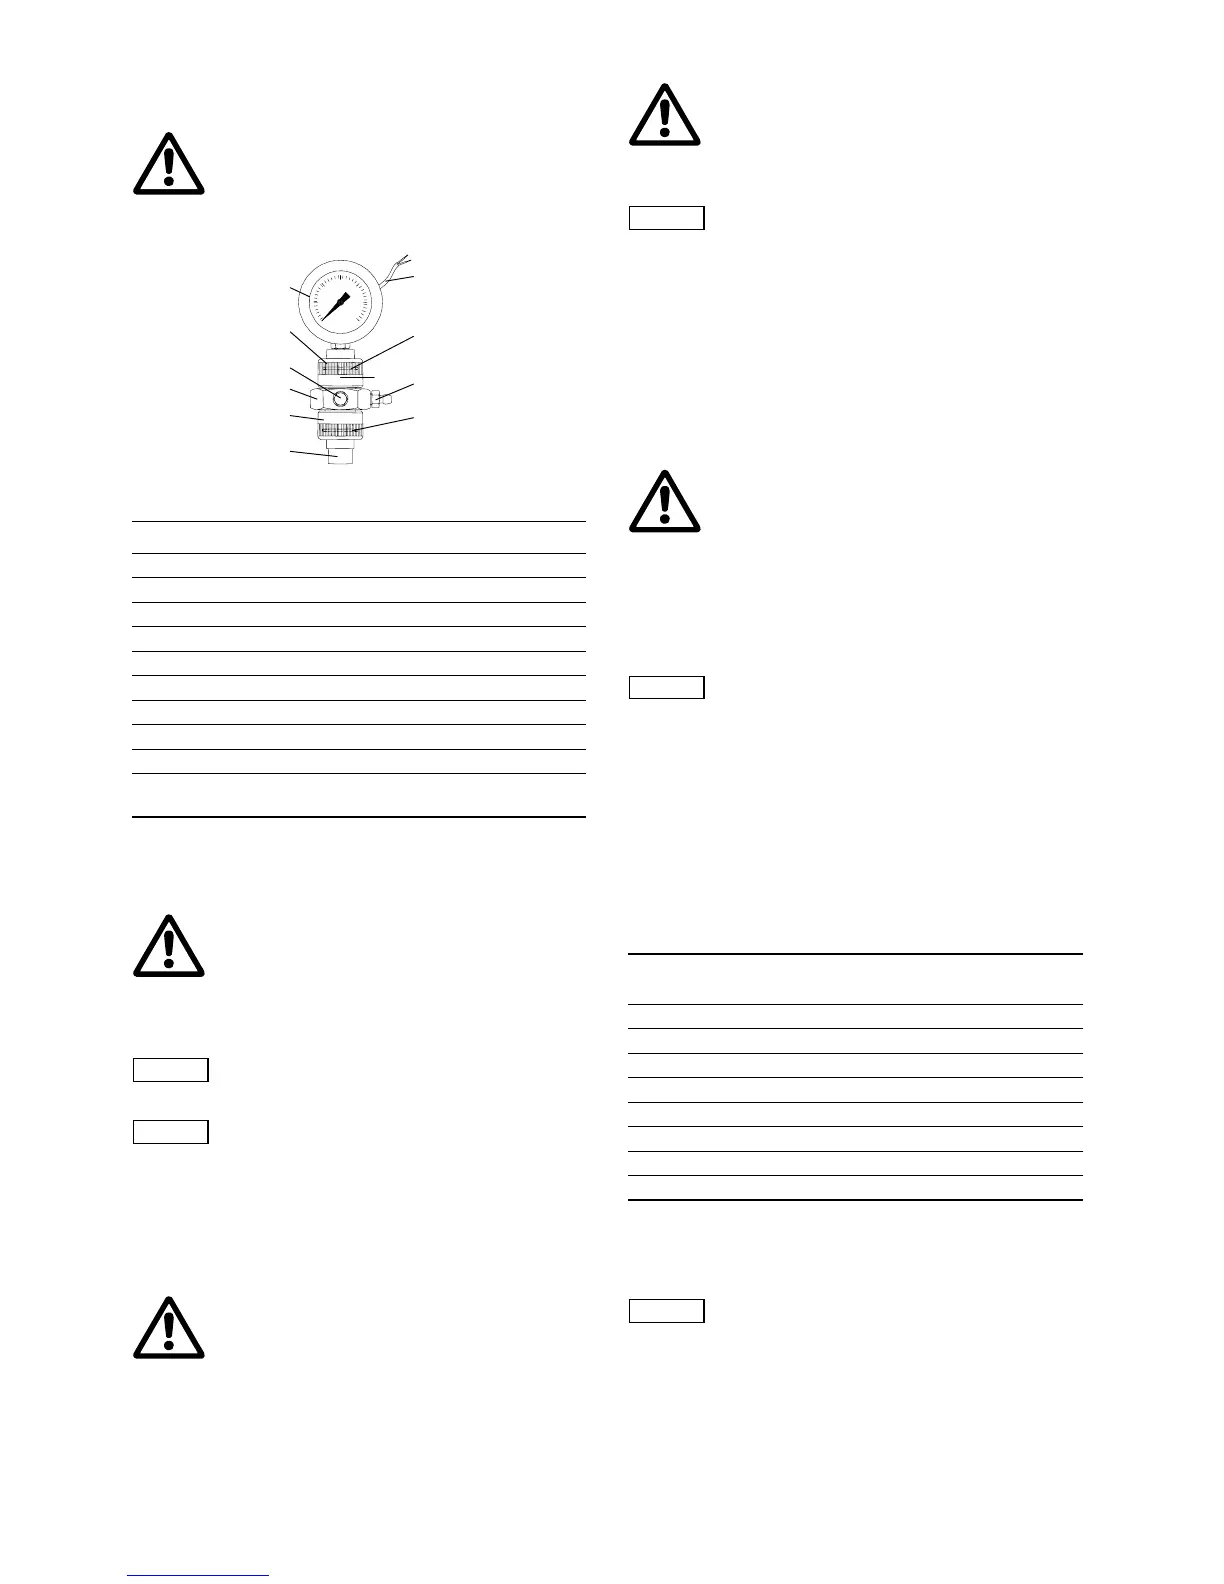
Fig. 25 Diaphragm controller
10.5 Connecting the power supply cable
• Do not switch on the power supply until you are ready to start
the pump.
10.5.1 Versions with mains plug
• Insert the mains plug in the mains socket.
10.5.2 Versions without mains plug
• Connect the motor to the power supply in accordance with
local electrical installation regulations and the connection
chart on the terminal box cover.
11. Start-up / shutdown
11.1 Initial start-up / subsequent start-up
11.1.1 Checks before start-up
• Check that the rated voltage stated on the pump nameplate
corresponds to the local conditions!
• Check that all connections are secure and tighten,
if necessary.
• Check that the dosing head screws are tightened with the
specified torque and tighten, if necessary.
• Check that all electrical connections are correct.
• Cross-tighten the dosing head screws using a torque wrench.
Torques
11.1.2 Oil filling
1. Slacken and remove the oil-filling screw (F).
2. Slowly add the hydraulic oil supplied with the pump through
the oil-filling opening (F) until the oil reaches the mark on the
oil dipstick.
3. Set the stroke-length adjustment knob (L) to "0".
Warning
Explosion-proof pumps with diaphragm leakage
detection are fitted with a contact pressure gauge
in explosion-proof version.
The pressure gauge must be earthed.
Connecting the earth cable (4u), see fig. 25.
TM03 6453 4506
Pos. Components
S Contact pressure gauge
5s Union nut
6s Contact output
T Ball non-return valve
U Connection piece
2u Deaeration screw
3u O-rings
4u Connection for earth cable
5u Union nut
* 2) or locking unit (instead of contact pressure gauge
and its connection)
Warning
Disconnect the power supply before connecting
the power supply cable!
Before connecting the power supply cable, check
that the rated voltage stated on the pump
nameplate corresponds to the local conditions!
Do not make any changes to the power supply
cable or plug!
Caution
The assignment between the plug-and-socket
connection and the pump must be labelled
clearly (e.g. by labelling the socket outlet).
Caution
The pump can be automatically started by
connecting the power supply!
Warning
The pump must be connected to an external
clearly labelled mains switch with a minimum
contact gap of 3 mm in all poles.
T
5u
4u
3u
2)
U
5s
3u
2u
S
6s
Warning
The specified enclosure class can only be
ensured if the power supply cable is connected
with the same degree of protection.
Caution
Observe the direction of rotation!
To protect the motor, install a motor protecting
switch or motor contactor, and set the bimetal
relay to the rated motor current for the available
voltage and frequency.
Warning
When dosing dangerous media, observe the
corresponding safety precautions!
Wear protective clothing (gloves and goggles)
when working on the dosing head, connections
or lines!
Before removing the dosing head, valves and
lines, empty any remaining medium in the dosing
head into a drip tray by carefully unscrewing the
suction valve.
The pump housing must only be opened by
personnel authorised by Grundfos Alldos!
Repairs must only be carried out by authorised
and qualified personnel!
Caution
Observe the flow direction of valves (indicated by
an arrow on the valve)!
Only tighten plastic valves by hand.
Pump type
Torque
[Nm]
DMH 251, 10 bar 8-10
DMH 251, 16 bar 10-12
DMH 251, 25 bar 13-15
DMH 252 8-10
DMH 253 10-12
DMH 254 50-54
DMH 255 50-54
DMH 257 50-54
Note
The pump is factory-checked, and the oil is
drained for shipping purposes. Before start-up,
add the special oil supplied with the pump.
The piston flange is filled with oil for easy start-
up. The stroke-length adjustment knob must only
be adjusted if the gear oil has been added,
otherwise the oil will leak from the piston flange.
 Loading...