8 / 19
4. Dismantling and assembly
4.1 General
When the pump has been pulled out, possibly because it was running at reduced performance, it is impor-
tant both to repair the pump and to check the submersible motor, please follow the instructions in the fol-
lowing sections.
Position numbers of parts (digits) refer to exploded views, sectional drawings and parts lists; position num-
bers of tools (letters) refer to section 3.
Service tools.
4.1.1 Before dismantling
• Disconnect the electricity supply to the motor.
4.1.2 During dismantling
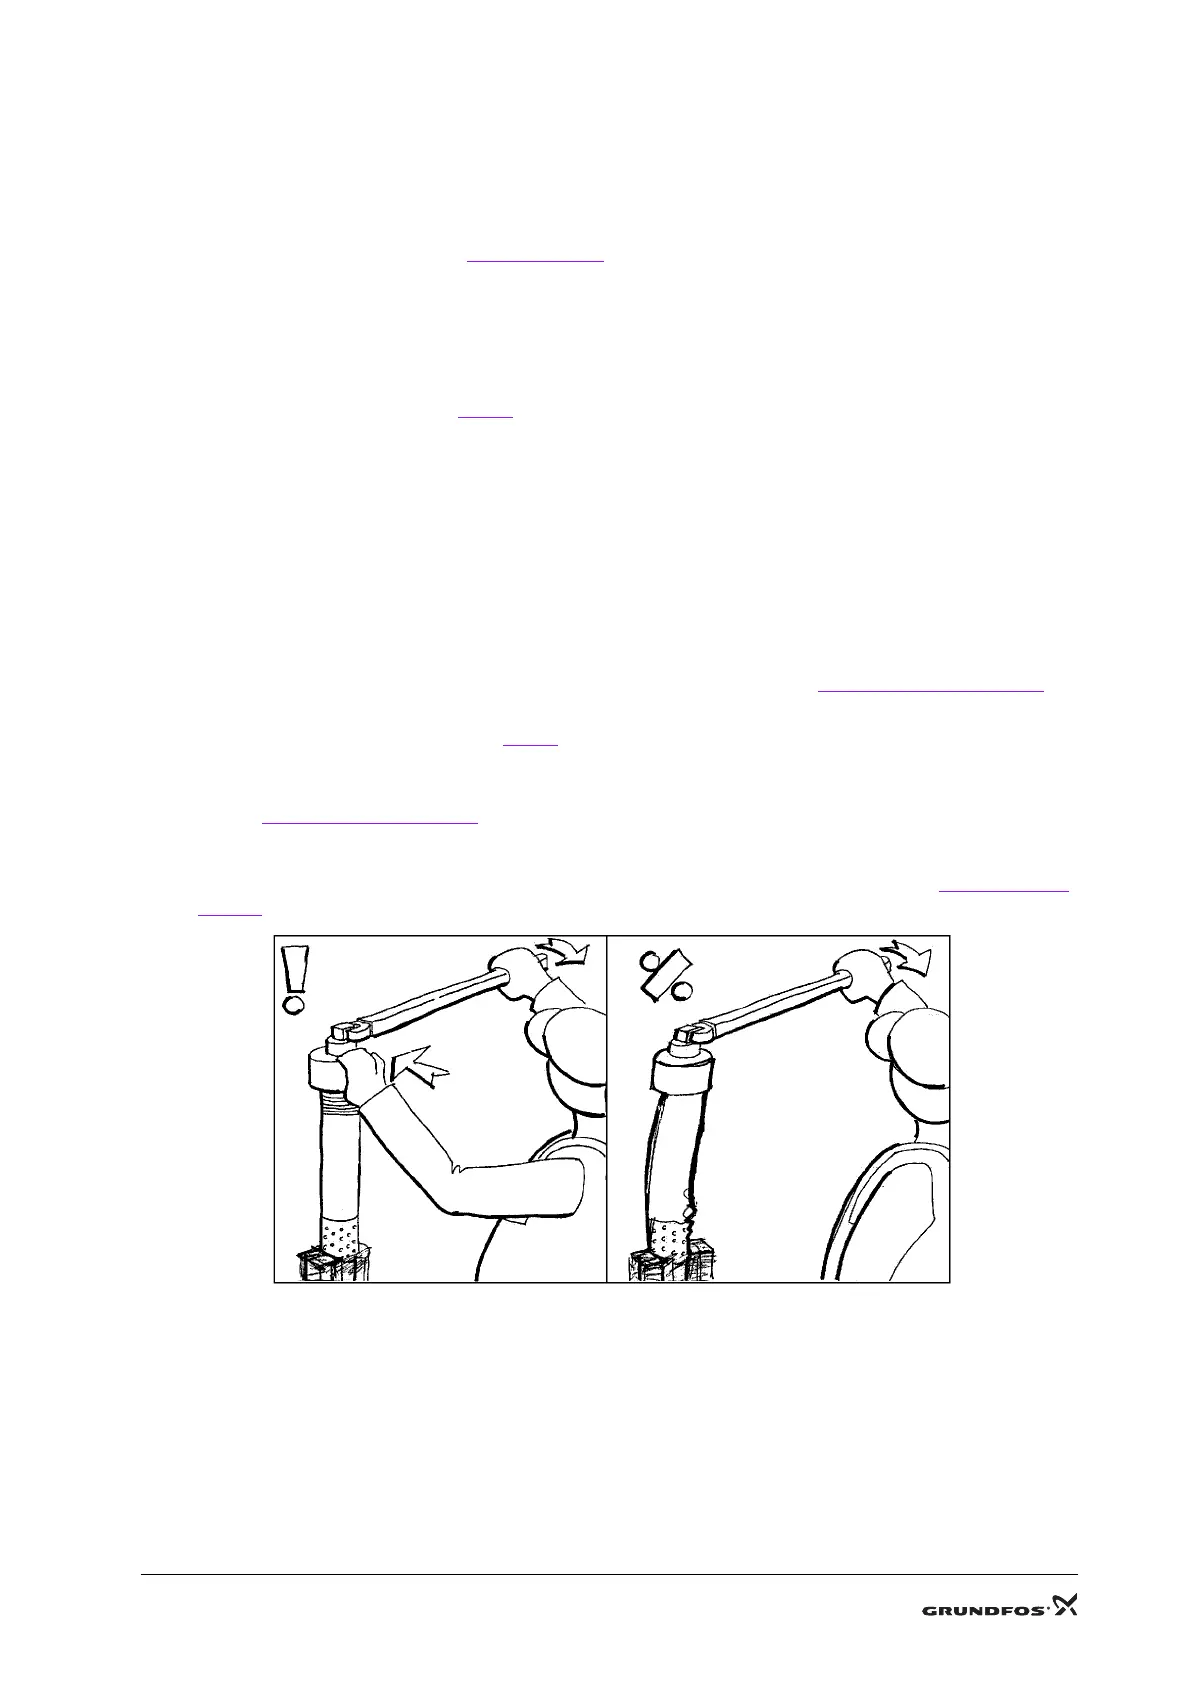
• When loosening the pump from the motor and from the discharge chamber, take care to apply coun-
terpressure to the pump, see Fig. 1.
This will prevent the pump or pump parts from being damaged,
bent or twisted.
4.1.3 Before assembly
• Clean and check all parts, especially the shaft with rotor due to magnetism. Citric acid is recom-
mended for decalcifying.
• Check all parts for fractures and wear.
• Order the necessary service kits and/or parts.
• Replace defective parts by new parts.
4.1.4 During assembly
• Lubricate and/or tighten threads and rubber parts according to section 2.
Torques and lubricants.
• When tightening the discharge chamber to the pump and the pump to the motor, take care to apply
counterpressure to the pump, see Fig. 1.
This will prevent the pump or pump parts from being dam-
aged, bent or twisted.
• Before connecting the pump to the motor, fill the motor with GRUNDFOS motor liquid SML 2, see
section 4.5
Filling of motor liquid.
4.1.5 After assembly
• The head and flow should be tested according to the test specifications, see section 6.
Test specifi-
cations
Fig. 1. Apply counterpressure to the pump, when loosening the pump.

 Loading...