11
Setup
This menu was designed for accessing the items that will need to be changed the most often. Below is an
explanation of the choices in the menu. Follow the instructions on the display for each key. The cell
shaded in gray has a multiple level menu.
FUNCTION
KEY
PARAMETER
DESCRIPTION DEFAULT
SETTING
KEYPRESSES
3
CHANGE
SAMPLE
Change the
default sample
size
10
Key in new sample size
and press Enter to accept
or F5 to escape
4
DELETE PART #
Delete specified
part number
Will not show
until a part
number is
established
Key in part # and press
F3. Press F5 to enter the
setup. Press F2 to delete
part #.
5
KEY-IN APW
Key in an average
piece weight for
sample
0
Key in new average piece
weight and press Enter or
F5 to escape
6
SETUP MENUS
Continues on to
the Setup Menus
Not applicable Press F4 to continue
Setup Menus
This is the next level of menus, which offer more advanced setup. Cells shaded in gray have multiple level
menus.
PARAMETER
DESCRIPTION DEFAULT
SETTING
KEYPRESSES
3
CAL
Calibration any of
the enabled scales
Not applicable
Key in access code and
press Enter or press F5 to
escape
4
DISPLAY STYLE
Chose how the
display will
appear
Style 2 Press either F1 – F3 to
chose the desired display
style or F5 to escape
5
PRINT MENU
Choose what
information to
print out
Not applicable
Continues on to the Print
Menu selections
6
ADVANCE SETUP
Continues on to
the Advanced
Setup Menu
Not applicable See page 14
CAL (Calibration)
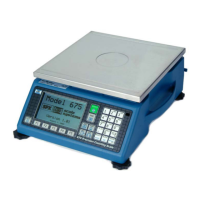
Refer to Chapter 4: Calibration on page 23 for complete instructions on calibrating the Model 672.
The YES key is the NO key is K.