.26
.27
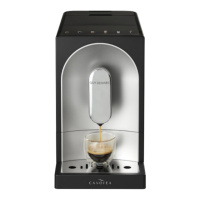
4. Fill the water tank (see section 4.1 Filling the water tank)
• Lift the water tank by using the lid as handle.
• Remove the polystyrene square that is at the bottom of
the water tank location.
• Then, follow the instructions of the section 4.1 Filling the
water tank.
5. Fill the coffee bean container with coffee beans
(see section 4.2 Filling the coffee bean container)
6. Unwind and straighten the power cord and insert the
plug into the socket at the back of the machine. Insert the
cord’s other plug into a wall socket with a suitable voltage.
3.4 Switching the machine ON and OFF
SWITCHING ON
1. Place a container under the spout
2. Press the ON/OFF button.
As soon as the machine is switched on, it automatically
rinses itself using approximately the same amount of
water as a small coffee cup.
3. Run a manual rinse cycle as explained in the section 5.2.1
Coffee circuit rinse/manual rinse cycle.
SWITCHING OFF THE MACHINE
Press the ON/OFF button.
The machine will automatically switch off when not in
use for an extended period of time.
Information : The rinse cycle is automatic each time the ma-
chine is switched on, so it is essential that your keep this cycle
on to clean your machine’s circuits.
4. DAILY USE
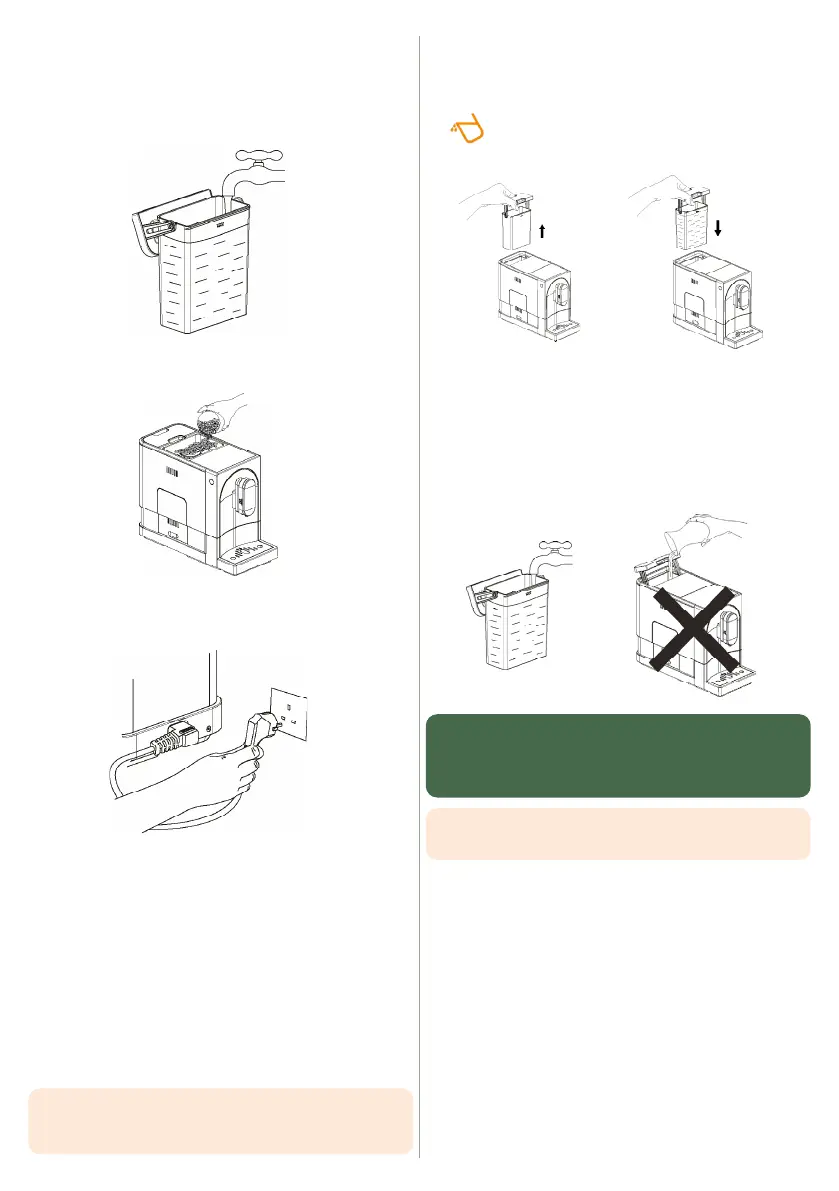
4.1 Filling the water tank
When the pictogram flashes, there is not enough
water in the tank, so you need to refill the tank.
1. Lift out the water tank using the cover as a handle
2. Rinse the tank with clean water and fill it to the maximum
level indicated by ‘MAX’ and put it back in the machine.
Make sure it is correctly positioned.
3. To prevent water from overflowing and damaging the
machine, do not add water directly into the machine
with another container.
WARNING: Never fill the tank with warm, hot, carbonated
water or any other liquid that could damage the water tank
and the machine. To get the most out of your coffee,
change the water every day.
TIPS: to release all the flavours of your coffee,
prefer filtered water.