English
.32
.33
5
B: Stainless steel milk jug and milk connection
hose
NOTE: It is important that you perform this step daily
to ensure that the automatic milk frother works properly.
1. Empty the milk out of the stainless steel milk jug and
clean it with hot soapy water.
2. Remove the rigid tube (19), the connector (18) from the
stainless steel milk jug lid, the milk connection hose
(14) and the lid and wash them in hot soapy water, then
reassemble them.
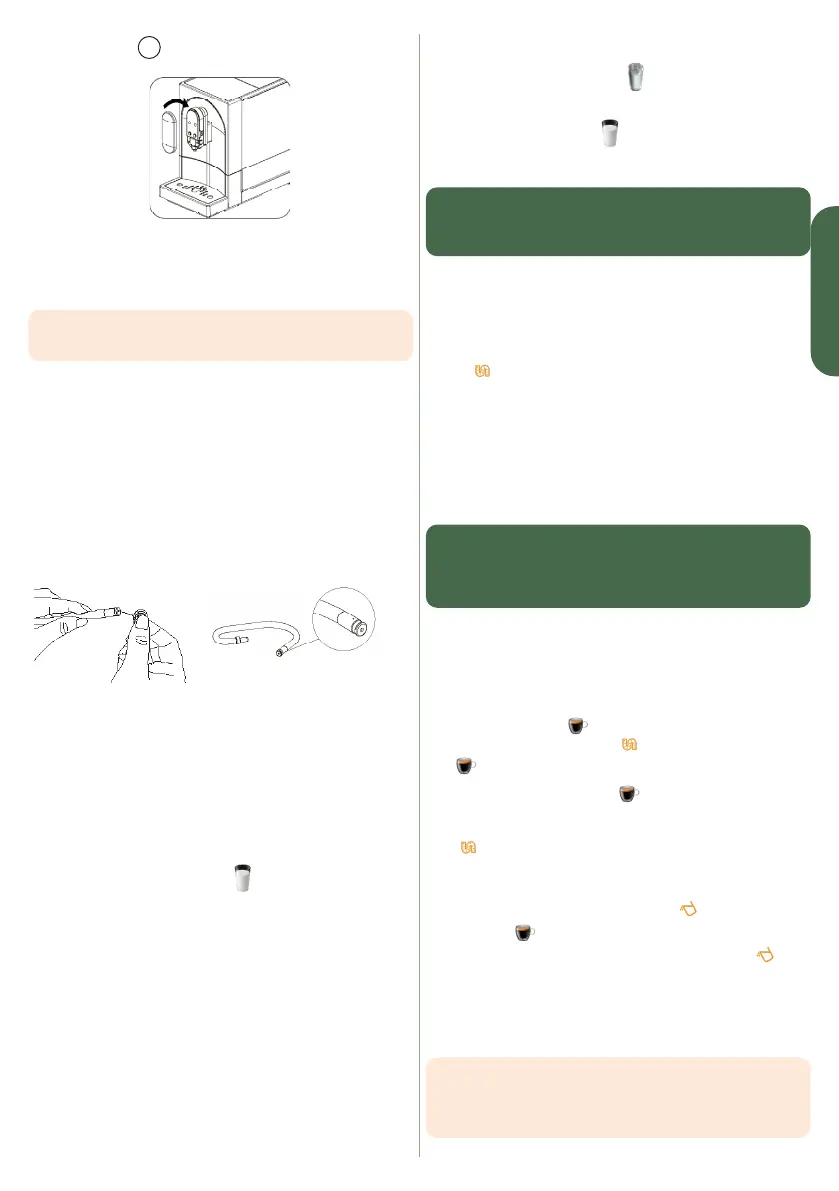
3. To ensure that the hose holes are clean (see the illustra-
tion below), use the spiral needle or brush (22) (included
with the machine) to clean them.
C : Milk circuit
1. Place a large cup under the spout.
2. Fill the milk tank about halfway with cool tap water.
3. Connect the milk tank to the coffee machine as described
in section 4.4 ‘Assembling the stainless steel milk jug lid
and automatic milk frother’.
4. Press the Milk Froth button .
5. The machine will dispense hot water and steam to wash
all the parts used for milk-based beverages.
6. The cleaning cycle will stop automatically. Empty the
remaining water from the stainless steel milk jug.
7. Switch off the machine by pressing the ON/OFF button.
5.2 Other maintenance operations
5.2.1 Coffee circuit rinse/manual rinse cycle
You can perform a manual rinse cycle to clean the coffee
nozzle after use. We recommend that you rinse the system
regularly (at least once a week using this function) or when
the machine is not used for a long period of time.
1. When the machine is in the ON position , press and hold
the ON/OFF and Hot Water buttons at the same time
for 5 seconds.
2.
The Milk Froth button
will flash. The coffee nozzle
will then dispense an amount of water to be used
for rinsing.
WARNING: The dispensed water is hot and is collected in
the external drip tray. Avoid contact with the hot water
dispensed.
3. After the rinse cycle, the machine goes back into standby
mode.
5.2.2 Self-cleaning and descaling (~20 min)
When
lit, this means that the machine needs to be
descaled/self-cleaned. This should be done as soon as possible
to keep the machine in perfect working order. Depending on
the number of beverages prepared and the hardness of the
water, descaling is necessary approximately once a month.
1. Fill the water tank to the Max mark
2. Add a packet of CANOFEA descaling agent to the water
tank, which is included in the box with the machine.
IMPORTANT: Do not use vinegar or other cleaning agents
to self-clean/descale this machine.This could damage the
machine. Only use CANOFEA descaling powder to maintain
the machine.
3. Plug in the machine.
4. Place a sufficiently large container under the spout.
5. When the machine is in the ON position (the control
panel buttons are lit), press and hold the ON/OFF and
Espresso buttons
at the same time for 5 seconds.
Two beeps will sound, with
and the Espresso button
flashing.
6. Press the Espresso button
to confirm that you want
to continue the cleaning process. If you wish to interrupt
the cycle, press ON/OFF.
7.
flashes and indicates that the machine is continuing
the cleaning process (Intermittent flow/Caution: keep skin/
body away from the hot water).
8. When all the water in the water tank is used and
Espresso flashes. Fill the water tank up to the Max
mark. When the tank is full of water, the indicator
will turn OFF. The machine will continue the descaling
process.
9. Once the self-cleaning process is complete, the machine
will automatically switch OFF (after 5 minutes).
NOTE: always make sure that water does not drip onto the
outer walls of the tank or the inner walls of the tank’s machine
holder. Do not let the machine go into standby mode during
step 8 as this will interrupt the process.