39
Required Parts
• Assembled engine nacelle (right and left)
• Main landing gear (right and left)
• Steering arm • 5/32 wheel collar (7)
• 3mm setscrew (8) • Nose gear mount
• 3mm washer (8) • 3mm nut (4)
• Servo • Pull-pull cable
• Crimp (4) • Nylon clevis (2)
• Tapered nose gear block • Nose gear
• Rigging coupler, Z-bend (2)
• Rigging coupler, threaded (2)
• Nose wheel, 2
1
/
2
-inch (63mm)
• 3mm x 25mm machine screw (4)
• #4 x 1-inch sheet metal screw (8)
• Main wheel, 3
1
/
4
-inch (82mm) (2)
• #2 x 3/8-inch sheet metal screw (8)
Required Tools and Adhesives
• Flat file • Threadlock
• Drill • Felt-tipped pen
• Crimping pliers • Side cutters
• Hex wrench: 1.5mm (included)
• Drill bit: 1/16-inch (1.5mm), 5/64-inch (2mm),
7/64-inch (3mm)
Step 1
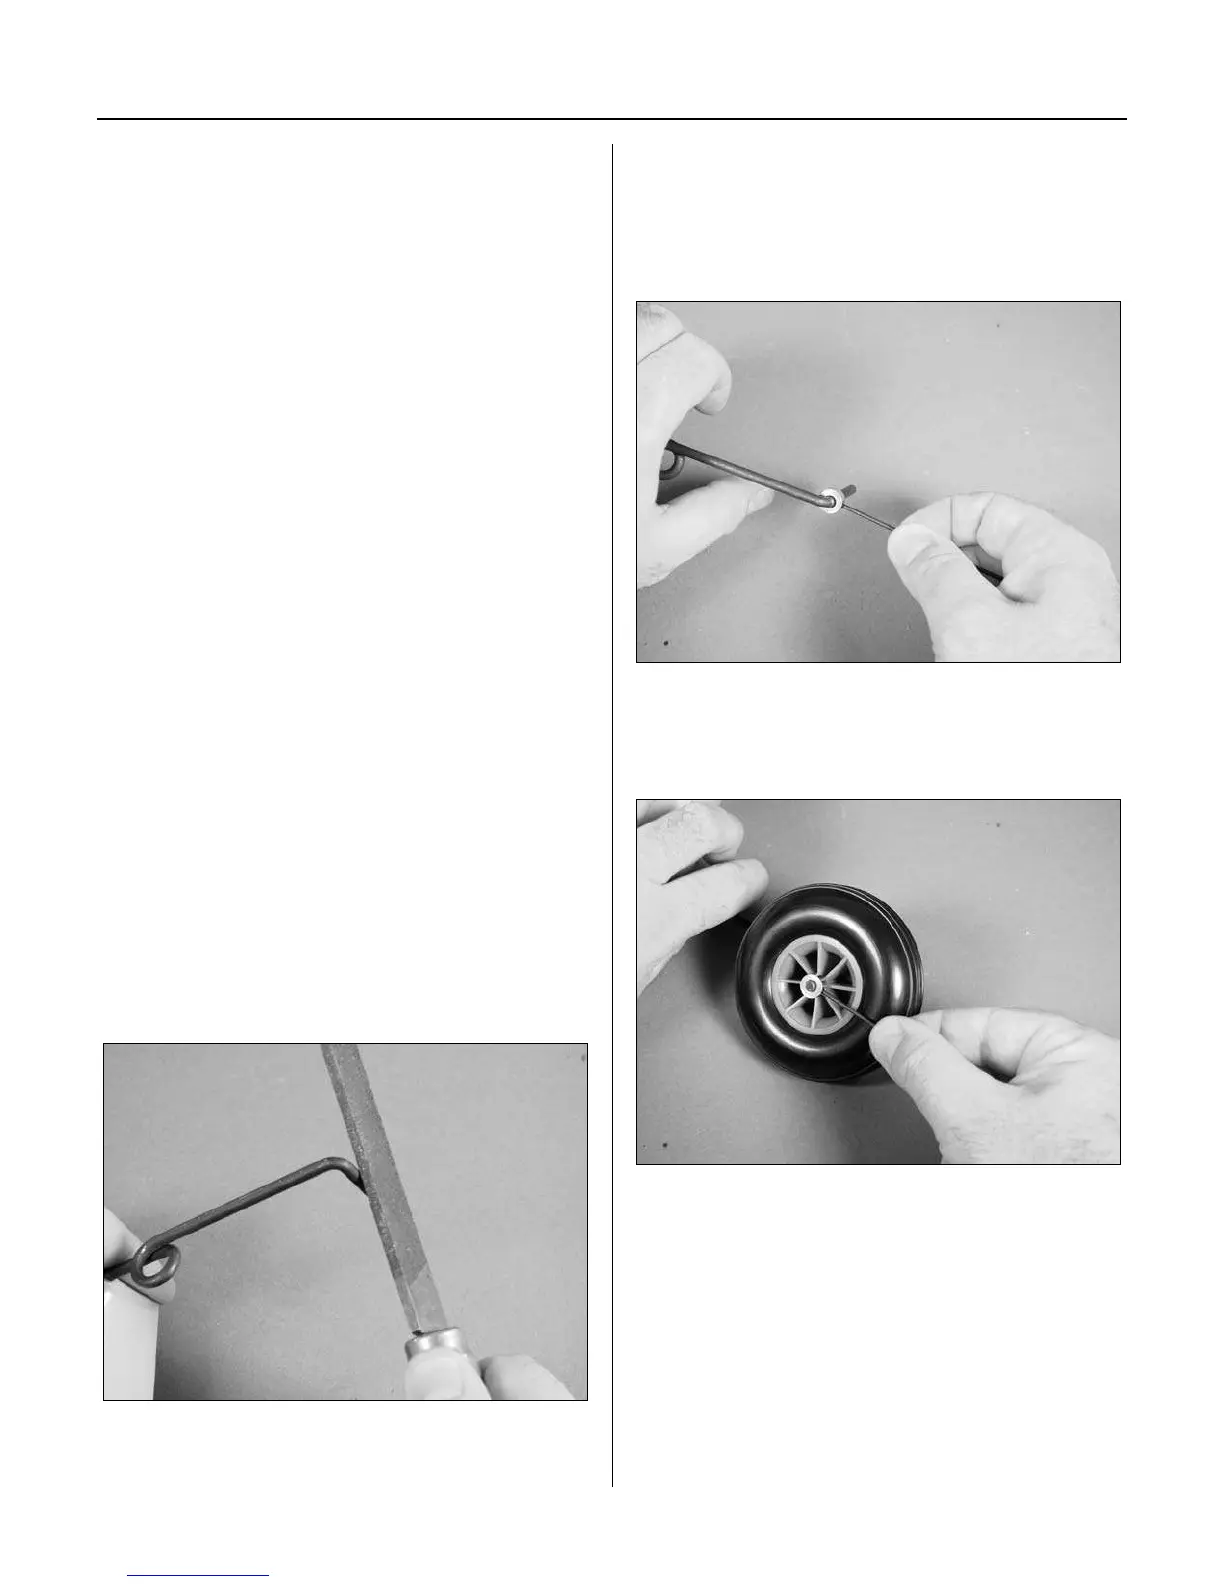
Use a file to create a flat area on the main and nose gear
wires for the wheel collar setscrews. This helps in keeping
them secure on the landing gear.
Step 2
Attach the 5/32-inch wheel collar to the landing gear
using a 3mm setscrew and the included 1.5mm hex
wrench. Use threadlock on the setscrew to prevent it from
vibrating loose.
Step 3
Slide the wheel onto the gear and secure it with a final
wheel collar and setscrew.
Important: Use threadlock on
any metal-to-metal fasteners.
Section 7: Fixed Landing Gear Installation



 To Next Page