6
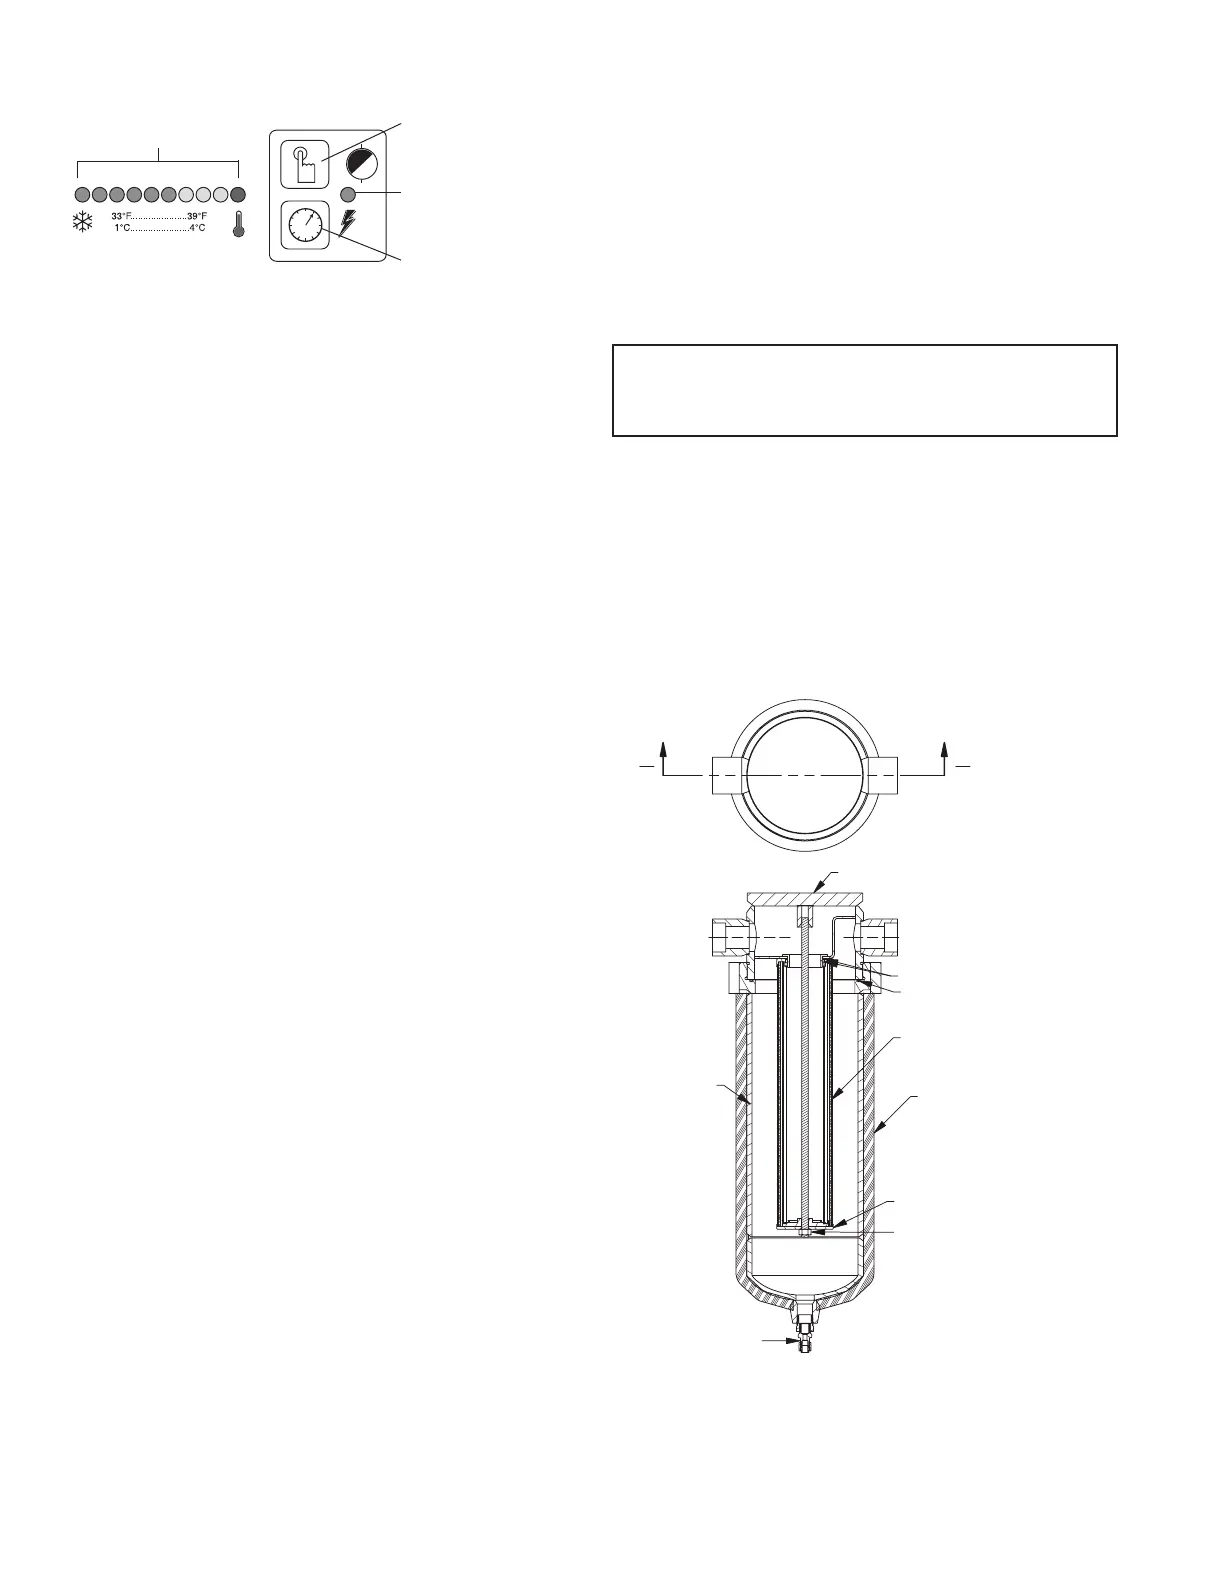
2.4 Timer Drain Programming Mode
1. Pressthe“DrainIntervalProgram”button.The“Conden-
sateDraining”LEDwillstarttoash,andtheilluminated
LEDonthe“DewPointTemperatureIndicator”willidentify
thefactorysettingfor“MinutesBetweenDrainCycles.”
(SeeTable1)
2. Pressandreleasethe“DrainIntervalSelector”buttonto
sequencethe“MinutesBetweenDrainCycleLED’s”from
lefttorightuntilreachingyourselection.The“Red”LEDis
notused(ReferenceTable2for“DrainCycleIntervals”)
3. Toinitiatethenewsetting,pressthe“DrainIntervalPro-
gram”button(thiswillstorethenewsettingandexitthe
program).
4. ExitingtheProgramwillcausetheTimerDraintodis-
charge and begin a new cycle.
NOTE:Failuretoperformstep3within25secondsofcom-
pletingstep2willcausetheunittorevertbacktotheprevious
setting.
NOTE:Intheeventofabrieforextendedperiodofpower
loss,theunitwillretaintheexistingprogramsettingandwill
begin a new cycle once power is reapplied. Had drain been
readytodrainbeforethelossofpower,thedrainbowl’scapac-
itywouldpreventdownstreamooding.Condensatewilldrain
completelywithinacoupleofcycles.(Manuallypressingthe
“Push-to-Test”buttonwoulddrainbowlimmediately)
2.5 Operating Check Points
Checkthefollowingonaperiodicbasis:
A. Green power on light is illuminated.
B. Dew point indicator is in green area.
C. Condensateisdischargingfromdrain.
Condensate Draining
(Flashes in
programmingmode)
Drain Interval
Program
Dew Point
Temperature
Indicator
Drain Interval
Selector
(LED illuminated
indicates drain
cyclesetting)
3.0 MAINTENANCE
3.1 Condenser Coil
A. Air-cooled-cleanoffaccumulateddustanddirtmonthlyor
as necessary in dirty environments.
B. Water-cooled-cleanstrainermonthly,moreoftenif
required.Shutoffwater,removesmallplugtorelievepres-
sure, then remove large plug to remove strainer. Clean
strainer and replace.
3.2 Moisture Separator/Oil Removal Filter
NOTE: Prepackagedmaintenancekitsareavailablethat
includeallnecessarylterandtimeddrainvalvecomponents.
MaintainmaximumperformanceandefciencywithGenuine
Parts.Seepage15fororderinginformation.
When to replace the Separator/Filters
Replacelterelementannually,orwhenpressuredrop
acrossdryerisexcessive.
Whenremovingliquidsatratedowconditions,anin-
creaseinpressuredropwilloccurastheseparator/lter
elements become loaded with solid particles.
A A
Separator Head
Separator Element O-Rings
Separator Bowl O-Ring
Separator Element Replacement Sleeve
Separator Bowl Insulation
Separator Element Bottom Cap
Separator Element Nut
Drain Compression Fitting
Separator Bowl
Air Inlet
Air Outlet
 Loading...