OPERATION 41
OPERATION
To select The Bridge as the AVR’s input source:
• From the front panel, press the
Input Source
Selector
6 on the front panel as needed.
• From the main remote, press the
Input DMP
Selector
3.
• From the ZR 10 remote, press the
/DMP
Selector
®
.
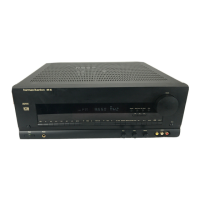
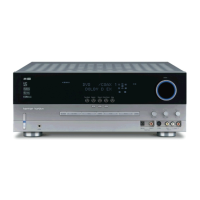
When The Bridge is connected and a compatible iPod
properly docked, the iPod’s menu will be replaced with
“harman/kardon” at the top of the iPod’s screen and
the front-panel display and semi-OSD message will
show messages that will guide you through the menu
and content selection. If the
Lower Display Line D
shows an UNPLUGGED… message, please
check to see that the correct iPod adapter is used in
The Bridge and that the iPod is properly seated.
The AVR’s front-panel controls may also be used to
access a limited number of iPod functions. Press the
Tuning Mode Button 7 to play or pause the cur-
rent track. The
Tuning Selector 3 may be used to
search in reverse (left side of button) or forward (right
side of button) through the tracks. Press the
Tuner
Band Selector
4 to call up the iPod’s menu. Press
the
Preset Station Selectors 5 to scroll and the
Set Button I to select. For complete information
on using the remote or front-panel controls to operate
an iPod, see the instructions that are included with
The Bridge.
AM/FM Tuner Operation
The AVR 645’s AM/FM tuner is capable of tuning AM,
FM and FM Stereo broadcast stations. Stations may be
tuned manually, or they may be stored as favorite sta-
tion presets and recalled from a 30-position memory.
Tuner and Station Selection
The AVR 645’s AM/FM tuner may be selected as the
unit’s source, and stations changed, by following one
of these steps:
• From the front panel, press the
Input Source
Selector
6 until the desired tuner frequency band
(AM, FM or XM) appears. To change stations within
a frequency band, press the
Tuning Selection 3.
• You may also press the front panel’s
Tuner Band
Selector
4 to select the tuner. The first press
will select the last used frequency band and station.
Subsequent presses will change the frequency
bands, selecting the last used station or XM pro-
gram used. Press the
Tuning Selection 3 to
change stations within a frequency band.
• From the main remote, press the
Tuner/FM Select
Button
by pressing the button up towards
the top of the remote. The first press of the button
selects the frequency band and station or XM
channel that was last tuned. Press the button again
to select between FM, AM and XM. You may also
directly select the FM tuner by pressing the
Tuner/FM Select Button down towards the
bottom of the remote. To change stations, press
the
Tuning Up/Down Button M.
• To select the tuner from the ZR 10 remote, press
the
Tuner Selector
É
, or for XM Radio press
the
XM Radio Selector Button
ƒ
(when an
optional XM Connect & Play or Passport module
is connected and the programming service has
been activated).
• To change the tuning mode, press the
Tuning Mode
Button
7B
ø
.
When the button is pressed so that
AUTO/
STEREO
appears in the Upper Display Line
#, each press will put the tuner in a scan mode
that seeks the next higher or lower frequency station
with acceptable signal strength. An
AUTO ST
TUNED
indication will momentarily appear when
the station stops at a stereo FM station, and an
AUTO TUNED indication will momentarily
appear when an AM or monaural FM station is
tuned. Press the Tuning buttons again to scan to
the next receivable station.
When the button is pressed so that
MANUAL/
MONO
appears in the Upper Display Line #,
each tap of the Selector will increase or decrease
the frequency by one increment. When the tuner
receives a strong-enough signal for adequate recep-
tion,
MANUAL TUNED will appear in the
Lower Display Line $.
• Stations may also be tuned directly in either the
automatic or manual mode. To enter a station’s
frequency directly, first select the AM or FM band
as shown above. Next, press the
Direct Button
8
μ
. Within 5 seconds of when DIRECT
IN
scrolls in the Upper Display Line #, enter
the station frequency by pressing the
Numeric
Keys
k
Δ
. If you press an incorrect button
while entering a direct frequency, press the
Clear
Button
9
¬
to start over.
NOTE: When FM reception of a station is weak, audio
quality will be increased by switching to Mono mode
by switching to the
MANUAL/MONO mode.
Preset Tuning
Using the remote, up to 30 AM or FM stations may be
stored in the AVR 645’s memory for easy recall, using
the front-panel controls or the remote.
To enter a station into the memory, first tune the station
using the steps outlined above. Then:
1. Press the
Memory Button
ñ
; the station’s
frequency will flash.
2. Within 5 seconds, press the
Numeric Keys
Δ
corresponding to the location where you
wish to store this station’s frequency. Once entered,
the preset number will appear in the
Upper Display
Line
#.
3. Repeat the process after tuning any additional
stations to be preset.
Recalling Preset Stations
• To manually select a station previously entered
in the preset memory, press the
Numeric Keys
Δ
that correspond to the desired station’s
memory location.
• To manually tune through the list of stored preset stations
one by one, press the
Preset Buttons 6v on
the front panel or the main remote, or the
Prev/Next
Transport Controls
π
on the ZR 10 remote.
XM Radio Operation
XM Radio is a satellite-delivered service that offers
hundreds of program channels, as well as local traffic
and weather information for select cities. The AVR 645
is “XM Ready,” which means that the unit is able to
receive the XM service when an optional XM Connect
and Play or Passport module is connected and the
service activated. You may purchase the antenna
module needed for XM Radio from many electronics
or online retailers, or directly from XM Radio through
the “Home Receivers” section of the XM Radio Store
at www.xmradio.com.
Once you have purchased the XM module, follow
the instructions accompanying it to activate the XM
Service. Connect the plug on the XM module to the
XM Ready Module Input V on the rear panel of
the AVR 645. For best results, point the antenna
module out a window, again, following the instructions
packed with the XM product. If a window view is not
available for the antenna, XM Radio operates a series
of terrestrial repeater stations that may be able to
provide reception, though this service is not available
everywhere.
IMPORTANT NOTE: XM Radio requires both the
optional, external antenna module and a sub-
scription to the XM Radio service. Antenna and
service sold separately; XM Radio is not avail-
able in Alaska or Hawaii.
If you need to view the antenna module’s number,
connect it to the AVR and then follow one of the steps
shown below to select XM Radio as the input source.
Tune to “000” to get a readout of the number.
Once you have an activated module connected, follow
one of these steps to select XM Radio as your sys-
tem’s audio source:
• From the front panel, press the
Input Source
Selector
6. If XM was the last-used tuner source,
OPERATION
HKP1445AVR645om 6/7/06 6:35 PM Page 41
 Loading...
