24
LOCATING AND INSTALLING THE MASTER CONTROL PANEL
For maximum convenience the Master Control Panel should be installed inside the home of the user.
However, it can be installed outside if desired. It must be mounted on a vertical surface such as a wall and be
located at eye level for the user. While choosing the location, plan for the routing of the control cable from the
Main Control Center to the Master Control Panel.
TO INSTALL:
1. If the pool and spa equipment room housing the Main Control Center is attached to the main dwelling where
the Master Panel will be located, simply route the cable through attics and hollow walls securing the cable as
needed for a neat installation. Store excess cable in the attic or between walls.
2. If the pool and spa equipment room housing the Main Control Center is in a separate building from the main
dwelling where the Master Control Panel will be located, 1/2" or 3/4" conduit should be installed from the Main
Control Center conduit knockouts entering the low voltage compartment and extend at the other end of the
conduit to a point within the main dwelling. Route the cable through the conduit, and through attics and hollow
walls, securing the cable as needed for a neat installation. Store excess cable in the attic or between walls.
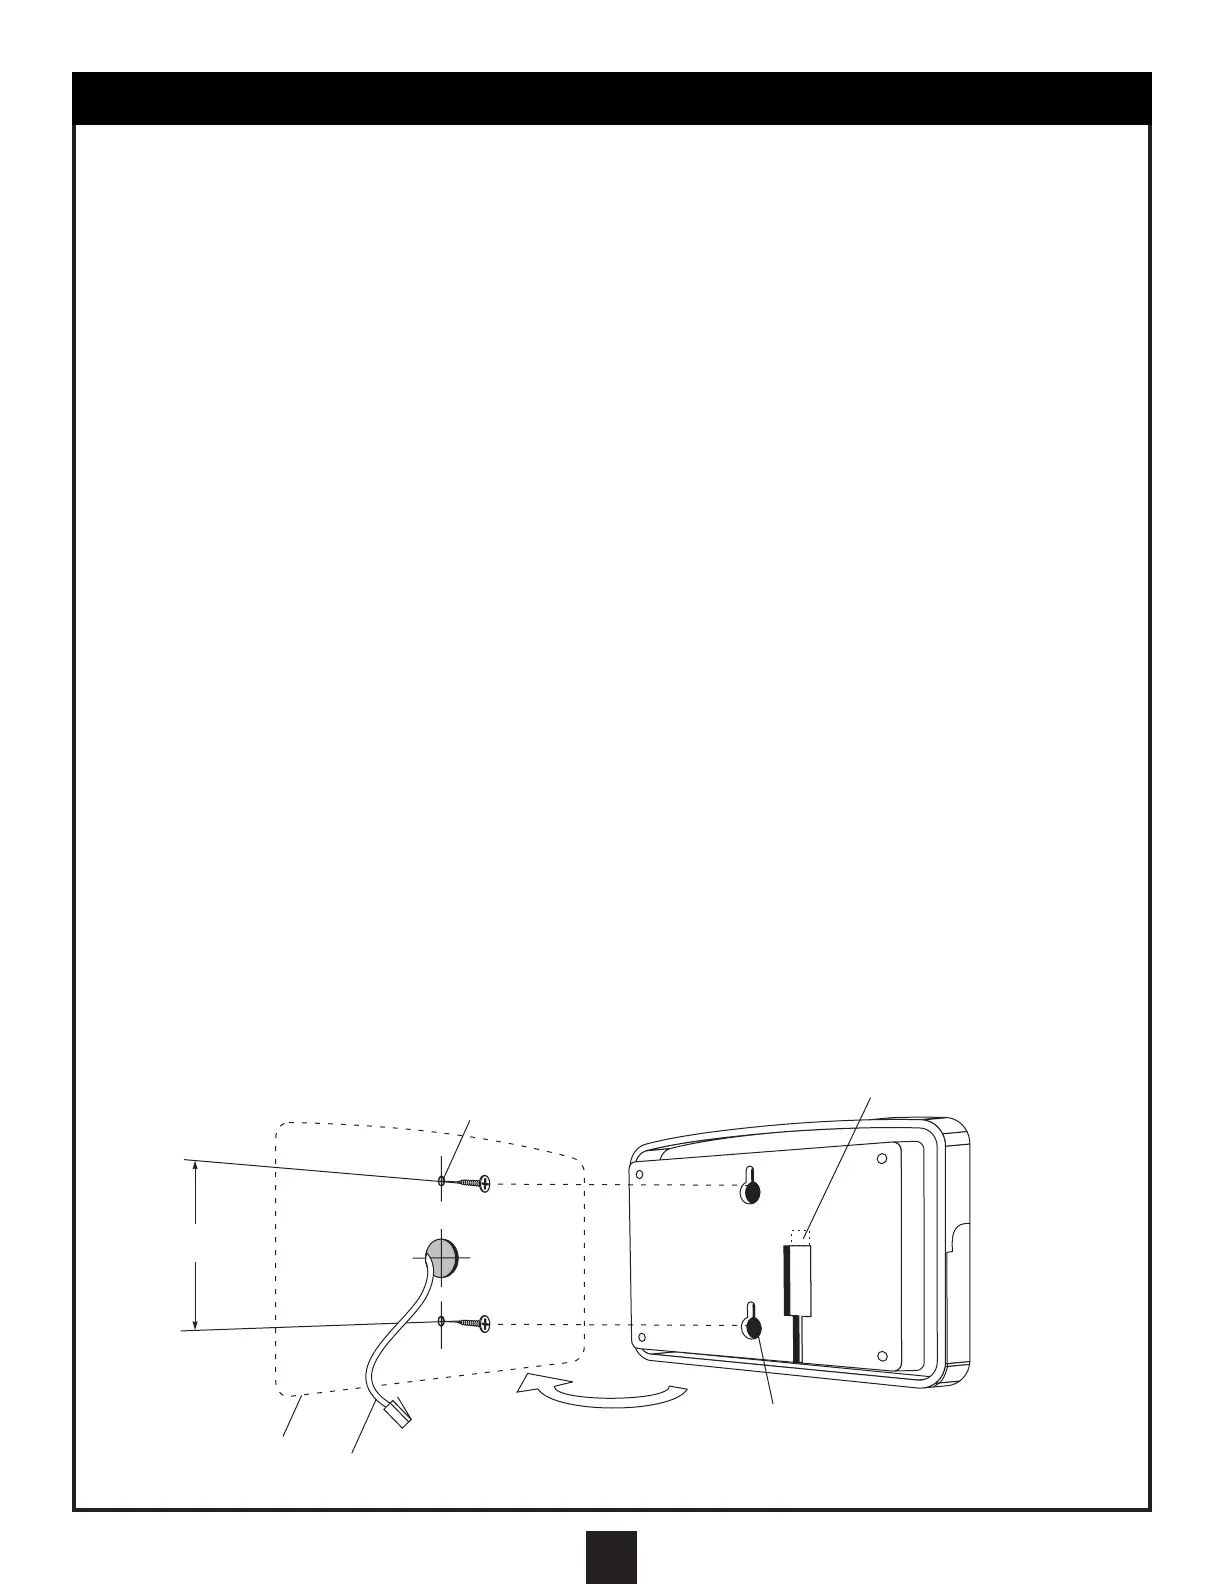
3. Next, drill a hole in the hollow wall at a location that will permit the cable to extend through the wall directly
behind the Master Panel. Pull the cable through the hole storing any excess cable in the attic or inside the
hollow wall. Install hollow wall anchors as needed on the Master Control Panel vertical centerline and 3" apart.
Install pan head screws into the anchors and adjust them so that the Master Control Panel rests snugly
against the wall when it is installed on the screws. Plug the control cable into the receptacle at the rear of the
panel and install on the wall anchor screws.
4. If the Master Control Panel is mounted outside, be sure to route the control cable so that it approaches the
panel from the bottom and enters below the panel vertically. Secure the cable to the wall to maintain this cable
orientation. This will prevent water from running down the cable connectors and into the Master Control Panel.
5. An Additional Master Control Panel can be added to the system by connecting a 2-1 cable connector to the
end of the cable coming from the Main Control Center. This provides 2 outputs for 2 Master Control Panels.
Connector cables are then run between the 2-1 cable connector and the Master Control Panels. The additional
Master Control Panels will perform the same functions and all panels will indicate system status
simultaneously. Master Control Panels and connecting cables are available as an option.
ATTENTION: IF A CABLE IS NOT LONG ENOUGH TO REACH FROM THE MASTER PANEL TO THE
MAIN CONTROL CENTER, DO NOT ADD LENGTH TO THE CABLE BY SPLICING ADDITIONAL CABLE
ONTO THE CABLE; OBTAIN A CABLE THAT IS LONG ENOUGH TO REACH. A CABLE THAT IS TOO
LONG MAY BE SHORTENED BY CUTTING OFF THE EXCESS AND REINSTALLING A NEW
CONNECTOR AT THE DESIRED LENGTH.
SEE TEMPLATE ON PAGE 17
CONTROL CABLE
PLUGS IN HERE
HOLLOW WALL ANCHORS
PANEL
POSITION
CONTROL
CABLE
KEY SLOTS
FOR HANGING
3”