31
LOCATING AND INSTALLING THE SPA SIDE CONTROL PANEL (continued)
4. COMPLETE THE INSTALLATION OF THE CONDUIT.
A. Before additional concrete is placed over the route of the conduit to the Main Control Center, complete the
installation of the conduit.
B. Be sure that all underground conduit is positioned in well compacted soil below the concrete. Also use care
when making the glue joints to be sure that they are watertight. Additionally, do not use more than two 90
degree sweeps in a single pull. Doing so may make pulling the cable difficult.
C. For long conduit runs (over 100') it may be advisable to use a watertight pulling fitting positioned in the middle of
the conduit run. If this is necessary, it is advisable to elevate the pulling fitting at least 6" above the finish grade
from the surrounding area to avoid potential flooding. Important: Do not cut the cable at the pulling fitting. Use
the pulling fitting as an intermediate pulling point only.
5. CUT THE EXCESS 1" CONDUIT FLUSH WITH THE FINAL FINISHED SURFACE.
After all finish work has been completed (plaster, tile, coping stone, deck finished, etc.), cut the 1" conduit flush with
the finished surface. Sawing the conduit will not produce a flush surface, so grind, sand, or file as necessary. After
cutting flush, deburr the inside diameter of the conduit.
6. PULL THE PANEL CABLE THROUGH THE CONDUIT.
An electrician's wire pulling snake is required for this job. For long pulls, wire lubricant is also a great aid.
Push the snake from the Main Control Center to the Panel location. After the snake has exited the conduit at the
Panel location, fasten the cable to the snake.
TAKE CARE TO PROTECT THE CABLE CONNECTOR FROM DAMAGE WHILE PULLING THE CABLE.
With one person pulling the cable and one person at the Panel location assuring that no kinks or knots occur, pull
the cable through the conduit and into the low voltage compartment of the Main Control Center. Neatly coil any
extra cable and store in the low voltage compartment. Route the cable to the top of the printed circuit board to be
sure there is enough cable to install the phone connector into J20.
ATTENTION: IF THE CABLE ON THE SPA PANEL IS NOT LONG ENOUGH TO REACH TO THE MAIN
CONTROL CENTER, DO NOT ADD LENGTH TO THE CABLE BY SPLICING ADDITIONAL CABLE
ONTO THE CABLE; OBTAIN SPA PANEL WITH A CABLE THAT IS LONG ENOUGH TO REACH. A
CABLE THAT IS TOO LONG MAY BE SHORTENED BY CUTTING OFF THE EXCESS AND
REINSTALLING A NEW CONNECTOR AT THE DESIRED LENGTH. TOOLS AND CONNECTORS FOR
THIS PURPOSE ARE READILY AVAILABLE IN MOST HOME CENTERS.
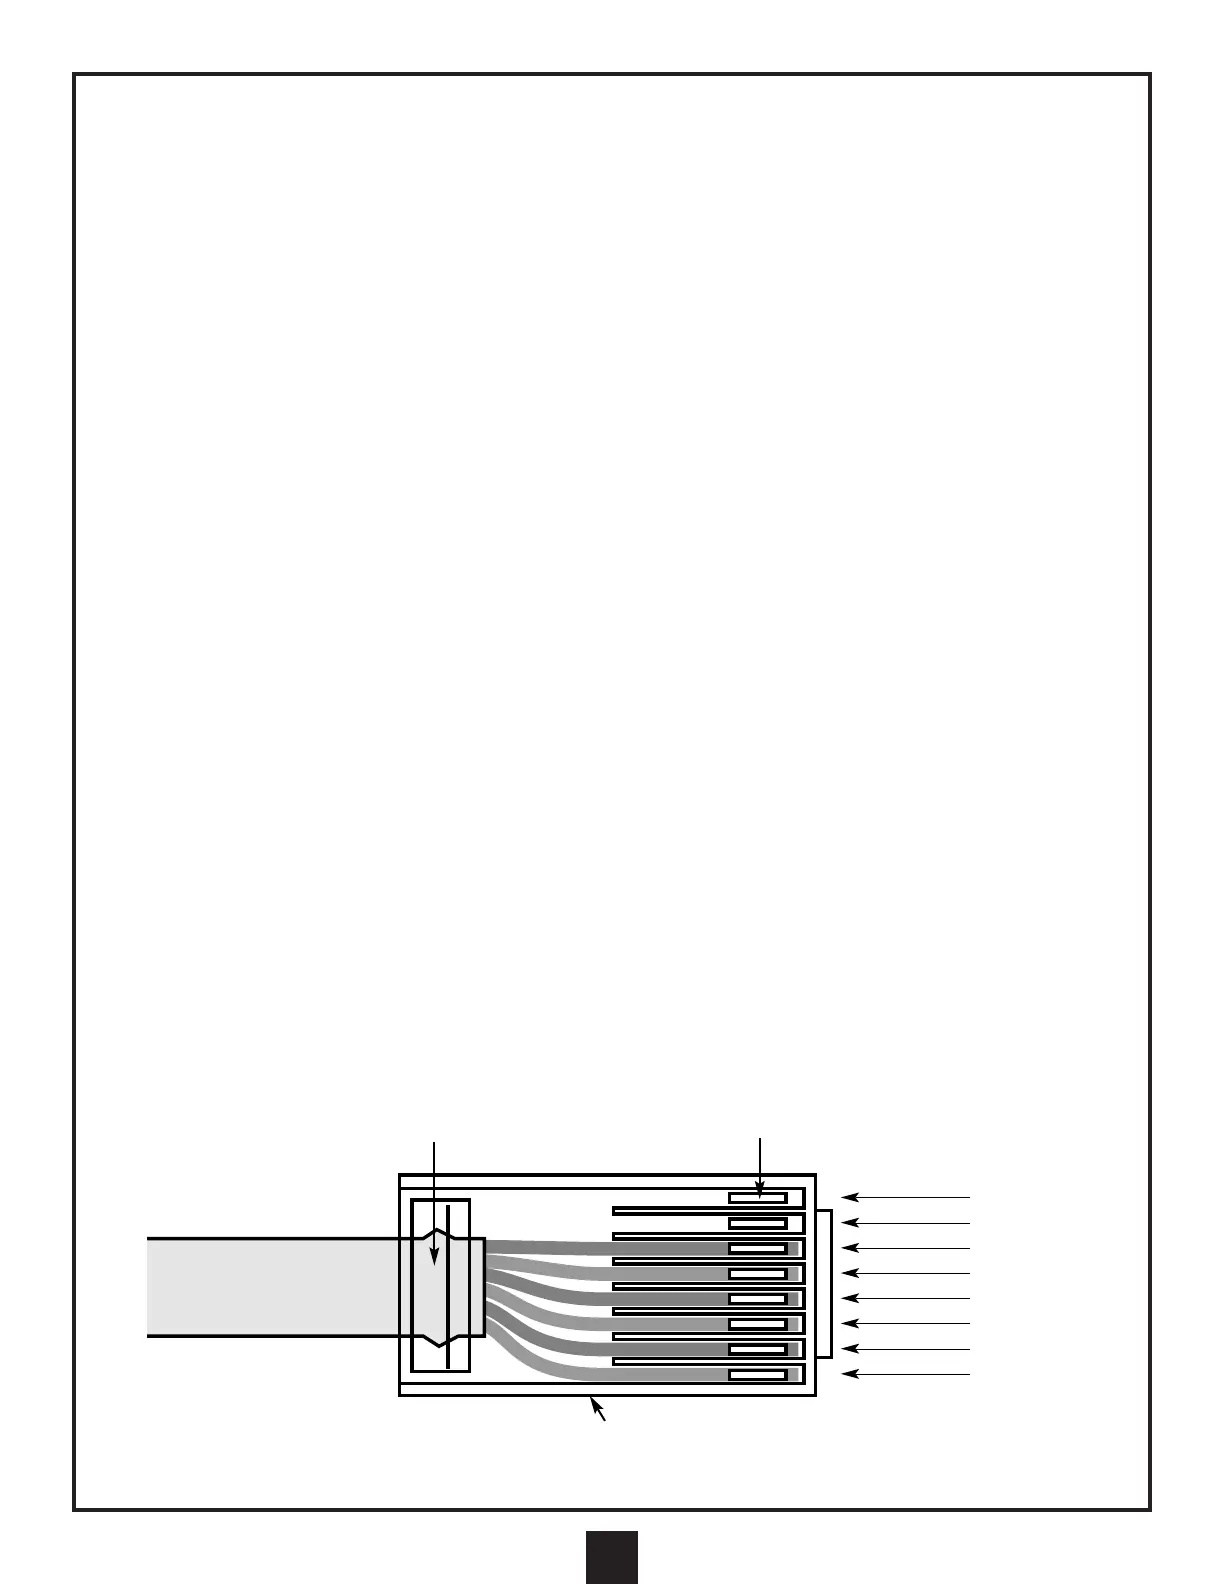
1 - Blank
2 - Blank
3 - Brown
4 - Yellow
5 - Green
6 - Red
7 - Black
8 - Orange
WIRING PATTERN FOR MASTER & SPA-SIDE CONTROL CABLES
*Termination of Master Panel cable should be identical on both ends
crimp area
gold contacts
cable
release clip on opposite side