IMPORTANT: WHEN PULLING THE PANEL CABLE THROUGH THE CONDUIT ALWAYS LEAVE
6" TO 8" OF EXCESS CABLE AT THE PANEL END. THE EXCESS CABLE IS THEN PUSHED
INTO THE 1" CONDUIT AS THE PANEL IS INSTALLED. THIS ALLOWS THE SPA PANEL TO BE
REMOVED FROM THE SPA WALL OR DECK FAR ENOUGH TO GAIN ACCESS TO THE CABLE
SO THAT IT CAN BE GRASPED AND PULLED FROM THE CONDUIT SHOULD THE PANEL
NEED TO BE REMOVED. IMPORTANT: WHEN REMOVING THE PANEL, DO NOT PULL ON THE
PANEL TO PULL THE CABLE OUT OF THE CONDUIT. ALWAYS PULL ON THE CABLE ITSELF.
7. MAKE THE FINAL CONNECTION
Route the cable through the low voltage compartment and to the top of the printed circuit board of the Main
Control Center. Push the connector on the end of the cable into the receptacle labeled J-20.
8. MOUNT THE PANEL.
Dry fit the Panel against the mounting surface to be sure there are no high points that need to be removed.
Clean the mating surfaces and then apply a bead of silicone adhesive. Remove the masking from the
double sided adhesive strips. Carefully push the extra 6" to 8" of cable into the conduit as you position the
Panel. Seat the Panel into the silicone, being sure it is level or square or parallel with surrounding surfaces.
Peel backing off adhesive strips. Push the Panel firmly against the mounting surface so that the adhesive
strips grasp firmly to the mounting surface. The adhesive strips will hold the Panel in position while the
silicone cures.
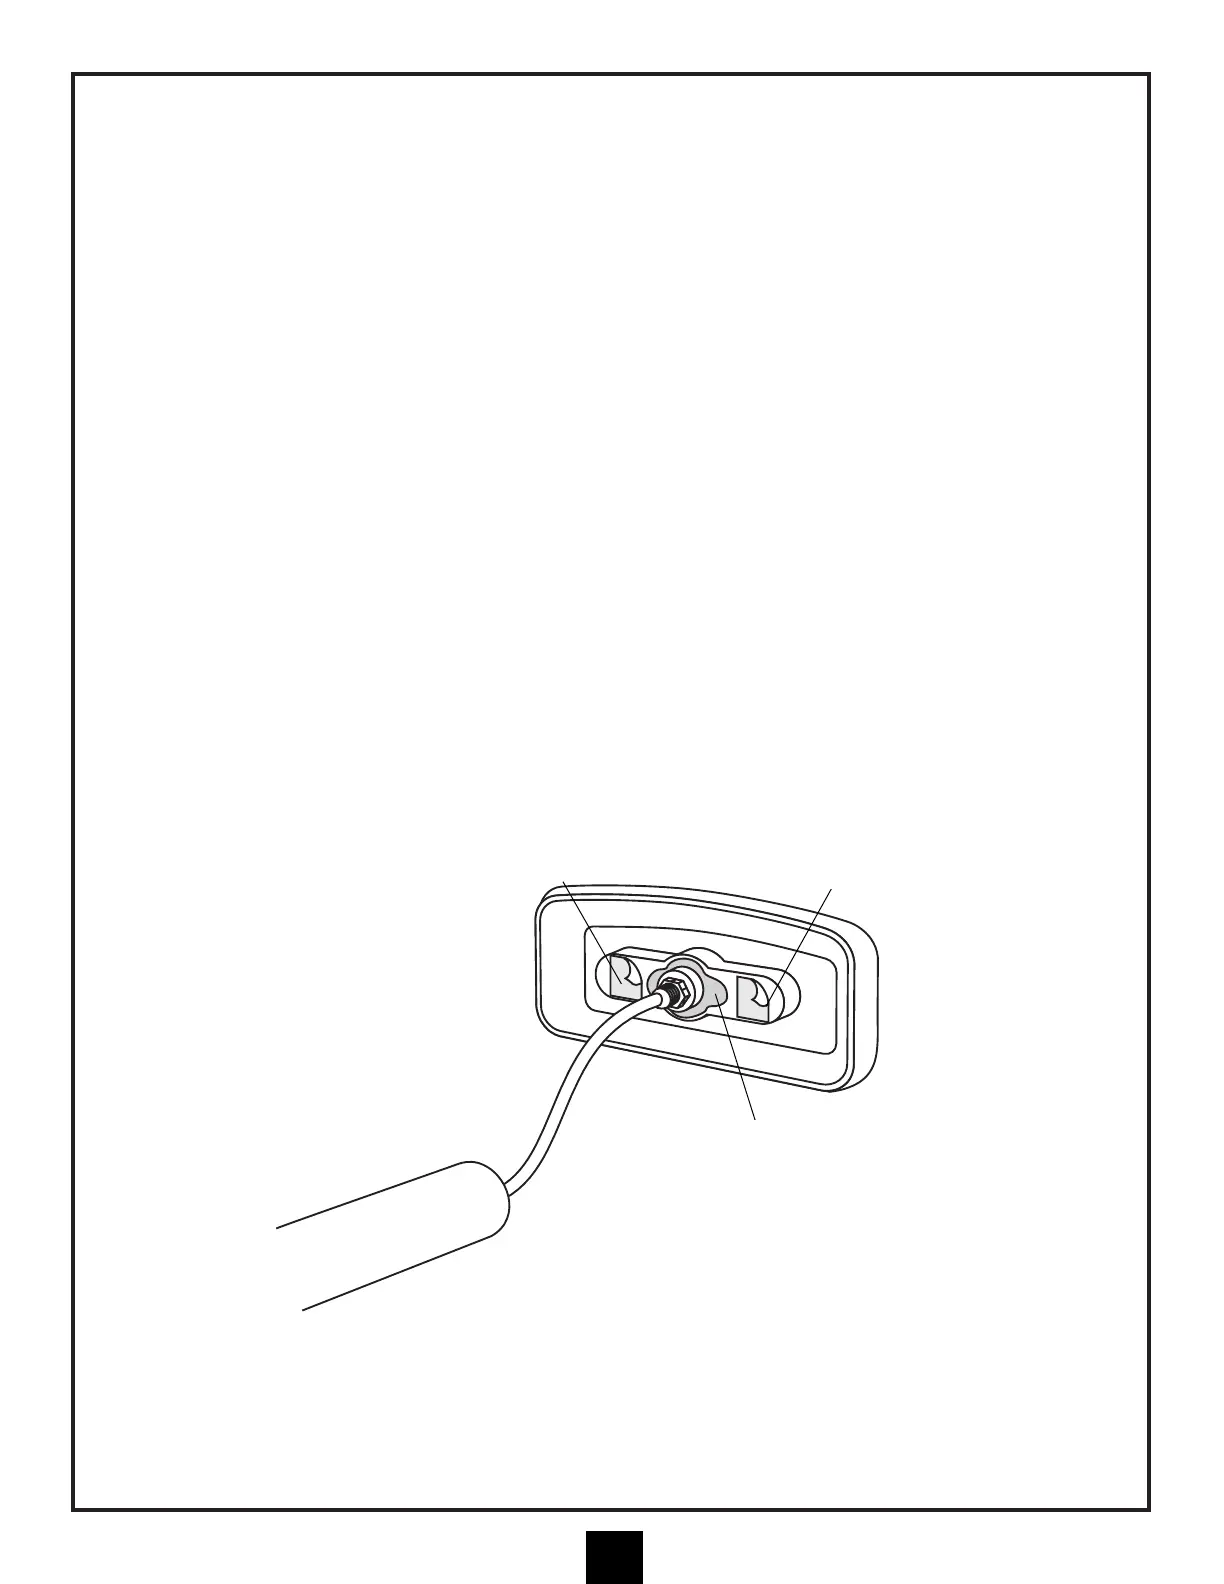
1” PVC CONDUIT
LOCATING AND INSTALLING THE SPA SIDE CONTROL (continued)
ADHESIVE STRIPS
ADHESIVE STRIPS
SILICONE
SEALANT
HERE
32