Hear Back PRO User Guide
With FW V1, the link affects only the Mixer you are adjusting.
Linking is Mixer specific. With FW V2, Stereo Linking is the same
as previously stated, but stereo placement and width are added.
With FW V5, linking is global for all Mixers (see Channel
Linking Mode on page 12).
AUX INPUT OPERATION
The auxiliary input connections provided are one 1/8 inch TRS
stereo unbalanced input optimized for 0 dBu input level, and
one XLR mono balanced input optimized for -42 dBu input level,
selectable via the switch located adjacent to the connections.
The inputs provide another mono or stereo-mixed channel to
be inserted into the Mixer. Examples of use would be a drum
machine click track into the drummer’s Mixer, or a crowd/
ambient mic in everyone’s Mixer (which can double as the
intercom mic). Another application would be a stereo mix from
a guitar or keyboard local mix from another Hear Back or Hear
Back PRO Mixer, creating a total of 18 channels controlled from
your Mixer.
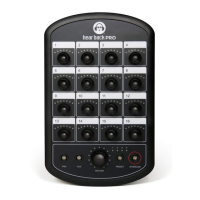
• Press the AUX button to change the function of the master
knob to control the volume of the auxiliary input in the mix.
• AUX button and master knob LEDs will turn RED to indicate
this function is active.
• Press the AUX button again to exit auxiliary volume control,
or wait 30 seconds from the last adjustment for the system to
automatically return the master knob to its default function.
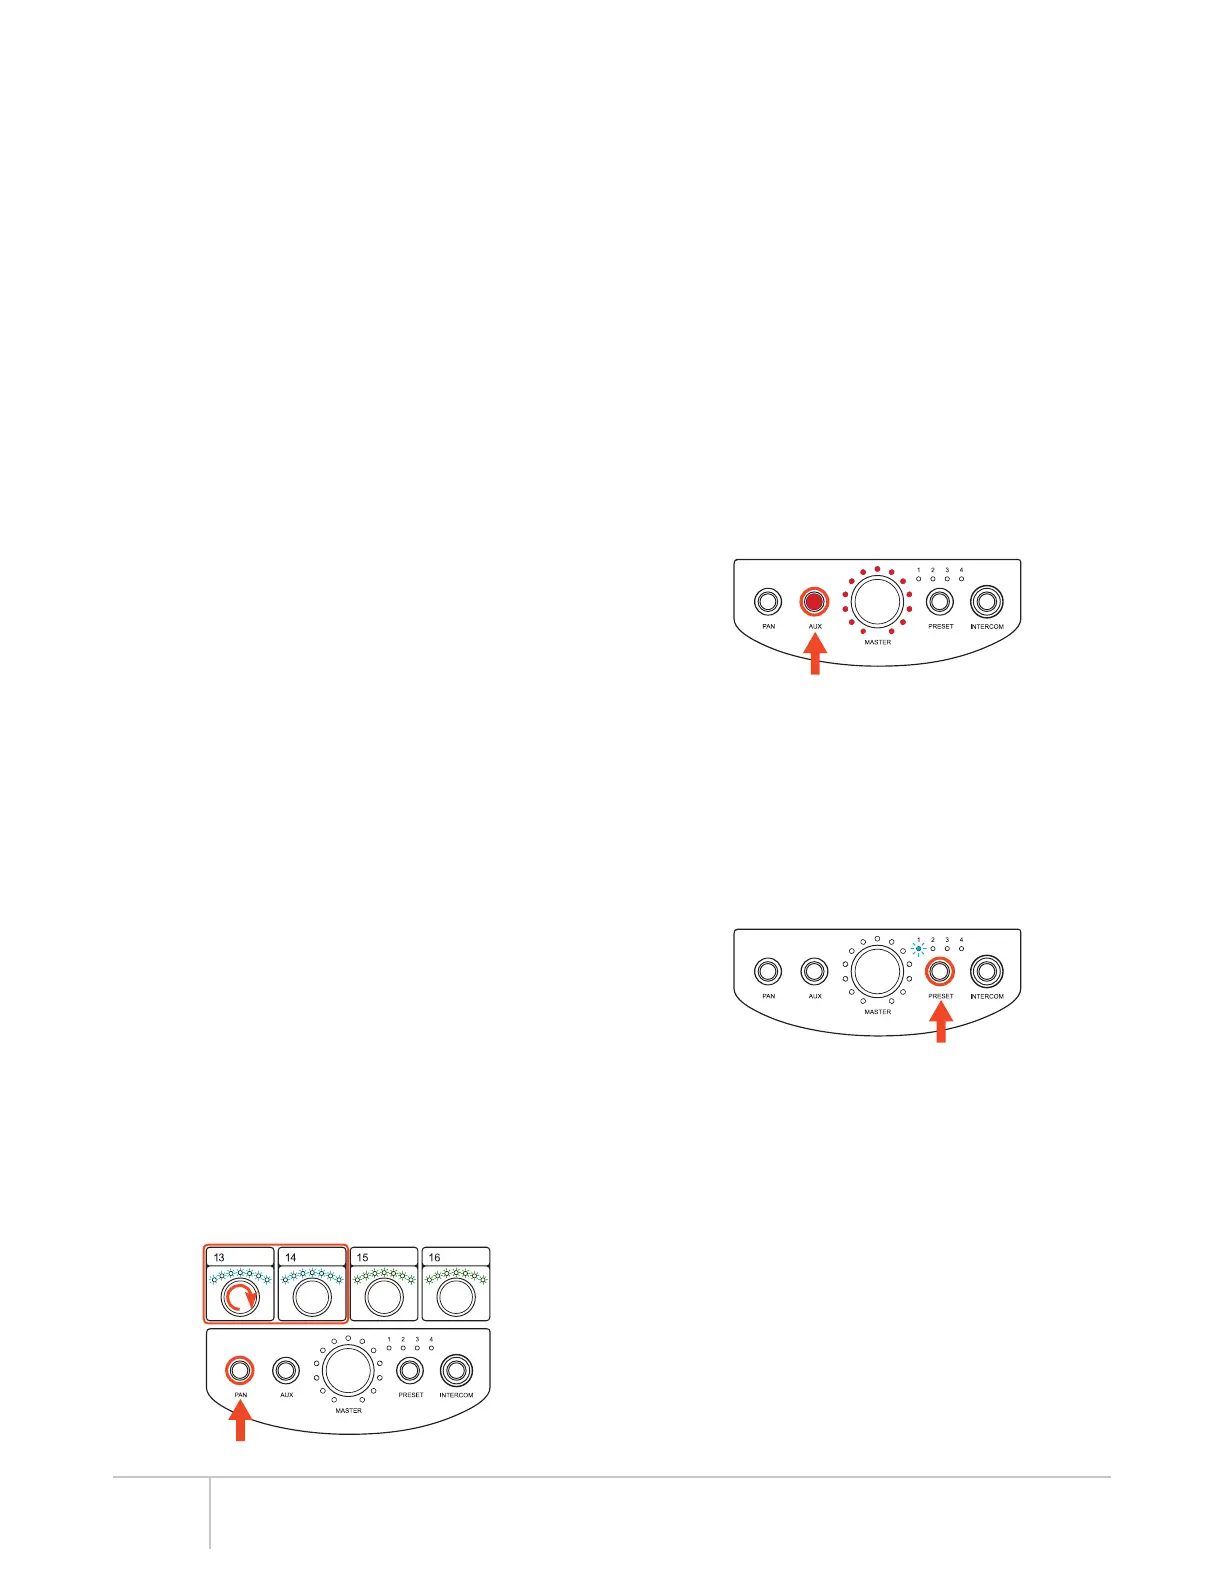
PRESET OPERATION
The Hear Back PRO Mixer has the ability to store up to four
system states in internal memory for easy session settings
recall. Pressing the PRESET button will step through presets
1 – 4, one at a time.
SAVE A PRESET:
• Press and hold PRESET for two seconds. The current preset
LED will begin flashing quickly.
• Keep holding if you wish to save to a different location (unit
will scan across the four preset locations).
• To EXIT, let go of the PRESET button.
Upon making any control change while using a preset, the
preset number will slowly blink to let you know your new settings
have not been saved. To save the changes to the preset, simply
hold the PRESET button for 2 seconds until the preset number
rapidly blink, then release.
To reset a preset’s parameters back to default (all volume at 0%,
all channels center-panned, all stereo-linked channels unlinked),
first complete the settings reset operation (discussed later in this
manual), then complete the normal steps listed above to save
the settings to a preset. For FW V2 and V5, changing presets
will automatically store the changes made before the preset
increments.
6
MIXER CONSTRUCTION
The Hear Back PRO is constructed of UV-stabilized ABS and
has a built-in mic stand mount. The cable strain relief channel
(molded into the Mixer) greatly reduces stress on the CAT6*
cable connectors and the Mixer RJ45 connector.
STATUS INDICATING MIXER LOGO
The illuminated logo serves as an indicator for several purposes.
Under normal conditions, the logo will be BLUE, indicating
digital audio packets are being received. A PURPLE logo
indicates audio packets are being dropped, and a RED logo
indicates no valid packets are being received. If the logo is
blinking RED, this indicates the headphone amplifier has
overheated. Check the troubleshooting section if any color other
than a BLUE logo occurs.
VOLUME
Each channel knob controls the volume of its respective
channel(s) within the mix. The master knob, by default, controls
the volume of the overall mix. Volume operation is indicated
by BLUE LEDs. Volume scales from 0% to 100%, left to right,
respectively.
MASTER VOLUME
The master volume is used to set the volume of the headphones
and the line outputs. When using the line outputs in conjunction
with the headphones, optimize the mix for the headphones and
then adjust the device connected to the line outputs to balance
the gain.
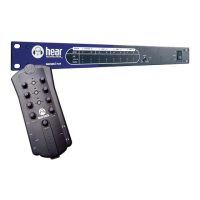
PAN OPERATION
To control panning of channels, press the PAN button. The PAN
button and channel knob LEDs will turn GREEN to indicate that
the channel knobs now control panning position of the audio
within the stereo field. To return to volume control, press the
PAN button again, or wait 30 seconds from the last adjustment
for the system to automatically return to volume control.
With FW V5, pressing PAN while in volume mode will show PAN
(GREEN LEDs) and pressing again will show width controls for
channels that are stereo.
STEREO LINK OPERATION
Each audio channel comes from a mono source, and is therefore
center-panned by default for FW V1. To quickly hard-pan two
channels left and right to create a stereo pair:
• Press and hold PAN for two seconds to enter linking mode.
• Channel LEDs will flash GREEN. Twist one of two adjacent
channel knobs (1-2, 3-4, 5-6, etc.) to link them. Channel LEDs
will illuminate AQUA when stereo linked. To unlink channels,
twist one of the linked knobs.
• To EXIT, press PAN button or wait 30 seconds to go back to
default volume levels.
This operation can only be performed on adjacent pairs of
channels. Therefore, channel 1 can only be linked with channel
2, channel 3 with channel 4, and so on. Upon linking channels,
the volume of the right channel is set according to the volume
of the left channel. Volume adjustments to either stereo-linked
channel now effects both channels in unison.
*Cable complying with the National authorities (cable with an outer jacket or sleeving rated VW-1 or better).