Hear Back PRO User Guide
CHANNEL LINKING VIA CONFIG FILE
EDIT CONFIG.TXT FILE
Each Hear Back PRO Hub has its own editable CONFIG.TXT
file. To access, follow the steps below:
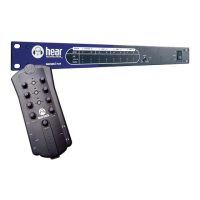
1. Plug USB (B-Male) into the PROGRAM connector in the
back of the PRO Hub
2. Connect USB (A-Male) to computer
3. Hub will show up as a DRIVE (i.e. HBPRO on D Drive)
4. Open folder
5. Open CONFIG.TXT
The CONFIG.TXT file contains the following information:
• Header information and comments (##)
• Clock Settings:
INTERNAL - Internal clock (Default)
EXTERNAL - Word Clock card (use only if you have a Hear
Back PRO Word-Clock Card installed)
• Channel Link Settings
STEREO – Adjacent channels are stereo linked
MONO – Channels are mono
EDIT CHANNEL SETTINGS
To change the channel settings type (not case sensitive) either
• STEREO or MONO (S or M – shorthand can also be used)
• Save CONFIG.TXT file
CHANNEL LOCATIONS
Hub 1 – Channels 1-32
Hub 2 – Channels 33-64
Hub 3 – Channels 65-96
Hub 4 – Channels 97-128
RETURN HUB TO FACTORY DEFAULT
• Delete CONFIG.TXT file
• Power OFF Hub
• Power ON Hub
• CONFIG.TXT file is now set back to factory default settings
SAMPLE “CONFIG.TXT” FILE
## Hear Technologies Configuration File v2.0
## Clock Configuration
## Choose External if Word Clock Card
## is installed in a slot
## For external clock: Input A = External
## For internal clock: Input A = Internal
##
## Stereo Channel Link Configuration
## For mono channels: CHANNEL 1&2 = MONO
## For stereo channels: CHANNEL 1&2 = STEREO
## Valid channels are 1 though 32
Input A = Internal
Input B = Internal
CHANNEL 1& 2 = STEREO
CHANNEL 3& 4 = MONO
CHANNEL 5& 6 = STEREO
CHANNEL 7& 8 = STEREO
CHANNEL 9&10 = MONO
CHANNEL 11&12 = MONO
CHANNEL 13&14 = MONO
CHANNEL 15&16 = MONO
CHANNEL 17&18 = MONO
CHANNEL 19&20 = MONO
CHANNEL 21&22 = MONO
CHANNEL 23&24 = MONO
CHANNEL 25&26 = MONO
CHANNEL 27&28 = MONO
CHANNEL 29&30 = MONO
CHANNEL 31&32 = MONO
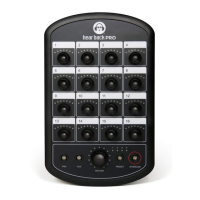
• Select and edit channels (channels can be turned on or off). A
channel with no LEDs ON indicates the channel is OFF or not
assigned. A channel with all LEDs ON indicates it is the only
channel (or stereo pair) assigned to the submix. If only one
channel (or stereo pair) is assigned, then adjusting volume,
Pan, and width is disabled. If you turn up 2 or more knobs
while editing, they will each display the respective levels.
Adjust each level to balance the mix of channels. You can
also adjust PAN and WIDTH (for stereo pairs only) if 2 or more
channels are selected. Up to 16 channels can be assigned to a
single knob.
• The Preset LEDs indicate the BANK of inputs currently
selected (as described previously for 128-channel mode).
Example: If Preset 1 LED is flashing (single flash) and Preset
2 LED is on, this would indicate that you are in BANK 1 of 2. If
both Preset 3 and 4 were also ON, that would indicate you are
in BANK 1 of 4.
• To save press and hold PRESET for 2 seconds. All LEDs will
flash, then the preset LEDs will go back to indicating only what
preset the Mixer is presently on.
ADDITIONAL BUTTON COMBINATIONS
PAN, WIDTH AND VOLUME CONTROLS
• Press PAN once to access Pan Controls (LEDs turn GREEN).
• Press PAN twice to access Width Controls (LEDs turn AQUA).
Note: WIDTH is ONLY available on stereo channels and
submixes. Single mono channels do not have width control.
• Press PAN to return to Volume Controls (LEDs turn BLUE).
CHANNEL LINKING MODE
This can only be done from the standard 16-knob mode if
everything is one-to-one channel mapped. Otherwise channel
linking must be accessed in 128-Channel Mode (see previous
information on 128-Channel Mode). Channel linking can also be
adjusted via the iOS App.
• Press and hold PAN for 2 seconds.
• Channel LEDs flash GREEN.
• Turn channel knob you want to stereo link (Note: adjacent
knobs link. Example 1-2, 3-4, etc.).
• Press PAN to exit.
Note: Linking is saved on the Hub and is global to all Mixers.
ZERO OUT MIXER
Zeros volume, pan and width, and sets one-to-one routing on all
the channels (i.e. input 1 goes to knob 1, input 2 goes to knob 2,
etc.) on whatever PRESET that is selected (does not affect any
other presets).
• Press and hold PAN and AUX until all the LEDs flash twice.
12