CALIBRATION
USING A
FREQUENCY
COUNTER
( )
Prepare
a
12"
length
of
wire and
a
length of
shielded cable (not supplied)
3S follOVrVS*
1. Cut a
12"
length of
hookup wire. Remove
1/4"
of insulation from
each wire end.
2. Form
a
loop of several turns of
the hookup wire, approximately
3/4"
diameter, in the center of
the wire. Leave both wire ends free.
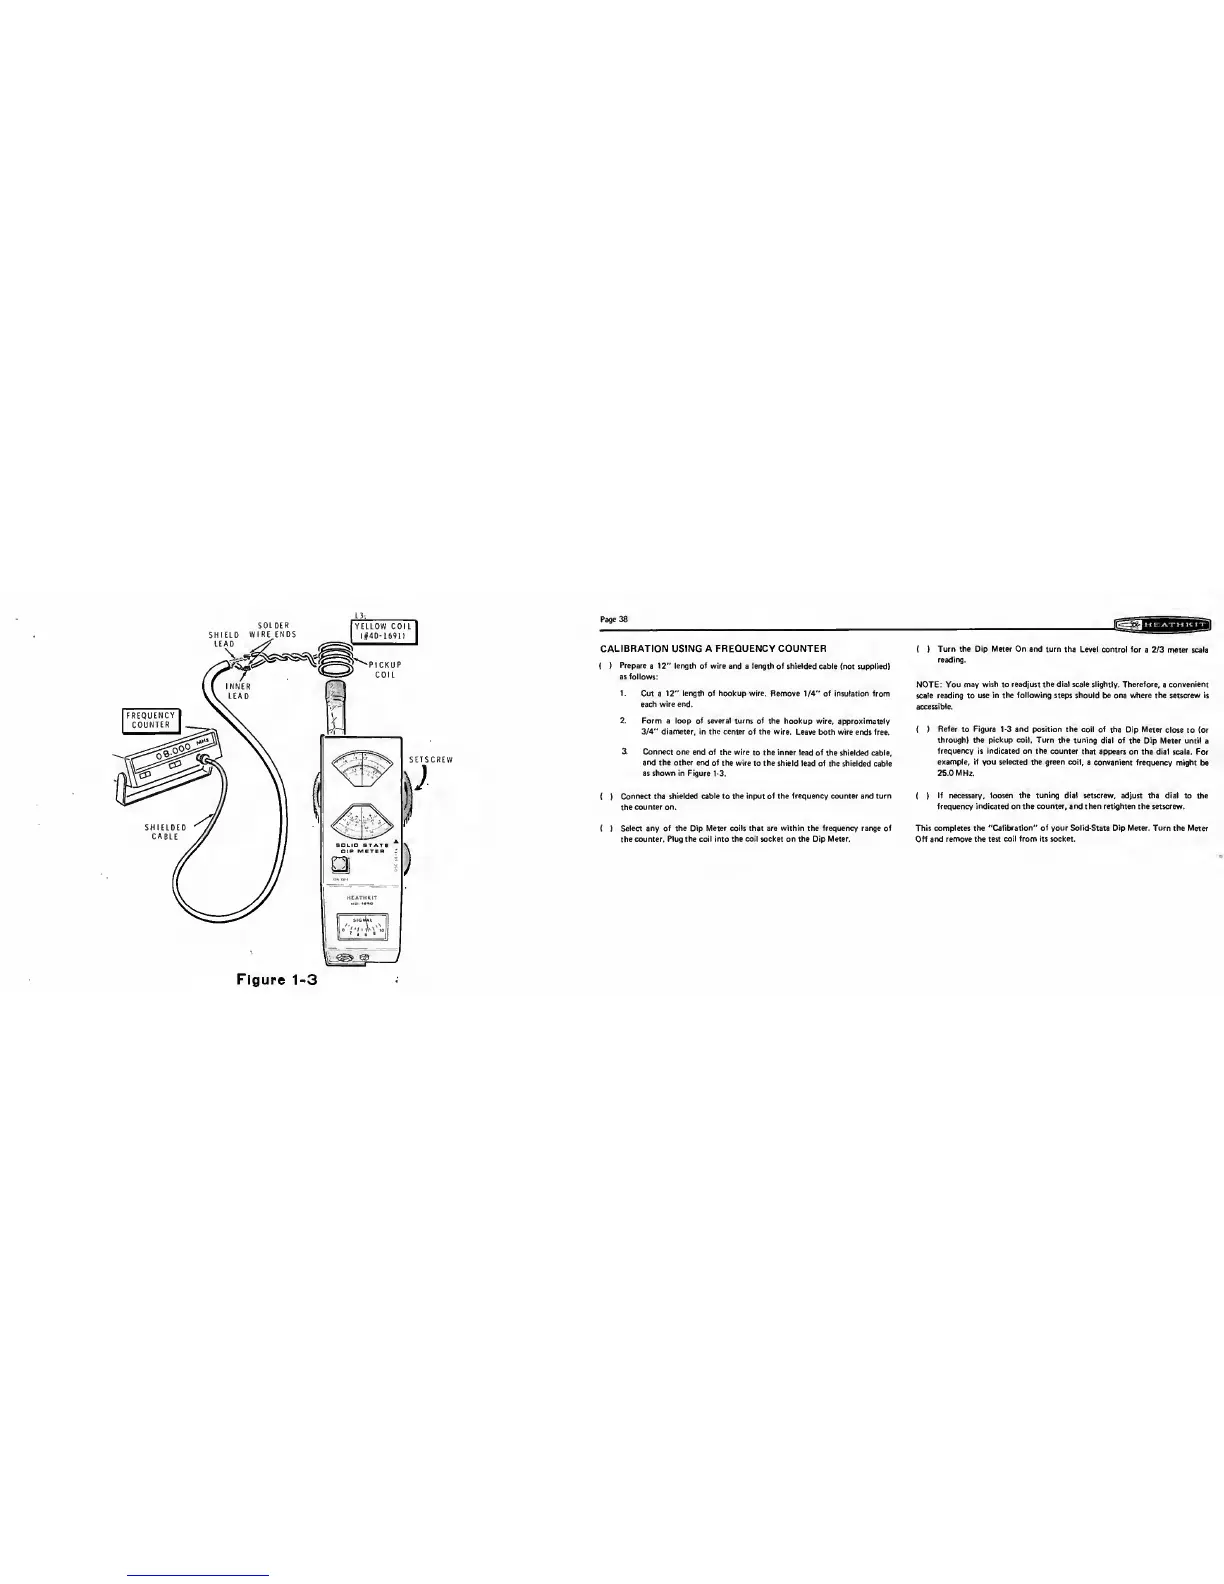
3. Connect one end
of the
wire to the inner lead of
the shielded cable,
and
the other end of
the wire
to the shield lead of
the shielded cable
as shown in Figure 1-3.
( )
Connect the
shielded cable
to
the input of the frequency counter and turn
the
counter on.
( )
Select any of the Dip Meter
coils that
are
within the frequency range of
the
counter. Plug the coil into the coil socket on the Dip Meter.
(
)
Turn the Dip Meter On and
turn the Level control for
a 2/3 meter scale
reading.
NOTE: You may
wish
to
readjust the dial scale
slightly. Therefore, a convenient
scale reading to use
in the following
steps
should
be
one
where the setscrew is
accessible.
(
)
Refer
to Figure
1-3
and position the
coil of the
Dip
Meter
close
to
(or
through) the pickup coil. Turn
the tuning dial of the
Dip Meter until
a
frequency is indicated on
the counter that
appears
on
the dial scale. For
example, if
you
selected
the green coil,
a convenient frequency might
be
25.0 MHz.
(
)
If necessary, loosen the tuning dial setscrew, adjust the dial to
the
frequency indicated
on
the
counter,
and then retighten the setscrew.
This completes the "Calibration" of your Sol id-State Dip Meter. Turn the
Meter
Off
and
remove the test coil from its socket.