Page 24
HEATHKIT
NAMEPLATE
RED
LENS
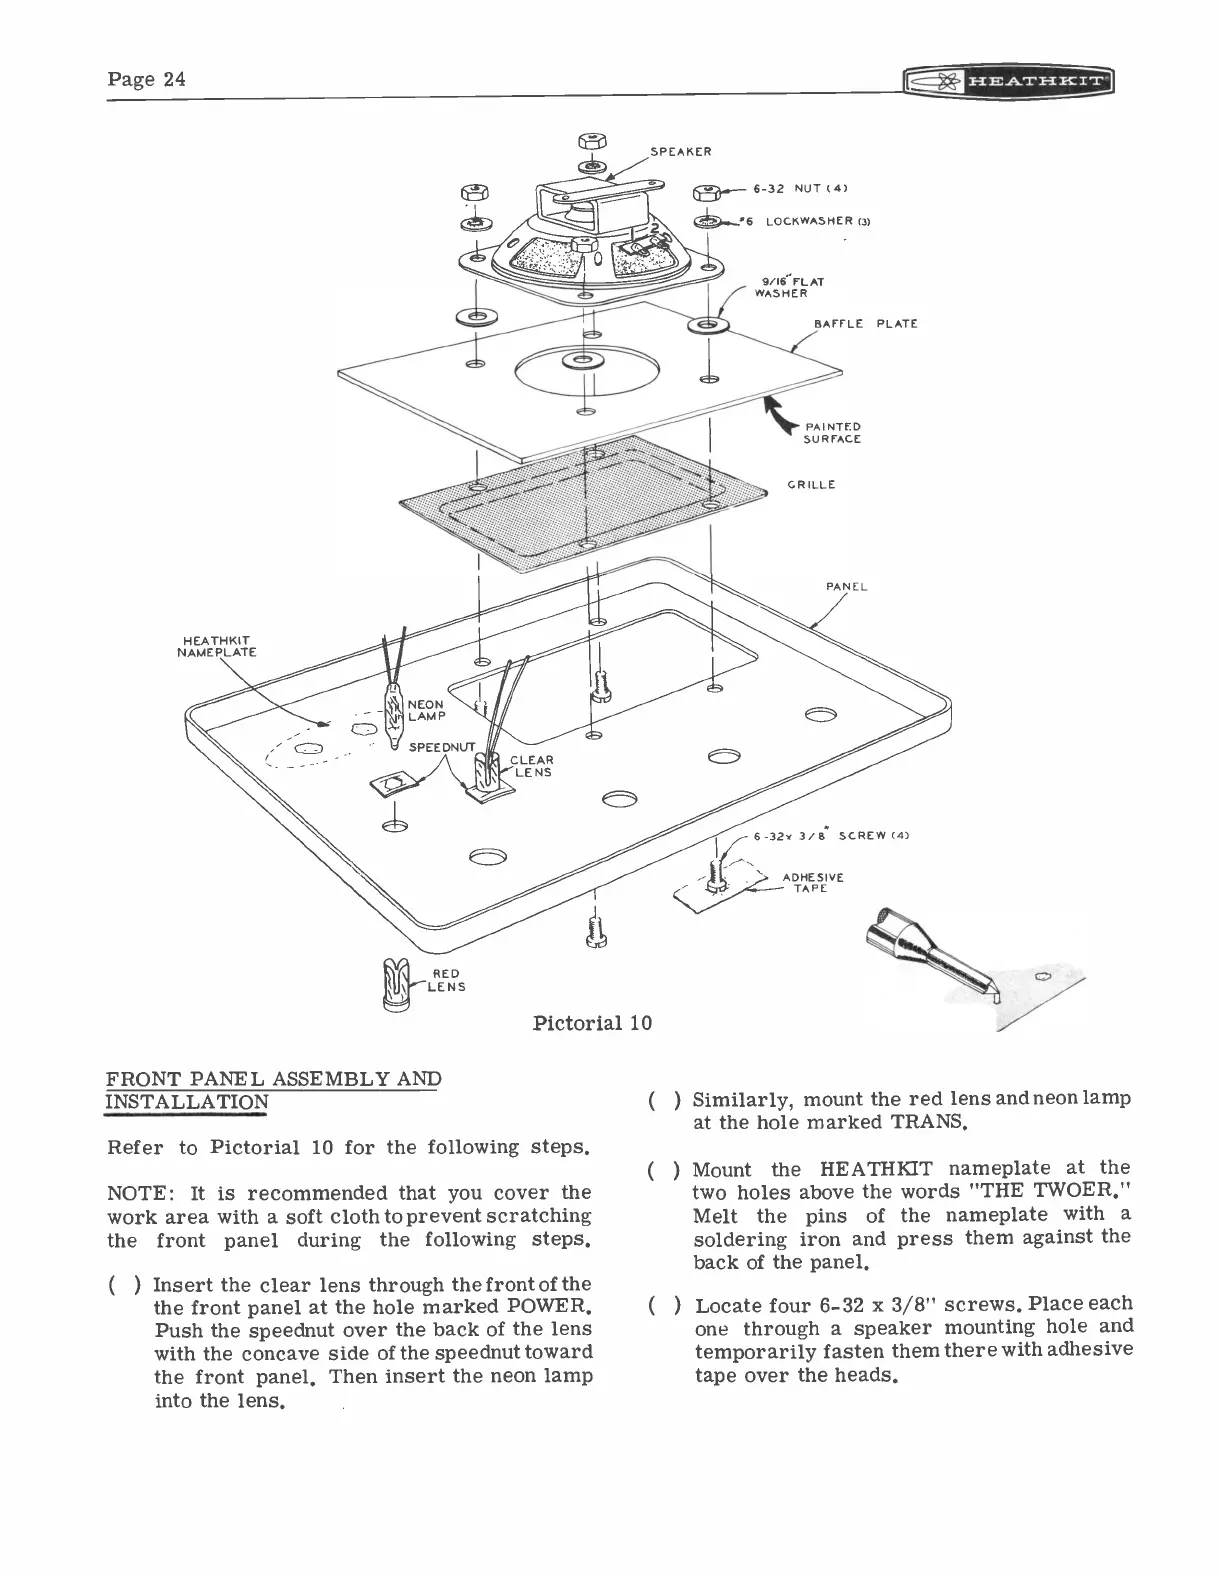
Pictorial 10
FRONT PANEL ASSEMBLY AND
INSTALLATION
Refer to Pictorial 10 for the following steps.
NOTE: It is recommended that you cover the
work area with a soft cloth to prevent scratching
the front panel during
the following steps.
(
)
Insert the clear lens through the front of the
the front panel at the hole marked POWER.
Push the speednut over the back of the lens
with the concave side of the speednut toward
the front panel. Then insert the neon lamp
into the lens.
SPEAKER
6-32 NUT (4)
LOCKWAS HE R (3)
9/16 FLAT
WASHER
BAFFLE PLATE
PAINTED
SURFACE
GRILLE
PANEL
6-32r 3/8' SCREW (4)
ADHESIVE
-- TAPE
(
) Similarly, mount the red lens and neon lamp
at the hole marked TRANS.
(
)
Mount
the HEATHKIT nameplate at the
two holes above the words "THE TWOER."
Melt
the
pins
of the nameplate with a
soldering iron and press them against the
back of the panel.
Locate four 6-32 x 3/8" screws. Place each
one through a speaker mounting hole and
temporarily fasten them there with adhesive
tape over the heads.