25 / 48
PL
SK
DE
EN
CS
HU
UNPACKING
• Carefully check the product after unpacking.
• If you notice transport damage or while unpacking, notify your supplier
immediately. Do not operate the product!
• Do not throw away packaging materials until you have not reviewed carefully if they did not
remain a part of the product.
• Parts of the packaging (plastic bags, paper clips, etc.) do not leave within reach of children,
could be a possible source of danger. There is a danger of swallowing or suffocating!
• We recommend save the package for future use. The packaging materials must still be
recycled or disposed of in compliance with the relevant legislation. Sort different parts of
the packaging according to material and hand it to the appropriate collection sites. For
further information contact your local administration..
C Fasteners can become loose during transport in the packaging.
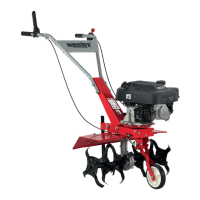
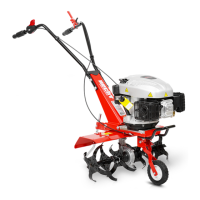
PACKAGE CONTENTStiller chassis, ploughshares, 2x fenders, lower handles, upper handles,
limited of depth cultivation, bag containing the connecting material, manual
• Standard accessories are subject to change without notice.
• This product requires assembly. The product must be assembled correctly before use.
ASSEMBLY
Safety instructions for putting into operation for the first time
Always pay attention to tightening of bolting and use exclusively parts delivered with the machi-
ne.
PROCEDURE
1. Gear levers must be fixed on guidance handles always before you will start to fix handles on
the machine. Thanks to limited lenght of the control cables there is not possible to fix levers
on guidance handles which are already fixed on the machine.
2. Take out rubber grips from guidance handles (Fig. 4b). Pay attention that levers are placed
on correct positions in order to avoid correct position mislead. Right position of the levers
is defined according cables leading out position on the gear box. Lever connected to upper
cable, controls backward gear and must be always fixed on the left guidance handle. Lever
connected with lower control cable must be always fixed on the right guidance handle.
3. Unscrew the tensioning screw on the lever (Fig. 2a) approximately to the half of the thread.
Strongly pull the wire with tensioning screw on the lever, to be possible to pull it out
and release it. in the space under the released wire thus it make available the screw for
mounting the lever on the handlebars.
4. Partially unscrew the allen screw in the lever (Fig. 3a) in space under the wire, so that it
would be possible to slide on the bracket of the lever on the handlebars (Fig. 3b).
5. Place the lever on the handlebars to the desired position and adequately tighten the locking
screw, so as the lever would not shift (Fig. 3a).
6. Pull the cable with the tensioning screw and put it back in its holder on the lever (Fig. 4a),
then loosen the tensioning screw all the way to the nut in the lever so that the cable is loose.